
- Overview
- Scorecard
- Updates39
![]()
Obsidian Text-to-Audio Plugin
Documents
Simplified Chinese | Traditional Chinese | English
Change Log
You can view the latest changes here.
Prerequisites
Before using this plugin, you need to apply for Microsoft's Text-to-Speech Service.
Installation and Configuration
You can configure the plugin by following the steps below.
Install the Plugin
- Open Settings in Obsidian.
- In the side menu, find Community Plugins under Community plugins, click Browse, search for Text2Audio, and install and enable Text2Audio.
- Fill in the
Speech key,Speech Region, andDirectory(optional,). You can refer to this document to get theSpeech keyandSpeech Region.
Configure the Plugin
You can quickly register or log in to Microsoft Azure Cloud Services through this website.
After logging in, click on
Azure AI services.
Find
Speech serviceand clickcreateto create a service instance.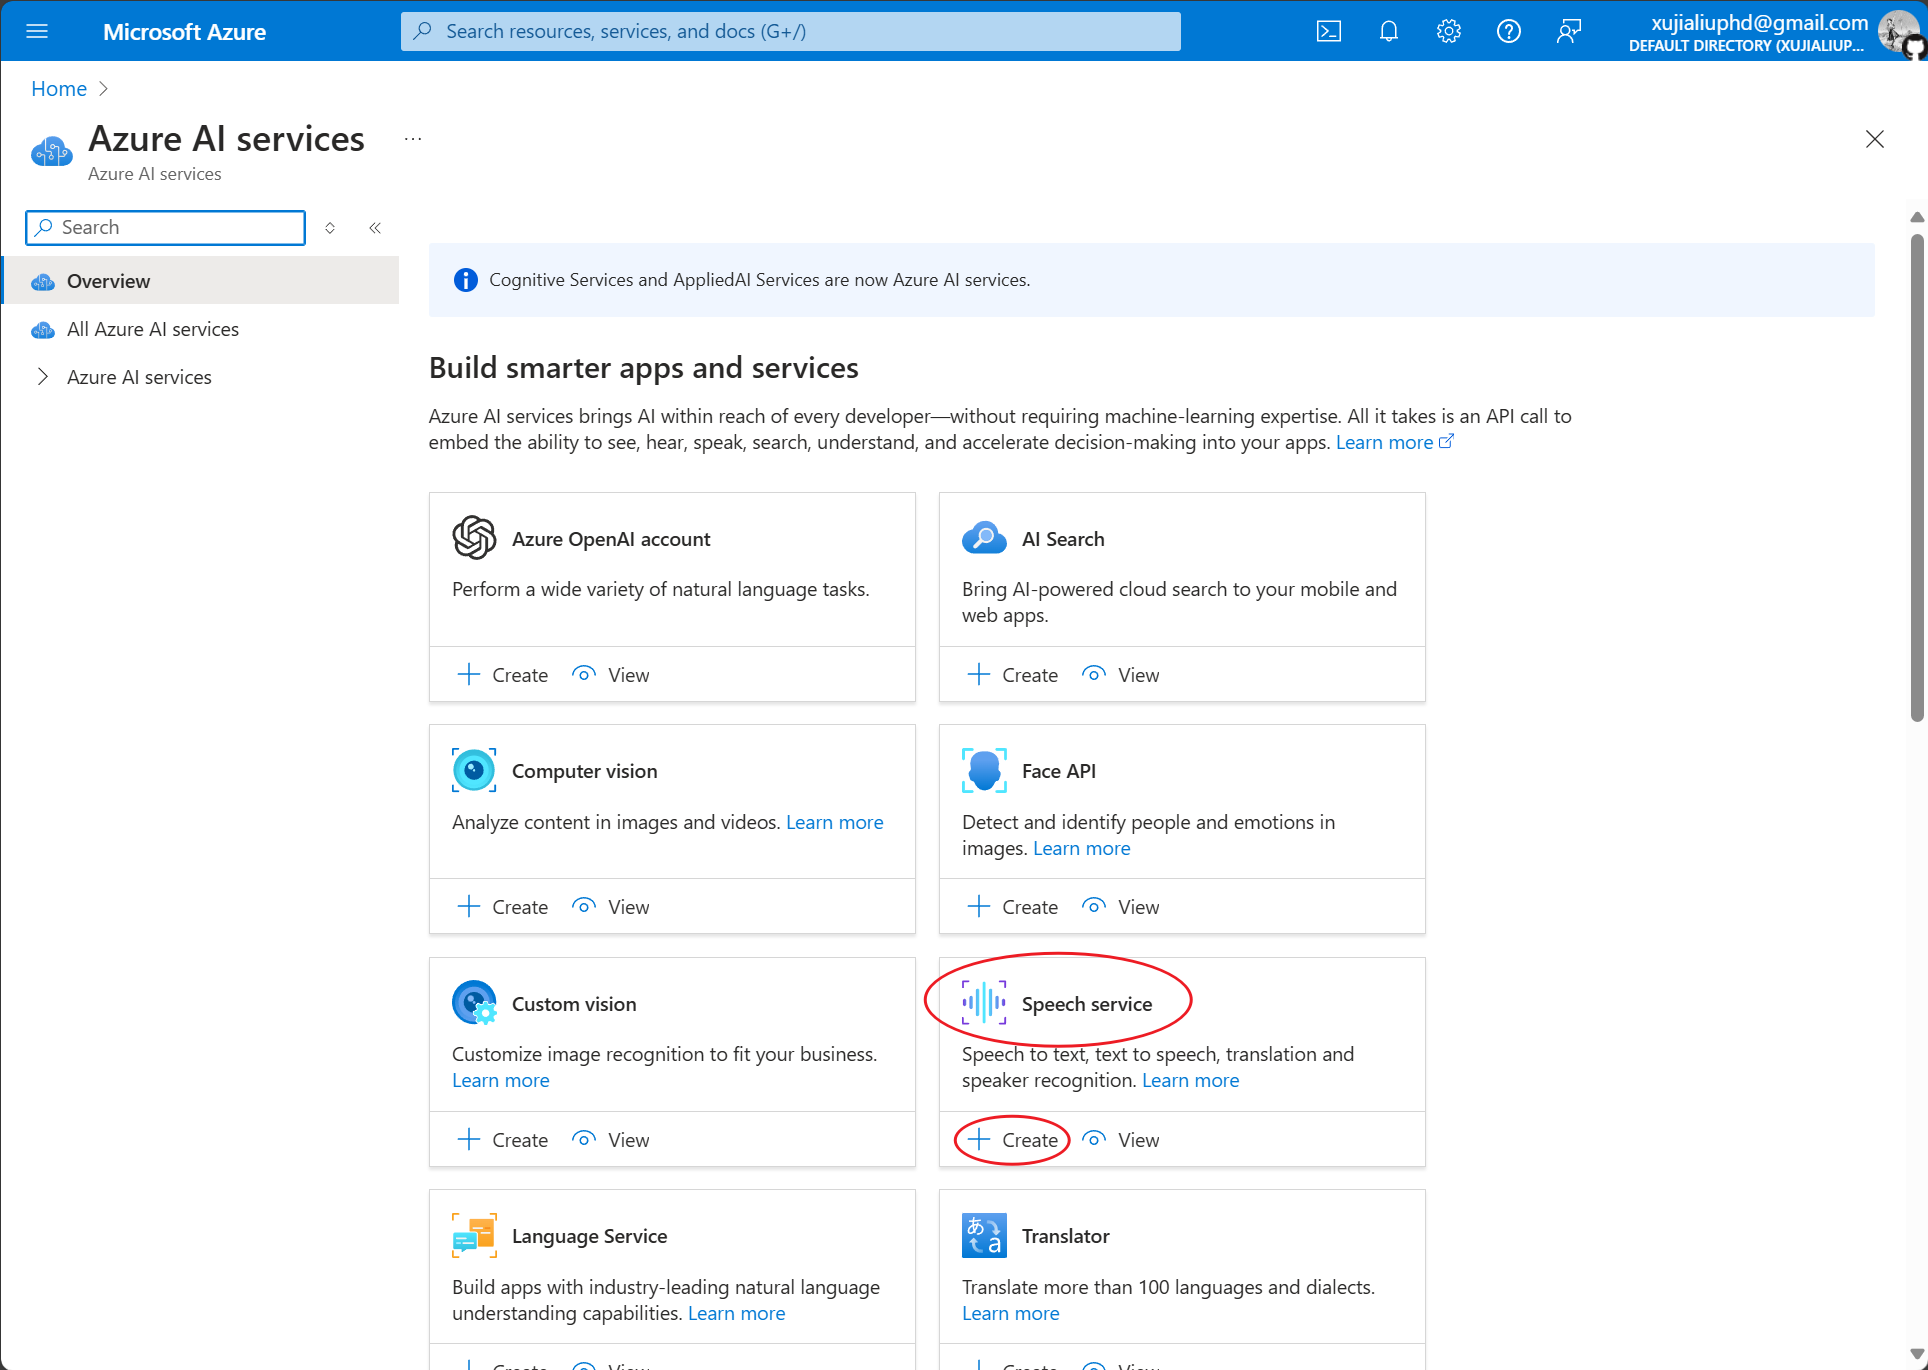
Create a
Resource group(if it's your first time using it), and then choose the Region closest to you.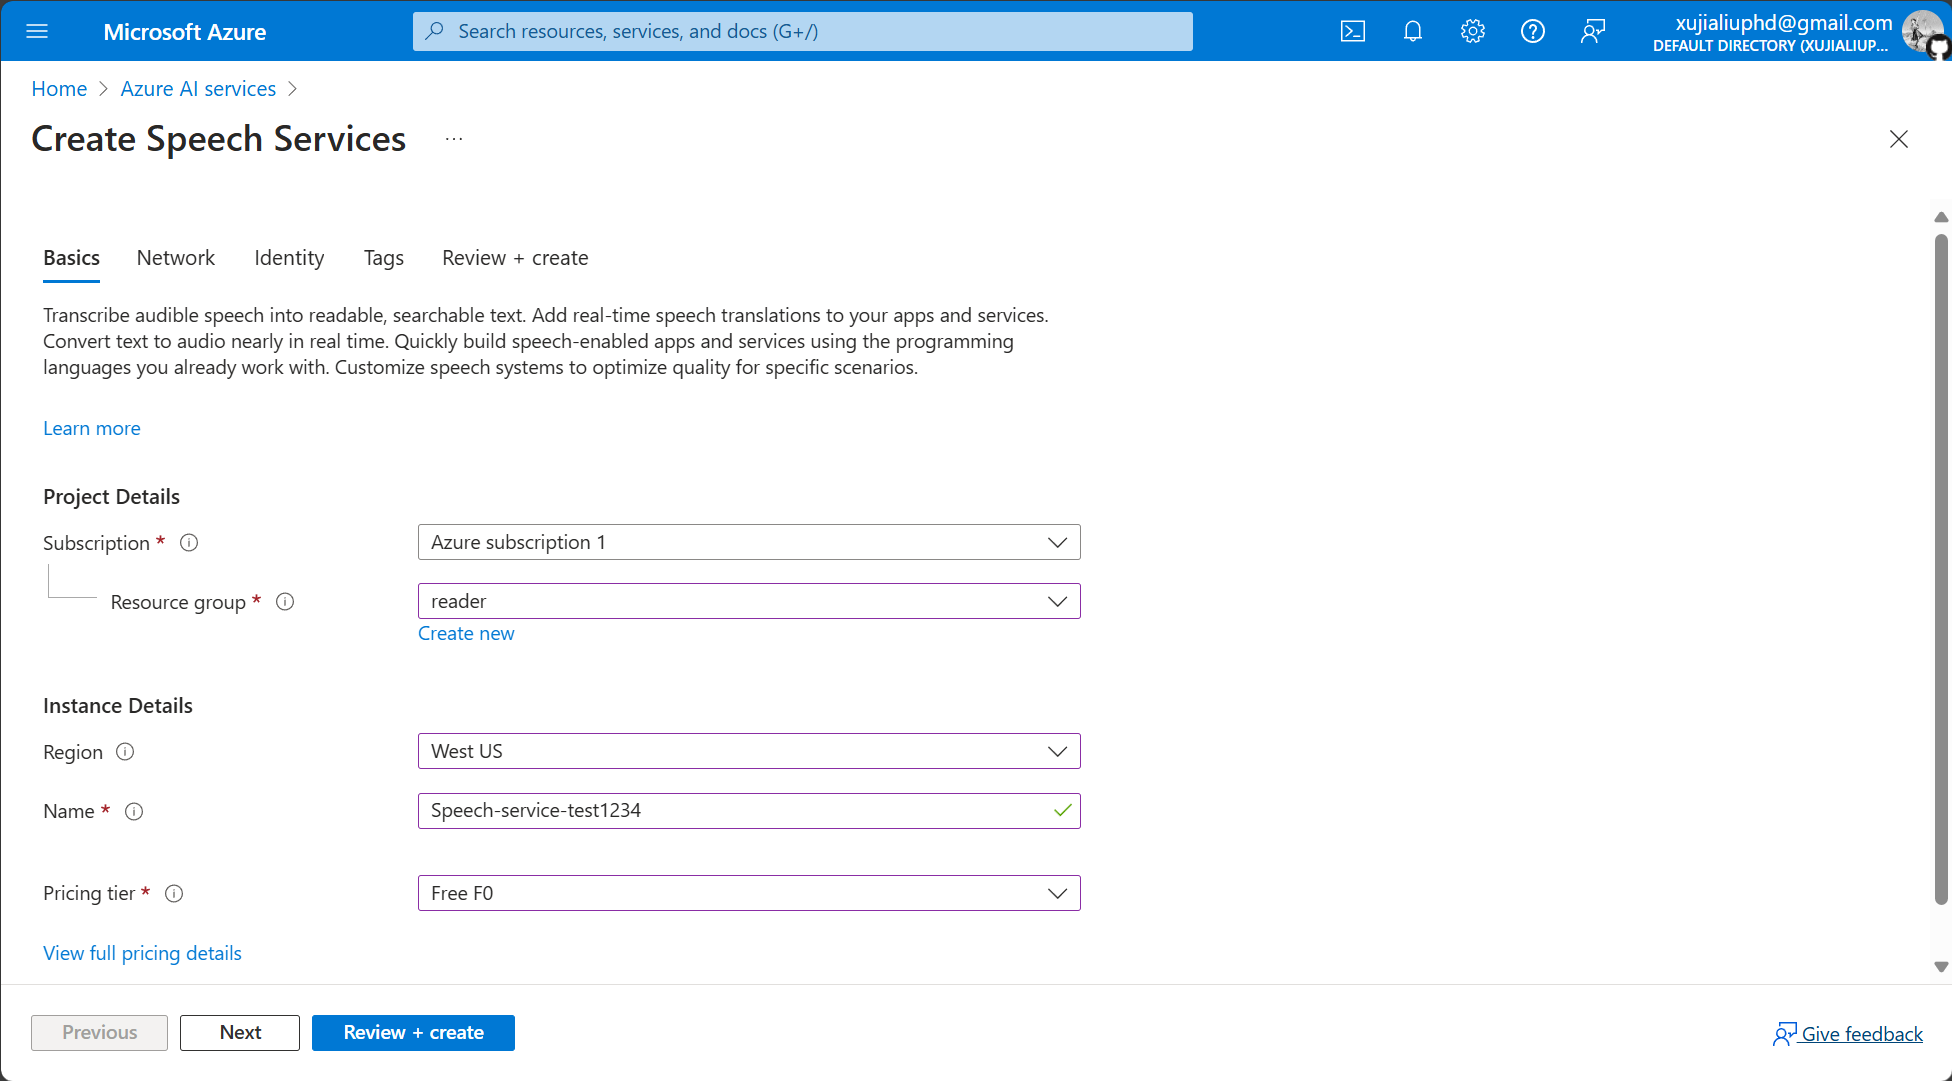
The
Namemust be unique globally, so please name it longer, note: no spaces or_are allowed.Choose
Free F0for Pricing tier.Click
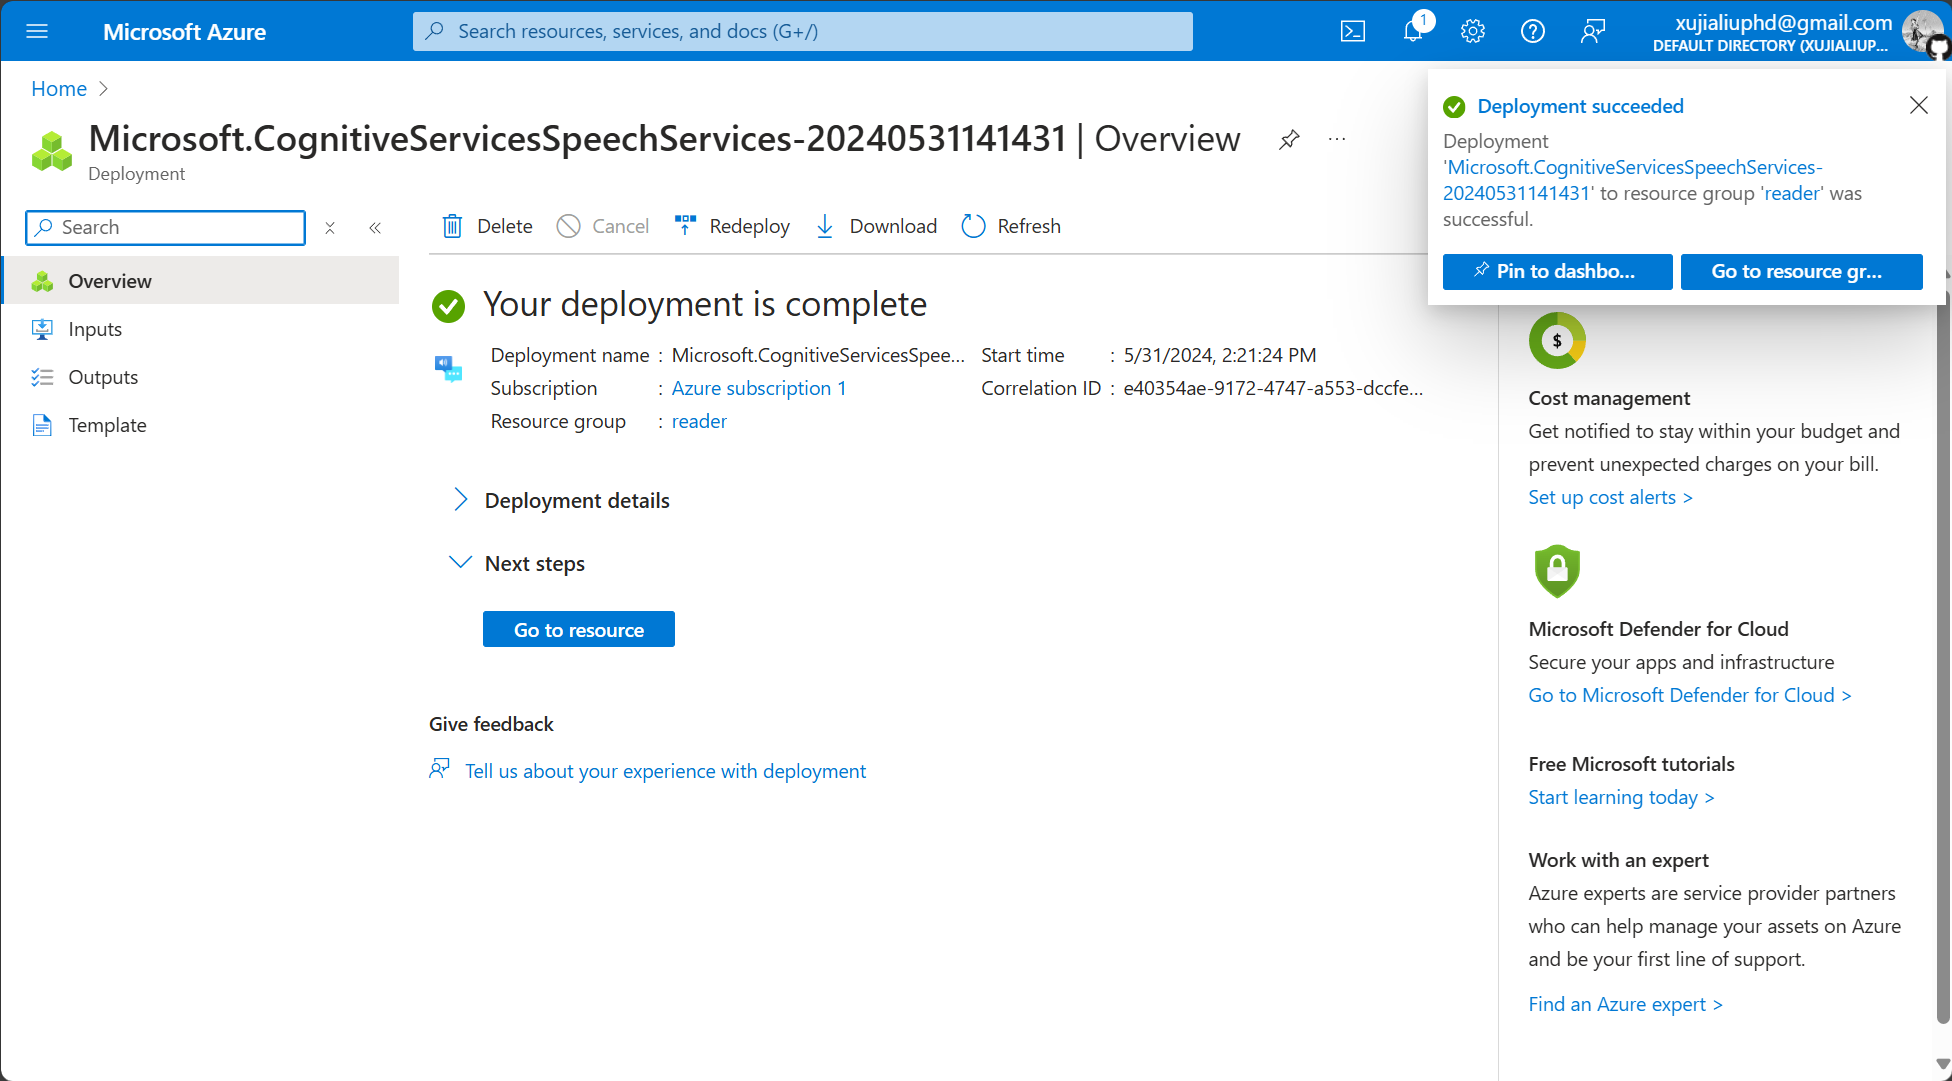
Review + create, then clickCreateafter the page transitions.Wait a moment for the instance to be created, then click Go to resource.
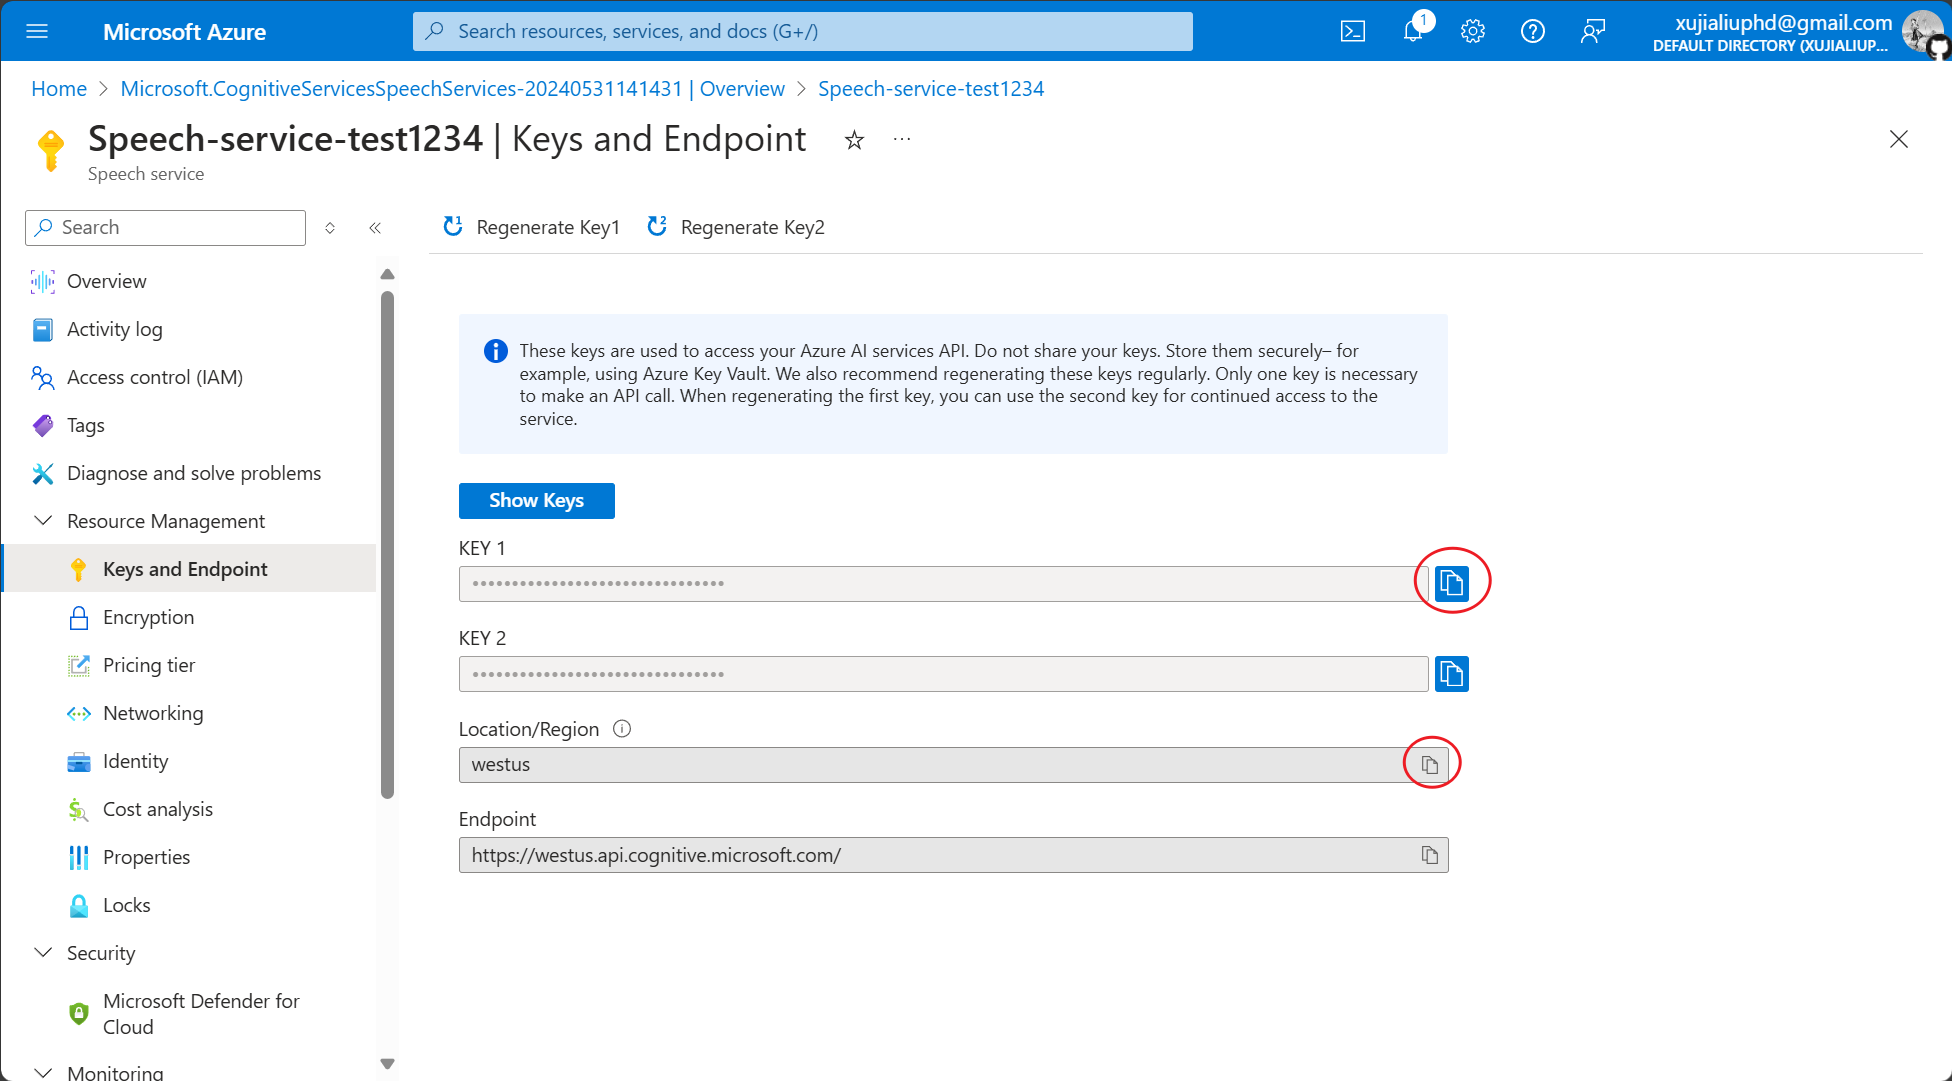
Click on
Keys and Endpointin the left sidebar.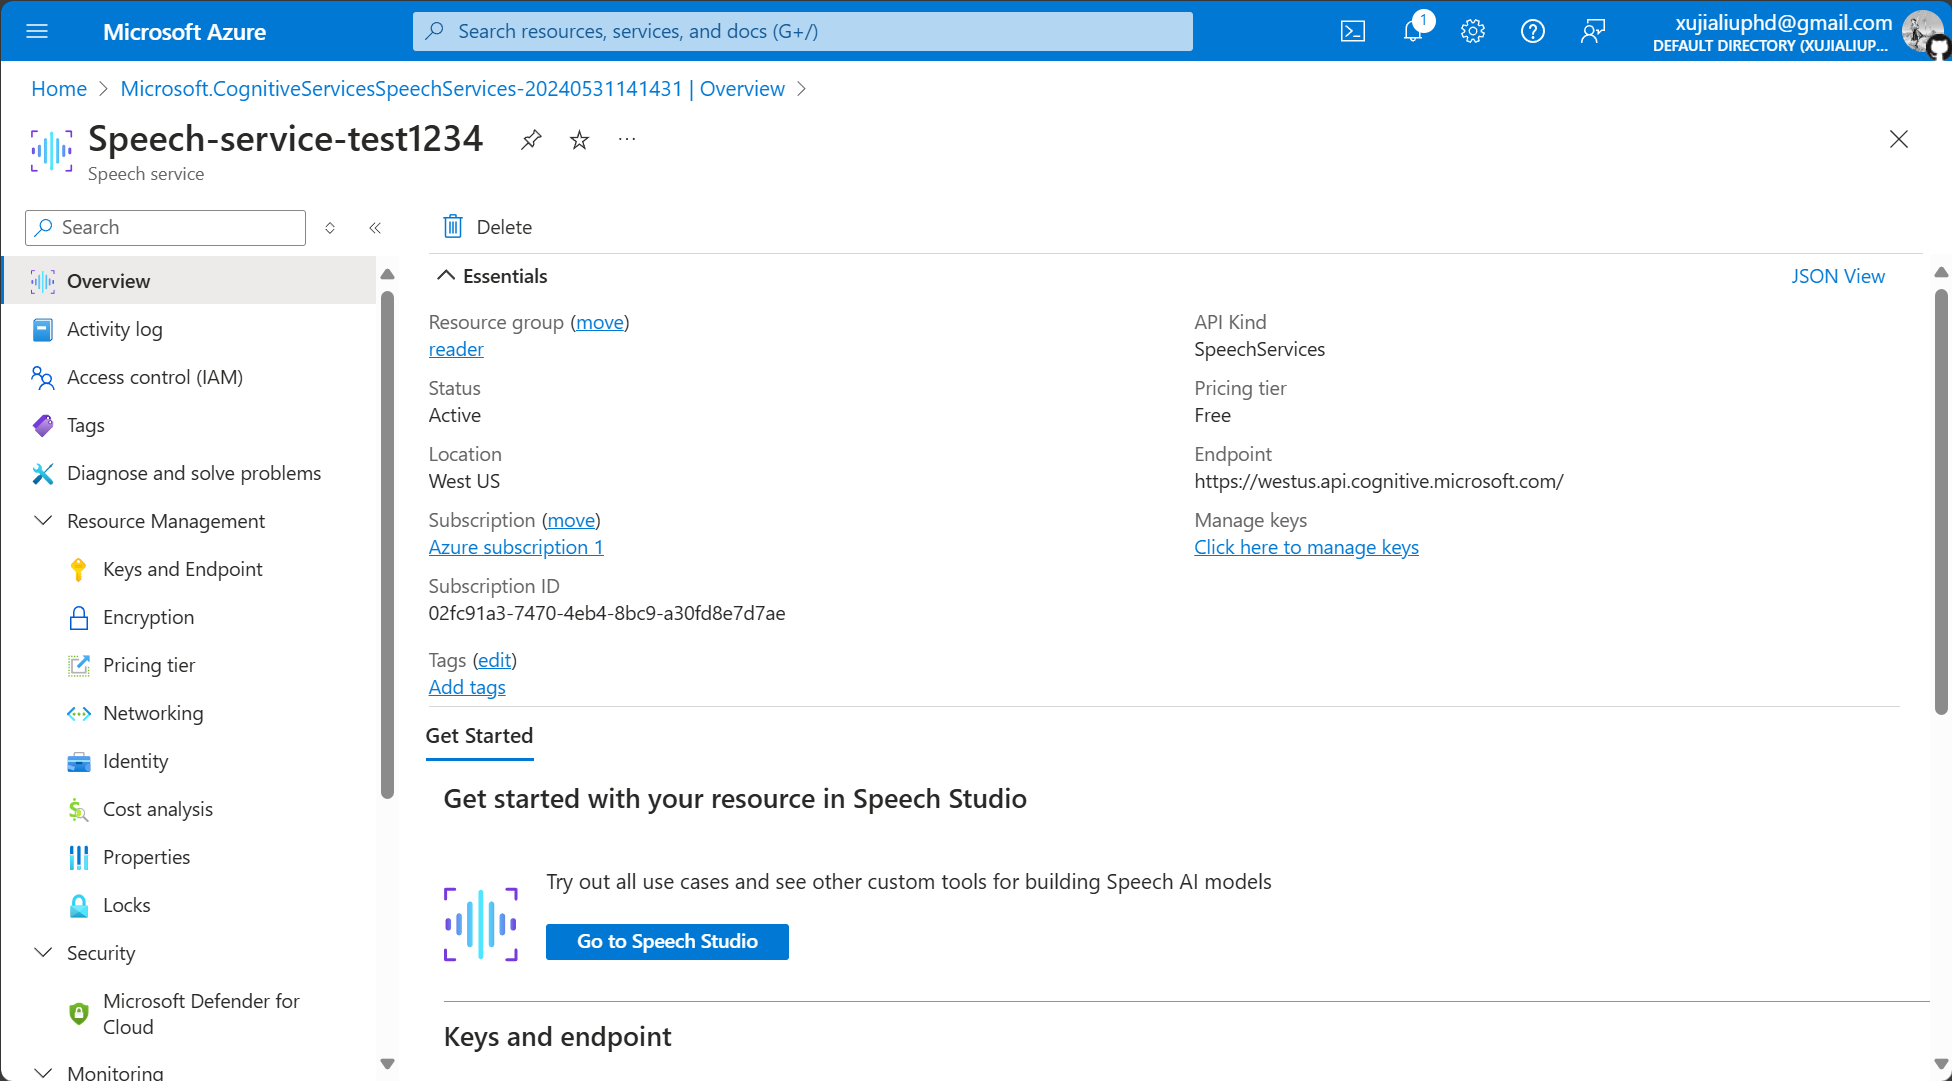
Copy the
KEYto theSpeech keyfield in Obsidian Text2Audio, and copyLocation/Regionto theSpeech Regionfield.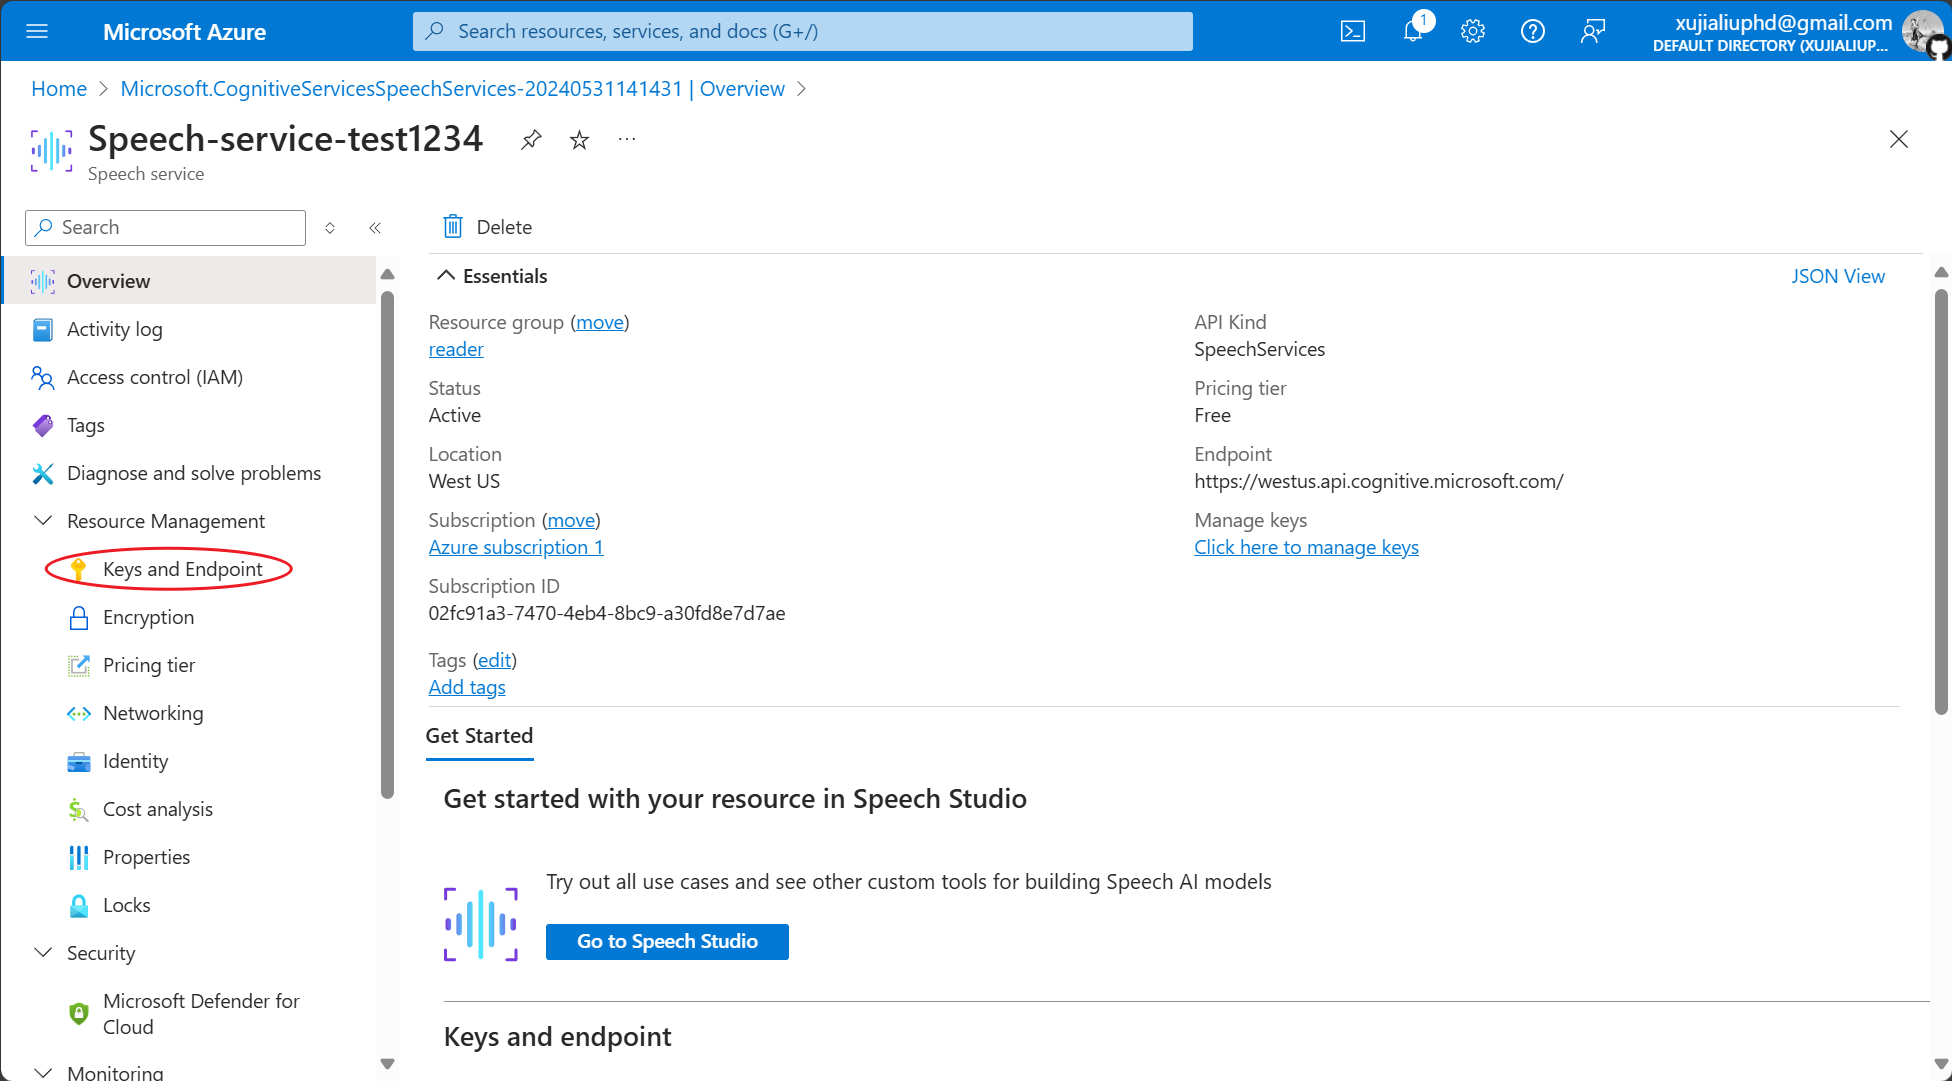
Congratulations, you have completed the setup!
How to Use
This plugin has two usage methods, using Keyboard Shortcuts or using the plugin window.
Using Keyboard Shortcuts (Recommended)
By setting hotkeys, you can quickly convert text to speech using keyboard shortcuts. The hotkeys and explanations are shown as follows.
- Convert text to speech: Select text or set Read before or after to convert text to speech and play it.
- Pause or resume the audio: Pause/play.
- Stop conversion: Terminate text-to-speech conversion and close the current player process.
- Convert text to audio: Open the plugin window (select text with the mouse, then press the shortcut key, and the selected text will appear in the plugin window input box).
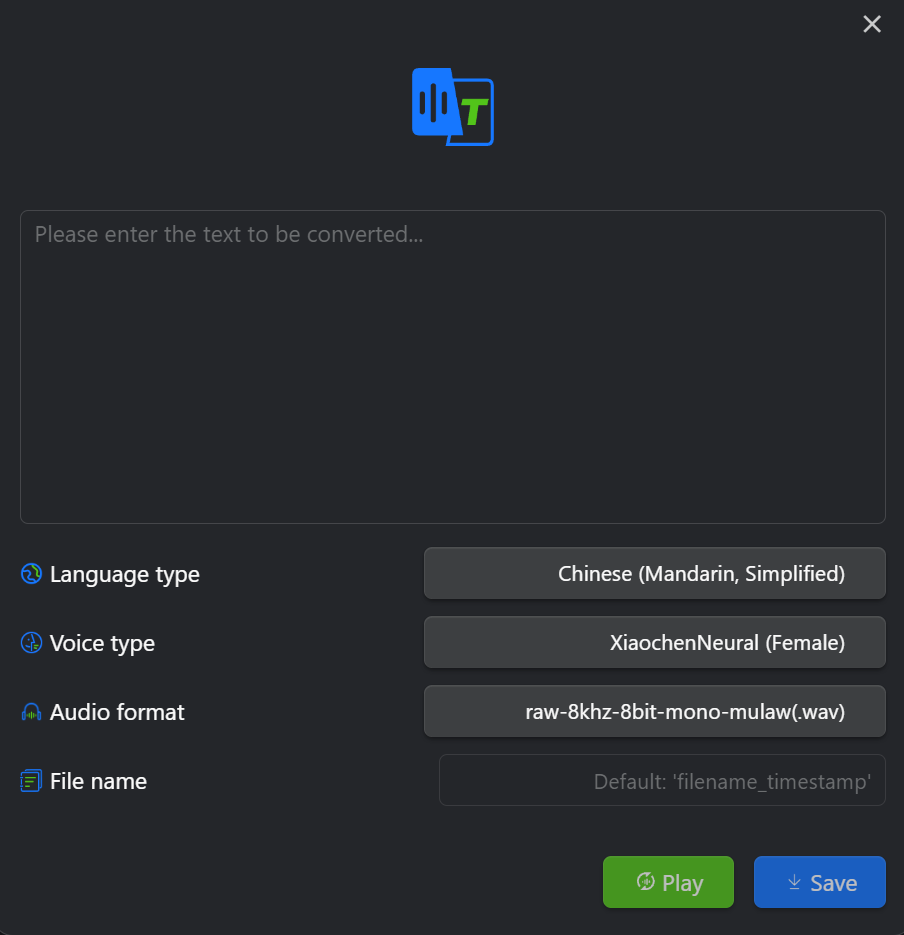
Using the plugin window
- Click the
Text to Audioicon in the left side menu, or click the command icon in the left side menu and select the command named Text2Audio: Convert text to audio to open the plugin window. - Enter the text and select the language that you wanna convert to.
- Click the play or save button.
Activity
