Smart Table
 maniarasan.s2k downloads
Interactive tables in your notes: typed columns, sorting, filtering, status pills, and add or remove columns and rows.
- Overview
- Scorecard
- Updates18
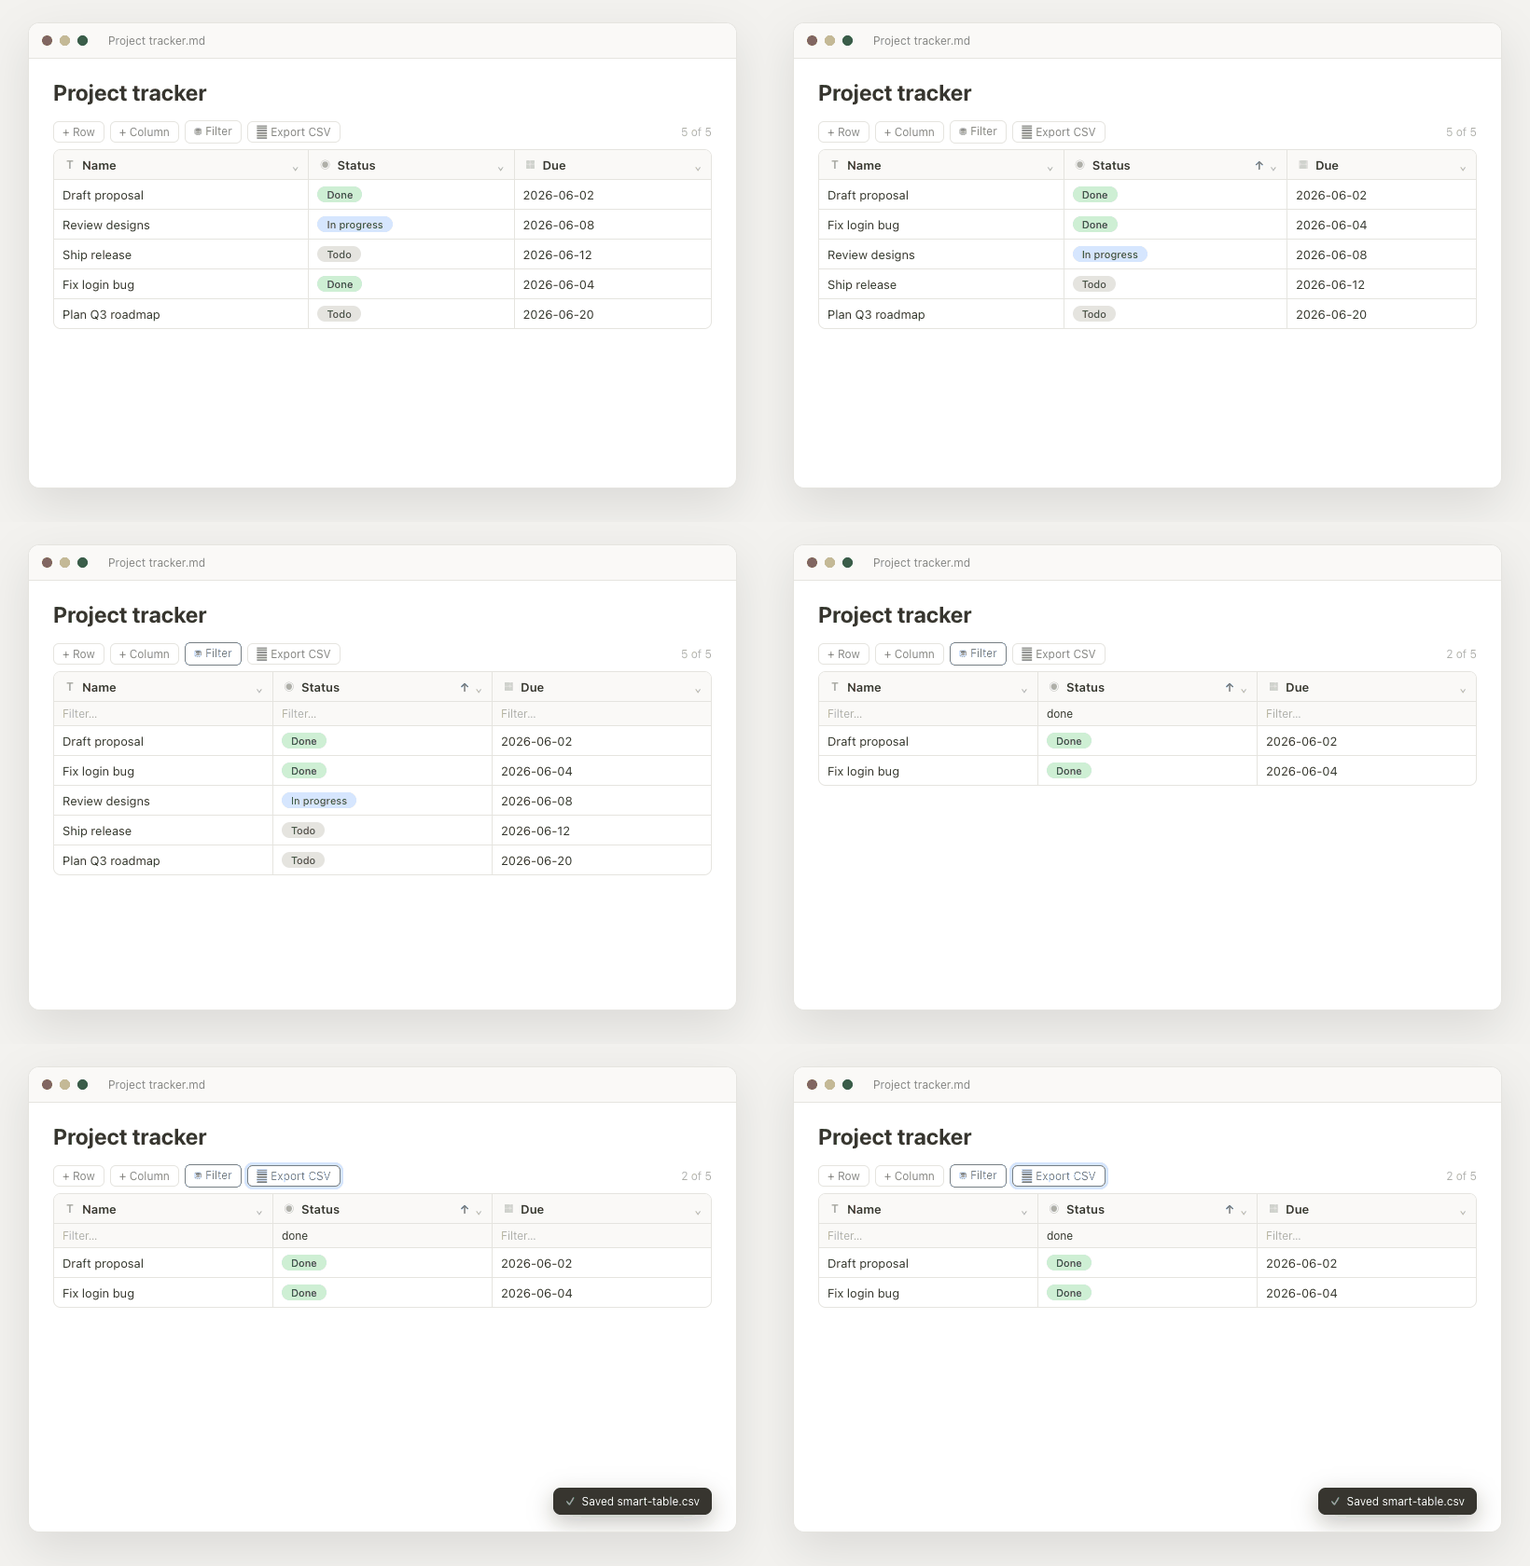
A database-style data table inside your notes — typed columns, sorting,
filtering, drag-to-reorder, and status pills, with easy add/remove of columns
and rows. The table is stored as a fenced smart-table code block (JSON), so
all your edits are saved right in the note and sync like any other text.
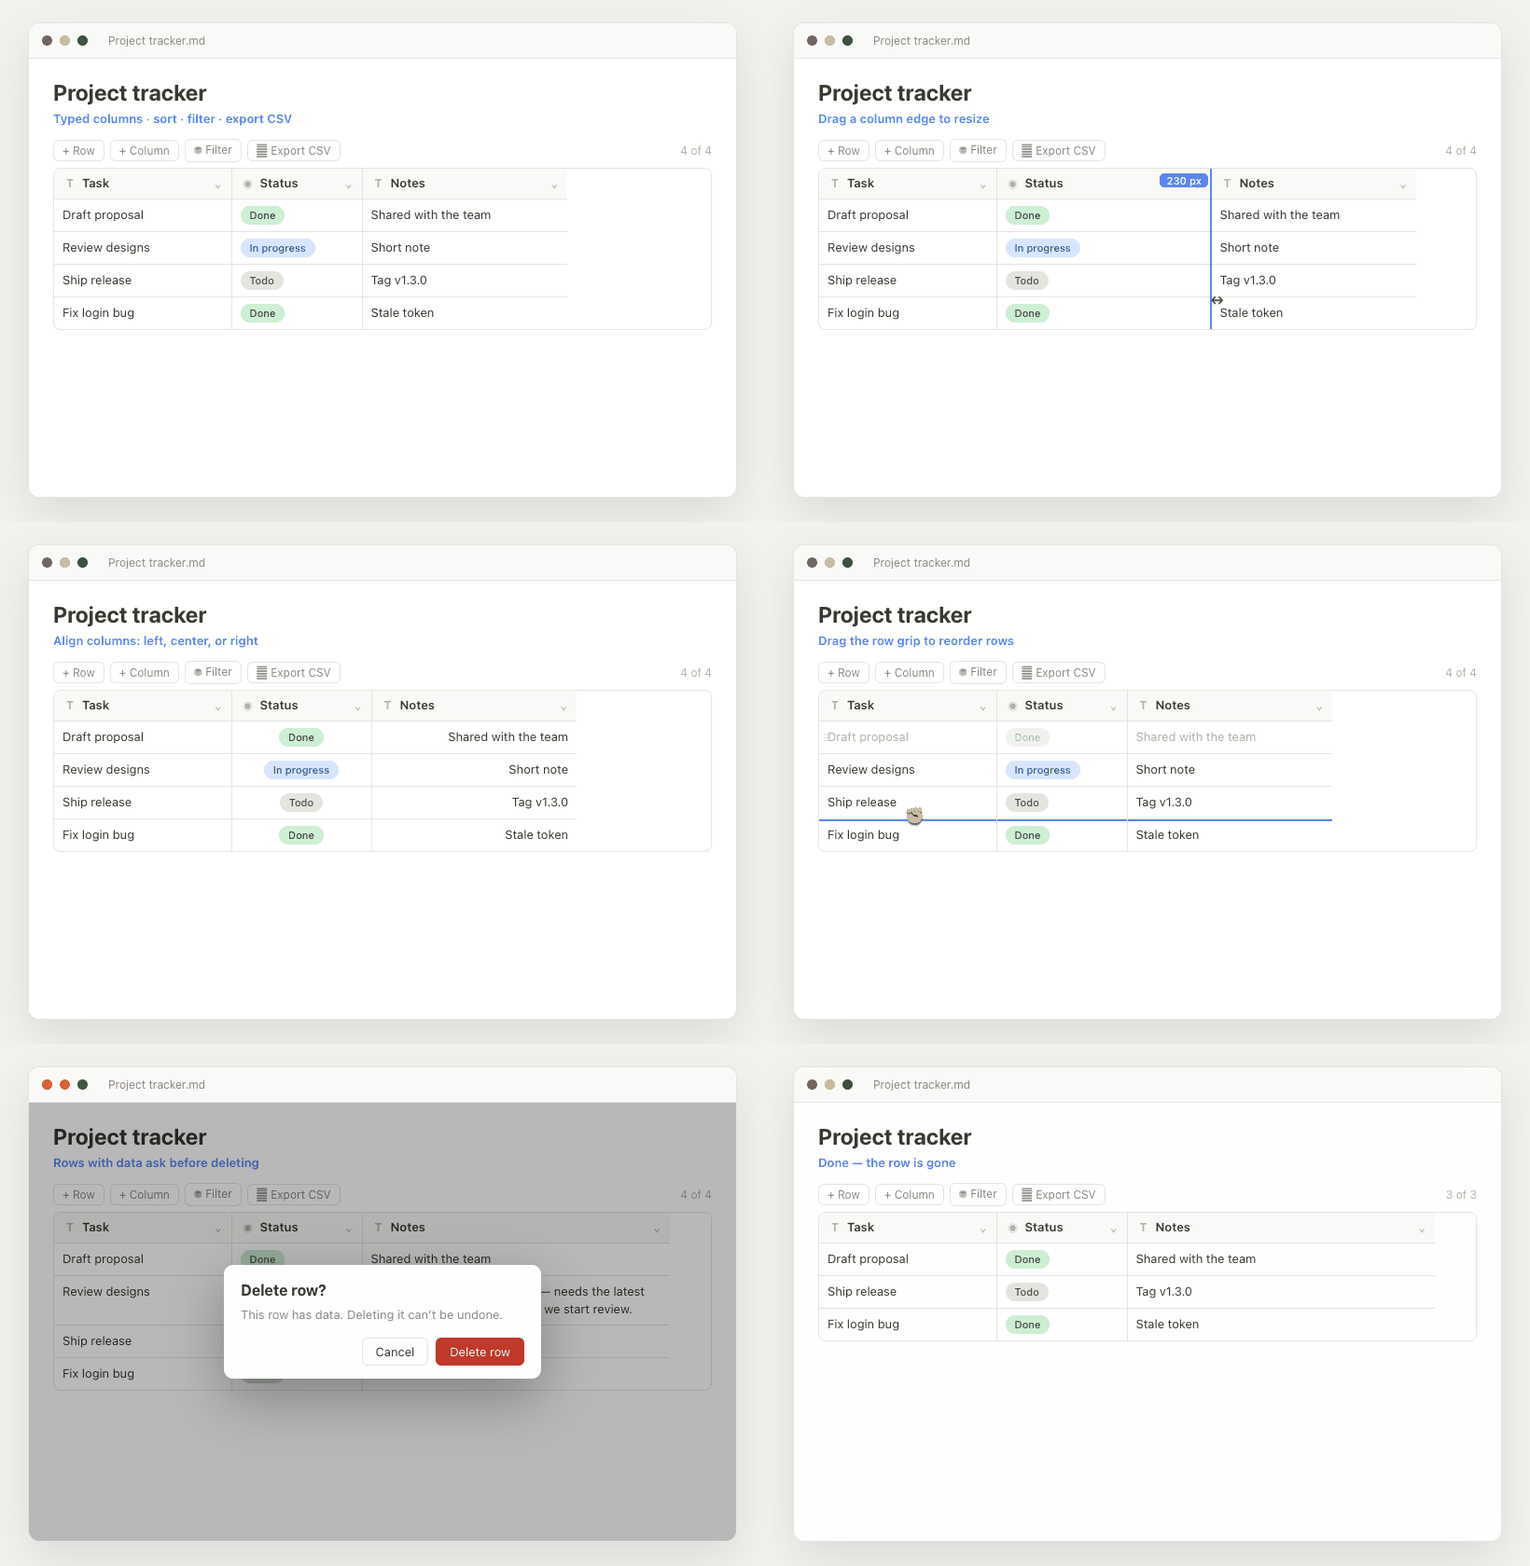
Wrap headers and cells, resize and align columns, drag to reorder rows and columns, and delete safely:
Usage
Run the command Smart Table: Insert table (Command palette, Cmd/Ctrl+P) to drop a starter table at the cursor. The block renders as an interactive grid in Reading view and Live Preview.
- Sort — open a column's ▾ menu → Sort ascending / descending.
- Filter — click Filter in the toolbar to show a per-column filter row.
- Add / remove columns — + Column in the toolbar (pick a type), or a column's ▾ menu → Delete column. Rename inline in the header.
- Add / remove rows — + Row in the toolbar or the + New row strip at the bottom of the grid (no scrolling back up); delete a row by hovering it and clicking ✕, or right-click anywhere on the row → Delete row.
- Insert / duplicate / copy rows — click a row's ⠿ grip (or right-click the row) for a menu: Insert row above / below, Duplicate row, Copy row, Delete row. Copy a row (or a Select-mode selection) and paste with Cmd/Ctrl+V to append copies, or paste onto selected rows to overwrite their values.
- Insert / duplicate columns — a column's ▾ menu → Insert column left / right (pick the new column's type) or Duplicate column (clones the type, options, width, alignment, and every value).
- Safe deletes — deleting a column always asks for confirmation, and so does deleting a row that has data; blank rows are removed instantly.
- Resize columns — drag a column header's right edge; the width is saved with the table.
- Wrapping text — text columns and column headers wrap long content onto multiple lines and grow to fit.
- Align text — a column's ▾ menu → Text align sets Left / Center / Right for every cell in that column.
- Reorder — drag a column by its type icon to move it; hover a row and drag the ⠿ grip to reorder rows (dragging a sorted row switches to manual order).
- Column types — Text, URL (clickable links), Number, Date, Date &
time, Checkbox, Select, Multi-select (multiple tags per cell), and
Status (colored pills; add your own options on the fly). URL cells stay
editable and show an ↗ open button for valid
http(s)links; a value written as[Label](https://url "Tooltip")renders as a clickable label (with tooltip) — hover and click ✎ to edit it. Date & time sorts and filters as a true timestamp. Changing a column's type converts existing values where it can, and warns you (with a count) before clearing any that can't be converted. - Edit options — a Status/Select/Multi-select column's ▾ menu → Edit options lets you pick each option's color from a preset palette, rename it, or delete it.
- Select rows — the toolbar Select button turns on row checkboxes (with select-all) for bulk Export and Delete.
- Ribbon icon — a left-sidebar button inserts a table into the current note.
- Export CSV — the toolbar Export CSV button downloads the table as currently sorted and filtered (RFC 4180 quoting, UTF-8 BOM for Excel).
Convert an existing Markdown table
Already have a plain pipe table? Select it (or just place the cursor inside it)
and either right-click → Convert to Smart Table, or run the command
Smart Table: Convert Markdown table to Smart Table. The table is replaced
in place, and column types are inferred from the data — numbers become Number,
YYYY-MM-DD values become Date, and [x] / true / yes become Checkbox.
How data is stored
Everything lives in the code block as a single line of JSON
({ "columns": [...], "rows": [...], "sort": ..., "filters": {} }). Keeping it
on one line means even a large table stays ~3 lines in the note, so Obsidian
renders it right away instead of showing the raw source until you scroll.
Edit through the interactive grid rather than by hand. In Live Preview the block stays an interactive grid even when your cursor is inside it — no raw JSON flashes into view. (To inspect the raw JSON, switch to Source mode.)
Install
Manually
- Copy
main.js,manifest.json, andstyles.cssinto<your vault>/.obsidian/plugins/smart-table/. - Settings → Community plugins → Enable Smart Table.
Support
Smart Table is free and open source. If it's useful to you, you can support its development with a one-off tip: Donate via PayPal. Thank you!
License
MIT © maniarasan.s