Ghostmark
 iceblyte34 downloads
Inspect and clean invisible watermark characters in clipped notes.
- Overview
- Scorecard
- Updates3
English · 简体中文
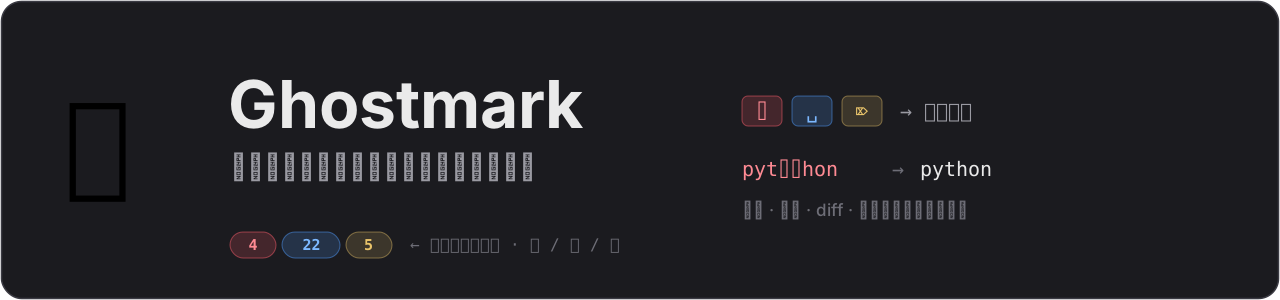
When you clip web pages into Obsidian with the Web Clipper, some sites slip invisible watermark characters into the text — zero-width clusters inside words, runs of exotic spaces at paragraph ends, hidden bidi marks. They render as nothing, but they silently break:
- 🔍 Search — a word with a hidden character never matches;
- 🔗 Links & wikilinks — polluted titles fail to link;
- 📝 Diffs & git history — lines look unchanged but are not;
- 💥 Code you paste into terminals —
pyt⟪2062⟫honsimply doesn't run.
Ghostmark makes them visible, and cleans them with context-aware, confirmable, undoable actions.
Inspect mode
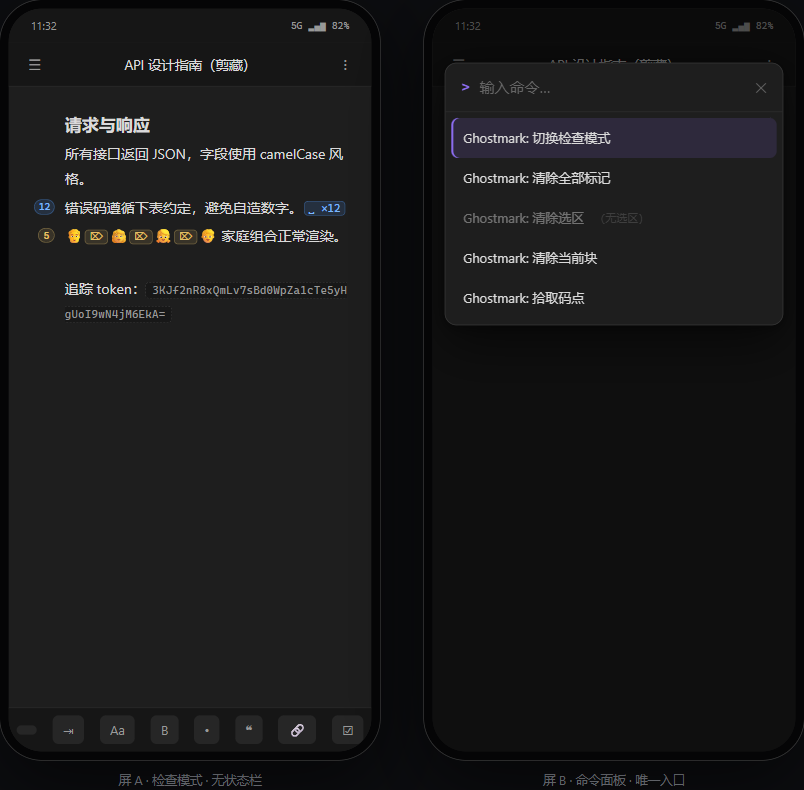
One toggle (command, status-bar click, or a hotkey you assign) renders every hit as an inline glyph — in Source mode and Live Preview, across all notes.
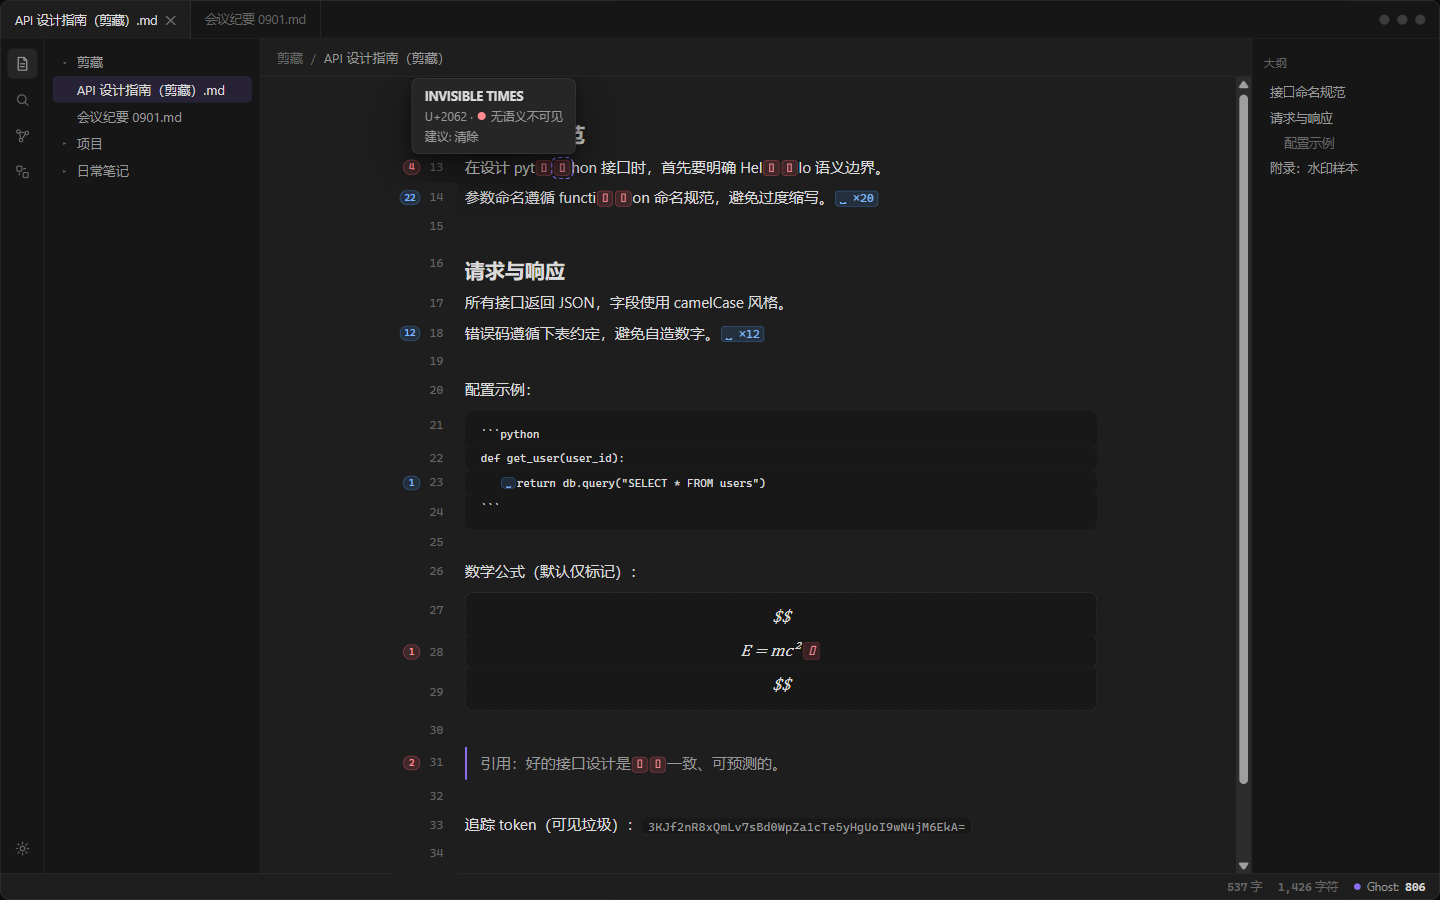
| Color | Meaning | Default action |
|---|---|---|
🔴 red ⌷ |
invisible, no semantics — zero-width and format characters (U+200B, U+2060–2064, U+061C, U+180E, U+200E/F, U+FFFE/F, U+FEFF, U+00AD, bidi controls U+202A–202E & U+2066–2069, tag characters, C0/C1 controls, noncharacters, …) | removed — including inside code |
🟣 purple ⌗ |
base64 tracking tokens (≥20 token chars ending in =) |
visible garbage — click a glyph to clear that segment; included by the clear commands |
🔵 blue ␣ |
space-like (U+2002, U+2009, U+2007, U+202F, U+00A0, and the remaining width-varying spaces) | runs of ≥2 removed whole, isolated → plain space; one-to-one in code |
🟡 yellow ⌦ |
protected semantics (ZWJ is hard-locked, ZWNJ, variation selectors) | marked only, never touched |
The red group also covers U+2028/2029 line and paragraph separators, which default to convert to space so the words beside them never glue together. The ideographic space (U+3000) is legitimate Chinese typography and is never touched. Base64 tokens glued in front of words mark only the trailing 44-character window, data URI payloads are exempt, and tokens inside code are marked but never swept (a setting toggle turns base64 marking off entirely).
Gutter badges are segmented — one colored segment per category with its own
count — and clicking one clears the enclosing block. Hovering any glyph shows
the character's name, codepoint, category and suggested action. The status bar
keeps a live Ghost: N count for the active note.
Live Preview's properties panel hides the frontmatter — so when the frontmatter
carries marks, a frontmatter contains N marks summary bar appears above the editor
content (segmented per category, like the gutter badges — rendered outside the
document so it can never interfere with selection or cursors). Clicking it
clears the frontmatter; in Source mode the raw marks are visible and the bar
steps aside.
Clear with confidence
Clearing always shows a confirm modal with the category breakdown, applies as one transaction (Obsidian's native single-step undo works out of the box), and reports what it did — including what it deliberately left behind.
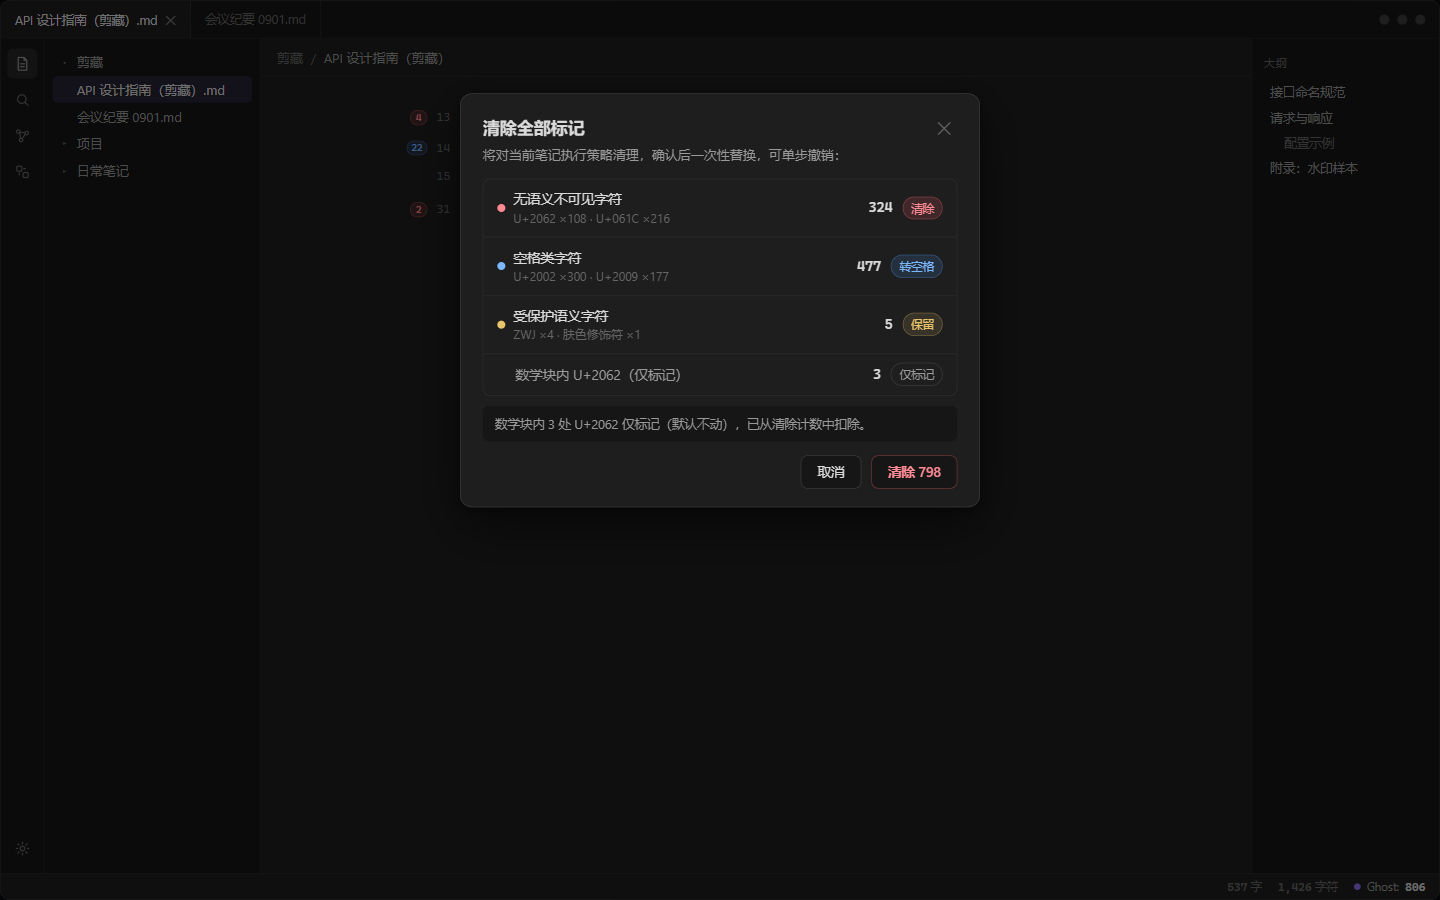
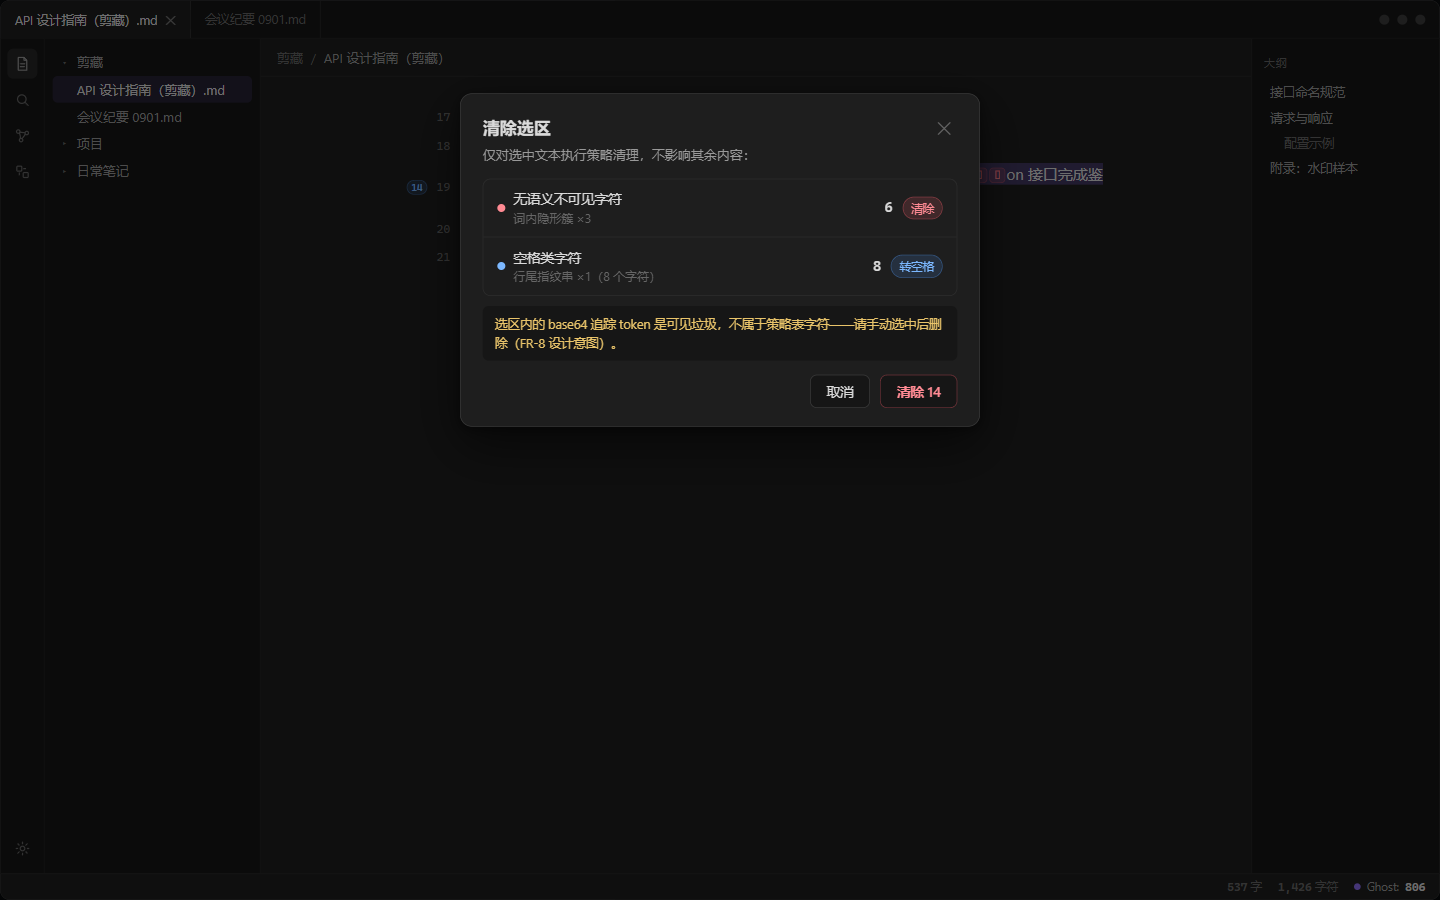
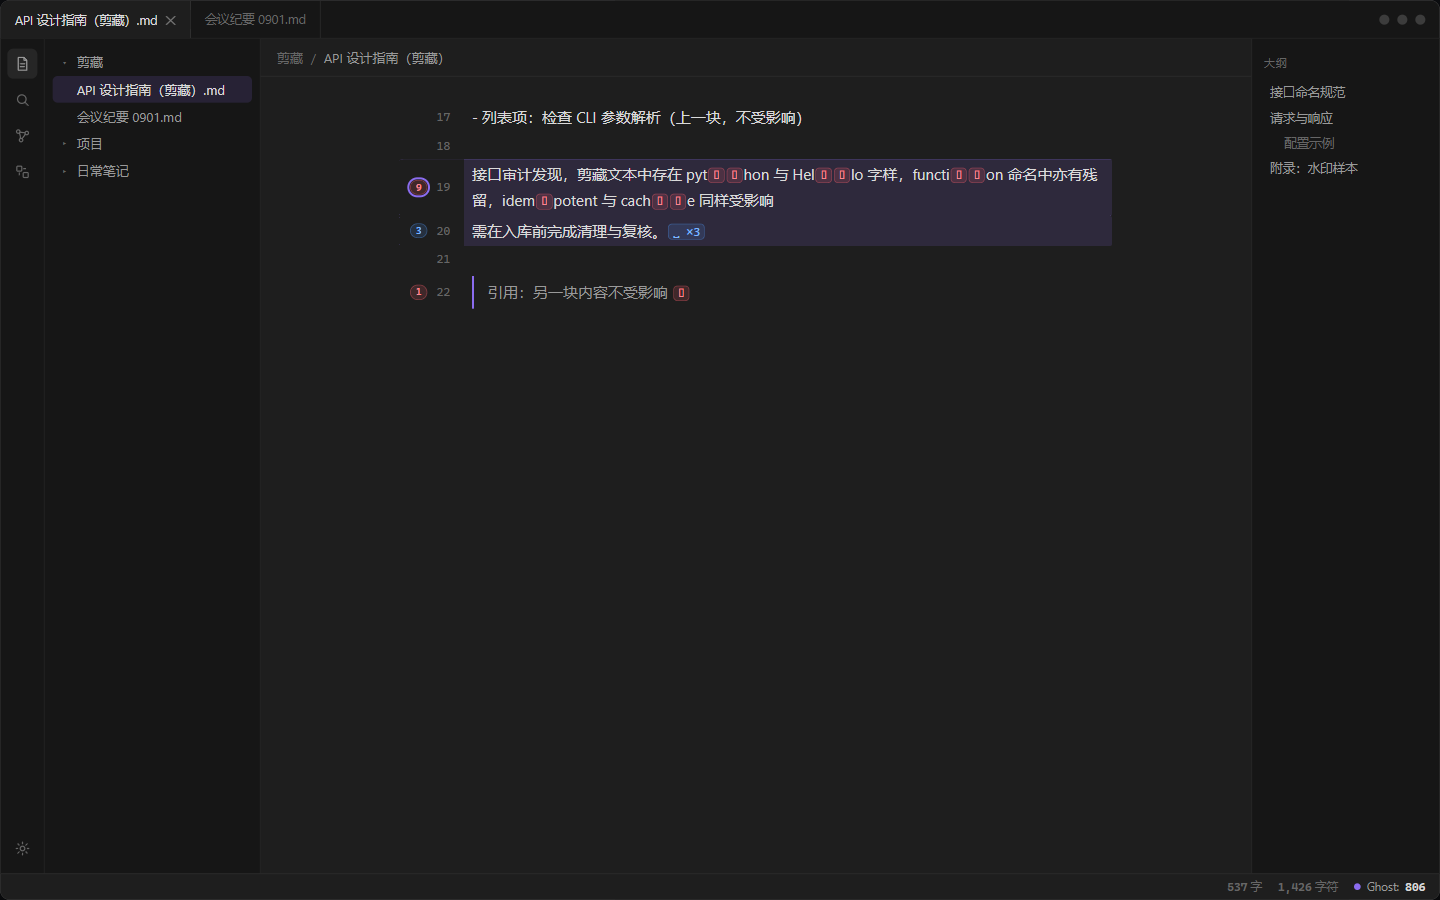
- Clear all — the whole note, gated by the modal above.
- Clear selection — grayed out until you select something.
- Clear current block — paragraph / list item / quote run / table row / whole code or math block / frontmatter. Confirm-free by default, therefore only available while inspect mode is on (visibility is the gate); the gutter badge is a second entry point.
Prefer to review every mark yourself? Use Jump to next / previous mark to hop between marks — they select the hit, scroll it into view and wrap around the document ends.
Pick unknown watermarks
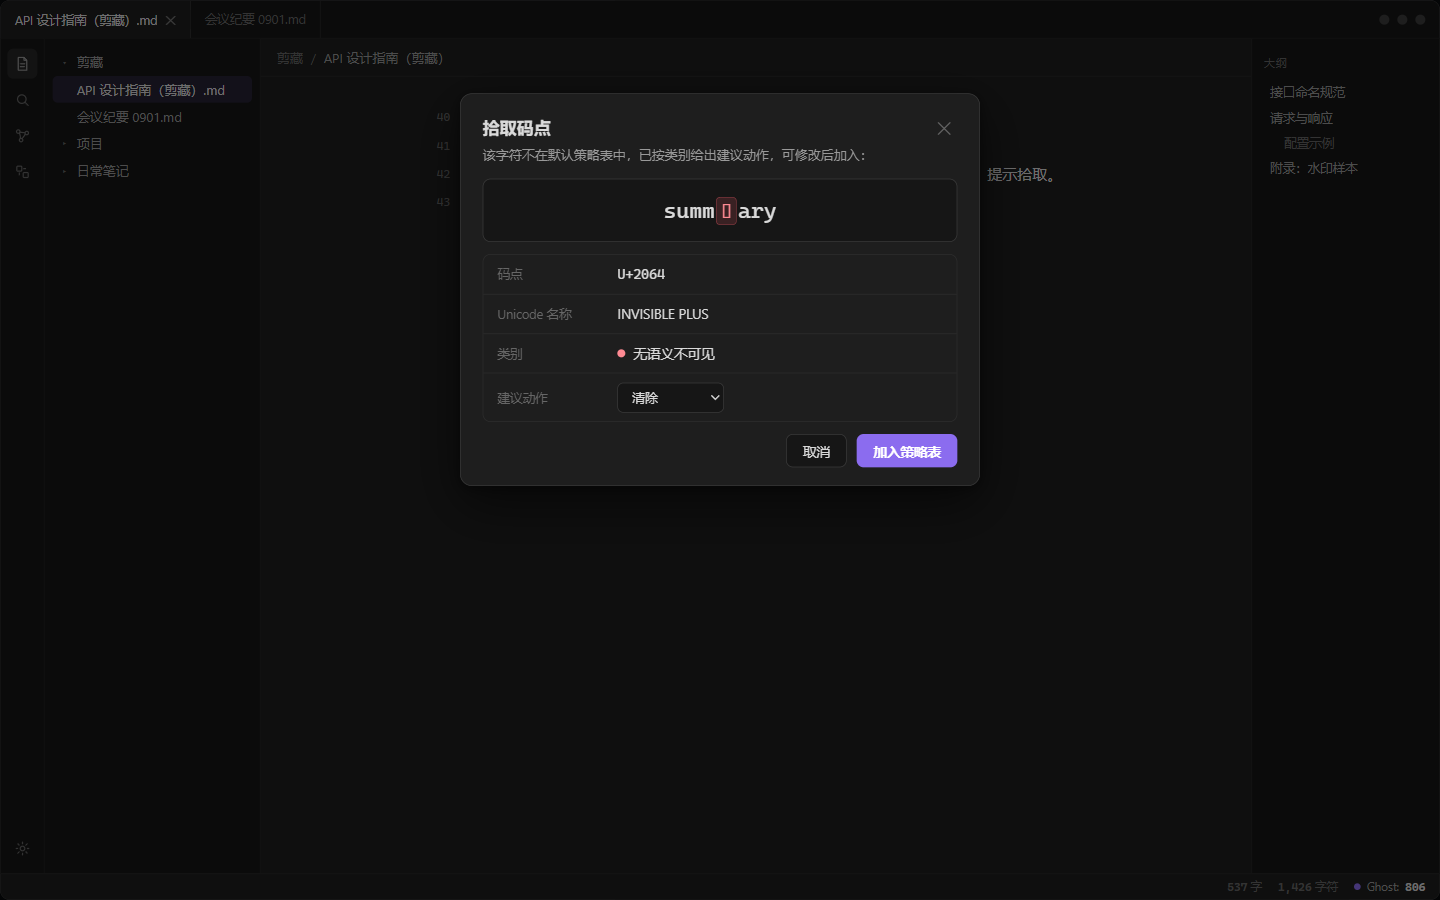
A new site invents a new watermark character? Park the cursor on it (or select a stretch of text), run Pick codepoint — the modal shows the codepoint facts and a category-based suggested action. Multiple characters open a check-list; you can also add codepoints by hand in settings.
Commands & settings
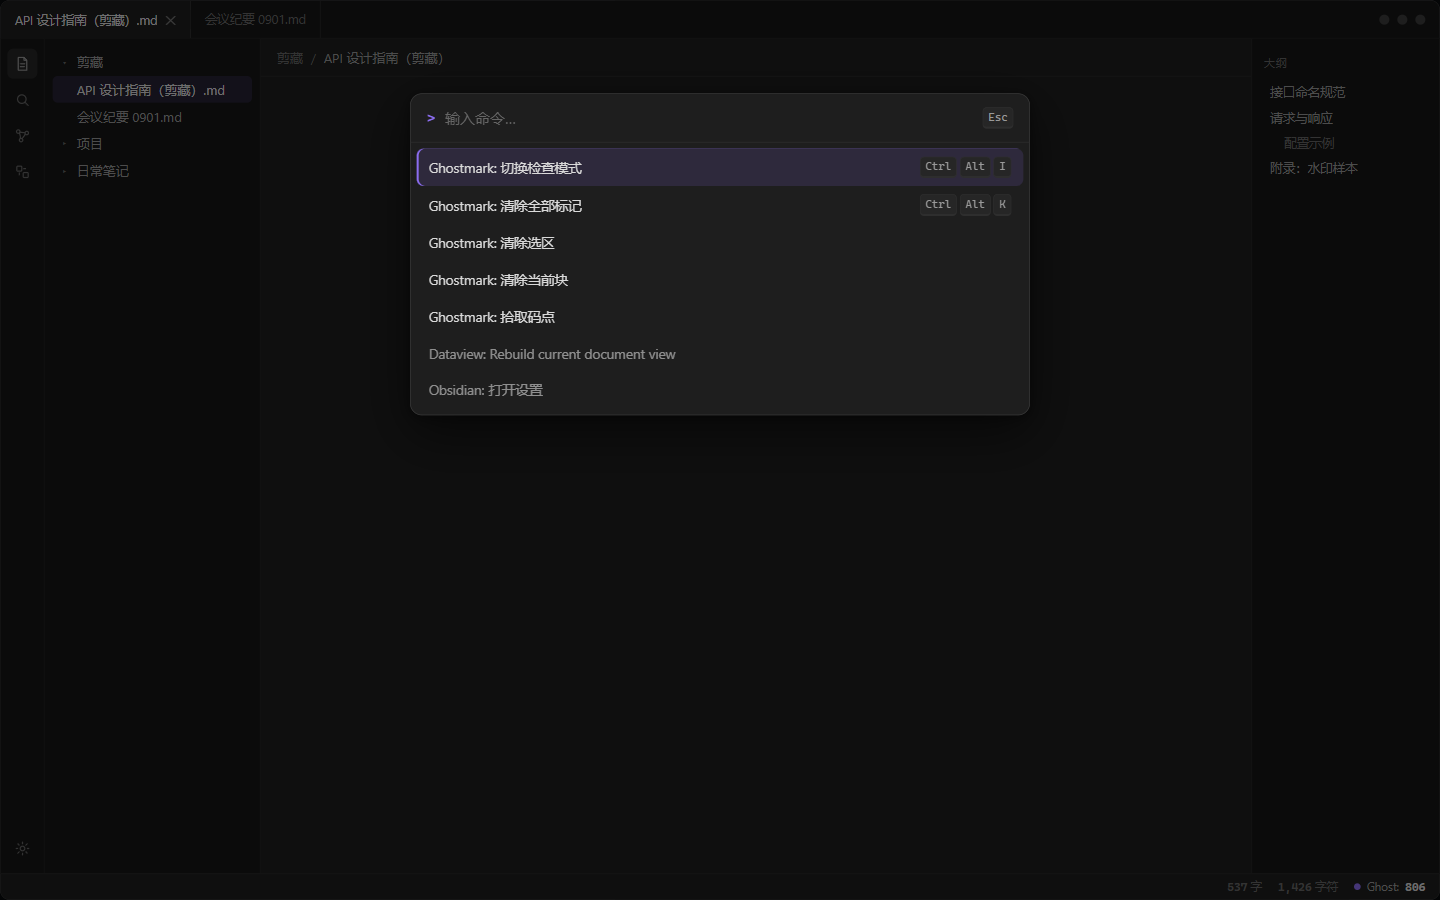
| Command | Suggested hotkey (not set by default — bind it in Settings → Hotkeys) |
|---|---|
| Ghostmark: Toggle inspect mode | Ctrl/Cmd + Alt + I |
| Ghostmark: Clear all marks | Ctrl/Cmd + Alt + K |
| Ghostmark: Clear selection | — (needs a selection) |
| Ghostmark: Clear current block | — (needs inspect mode) |
| Ghostmark: Jump to next mark | Ctrl/Cmd + Alt + . |
| Ghostmark: Jump to previous mark | Ctrl/Cmd + Alt + , |
| Ghostmark: Pick codepoint | — |
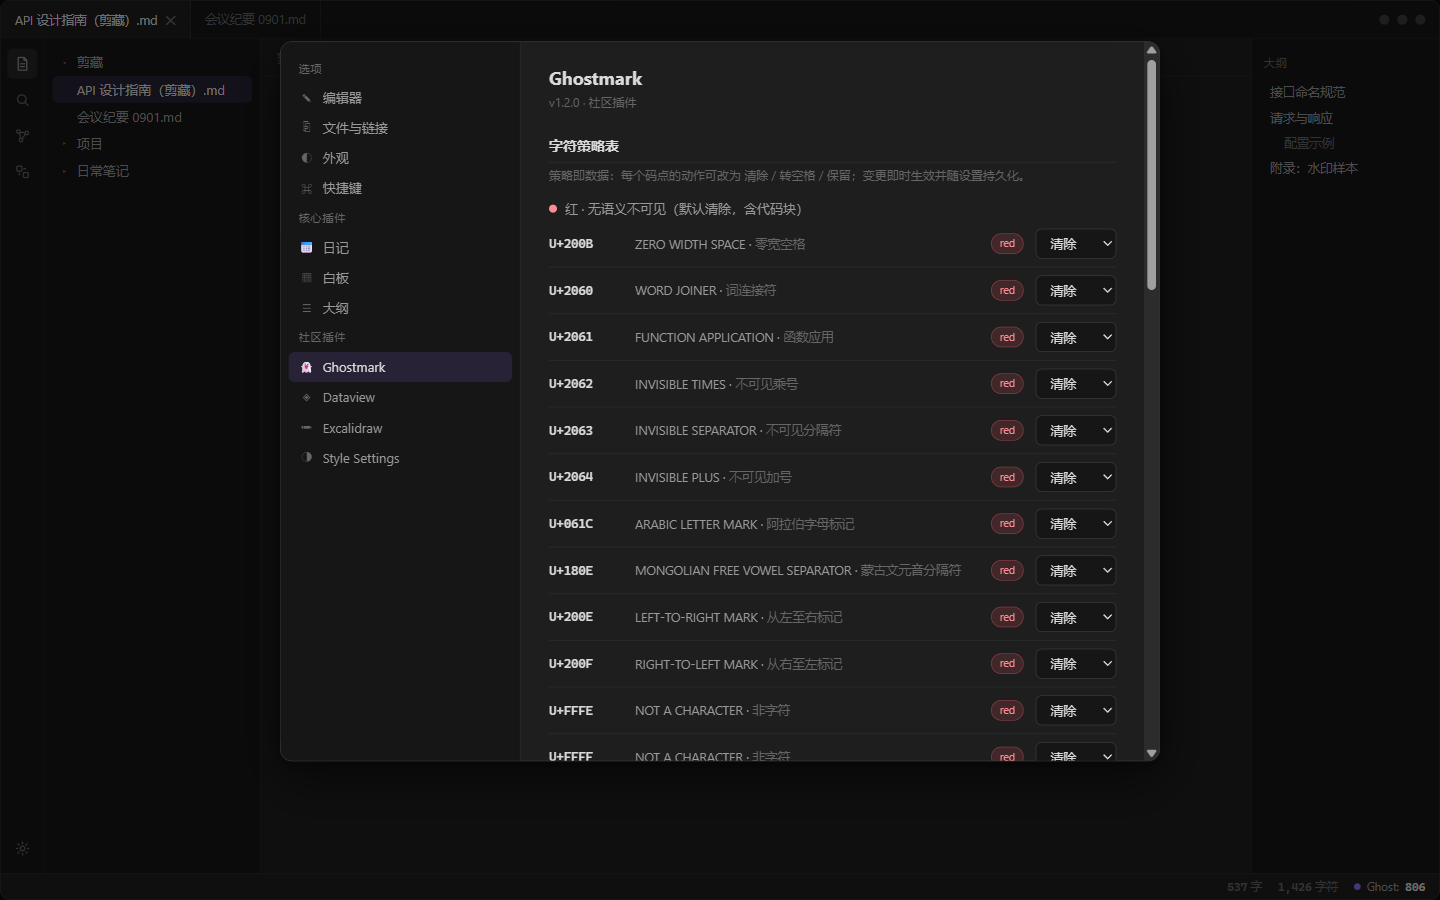
Settings group the 46 default policy rows (editable per codepoint group, with the picked additions section), context rules (math blocks are mark-only by default — MathML transcoding can put a meaningful U+2062 in a formula; base64 marking is on by default), interface options and a bilingual UI (English / 简体中文, following Obsidian's language by default).
On mobile
Decorations and all seven commands work on mobile; only the status bar is desktop-specific — the command palette is the mobile entry.
Install
Ghostmark is available in the official community plugin store — the easiest way to install it, with updates handled by Obsidian itself:
- Open Settings → Community plugins;
- Search Ghostmark, press Install, then Enable.
Or jump straight to the plugin page.
Via BRAT
BRAT works against this repository (its releases ship the files BRAT expects), but with the plugin already in the store it only makes sense for testing fixes ahead of a store release:
- Install and enable BRAT;
- Run BRAT: Add a beta plugin for testing from the command palette;
- Enter
iceblyte/ghostmarkand confirm, then enable Ghostmark.
BRAT follows this repository's releases; store installs keep updating through the store.
Manual
- Download
main.js,manifest.json(andstyles.css) from the latest release; - Put them in
<vault>/.obsidian/plugins/ghostmark/; - Enable Ghostmark in Settings → Community plugins.
Development
npm install
npm run dev     # esbuild watch
npm run build   # tsc -noEmit + production bundle → main.js
npm run lint    # eslint with eslint-plugin-obsidianmd
npm test        # vitest (core engine + fixture acceptance)
The core engine (src/core/) is pure TypeScript with no Obsidian or CodeMirror
imports, fully unit-tested against two committed synthetic samples:
src/core/fixtures/watermark-fixture.md— 801 invisible characters (U+2062 ×108, U+061C ×216, U+2002 ×300, U+2009 ×177) plus 4 ZWJ and 1 skin modifier: 806 hits, 798 clearable, zero residue after clear-all;src/core/fixtures/clipped-fixture.md— the 2026-10 expansion fixture: every expanded policy group, base64 tokens in all observed shapes (standalone, glued four-burst chains, word-glued, inside code) and anti-false-positive negatives (paths, URLs, git SHAs, data URIs).
Dev vault tip: copy main.js, manifest.json and styles.css into your
test vault's .obsidian/plugins/ghostmark/ after every build, or use
pjeby/hot-reload with npm run dev for
instant reloads.
License
Screenshots are rendered from the plugin's UI design prototypes; the real UI follows them with a segmented gutter badge, sub-page settings and a pick check-list on top.