Modelica Studio
 mechanical-eng35 downloads
Model, simulate, and plot Modelica systems with a visual drag-and-drop schematic editor powered by OpenModelica.
- Overview
- Scorecard
- Updates86
Model, simulate and plot Modelica systems inside Obsidian: drag components onto a schematic canvas, wire them, run them with the OpenModelica already installed on your machine, and read the result as a plot — in the studio, or in the note itself.
 |
 |
| Light theme | Dark theme |
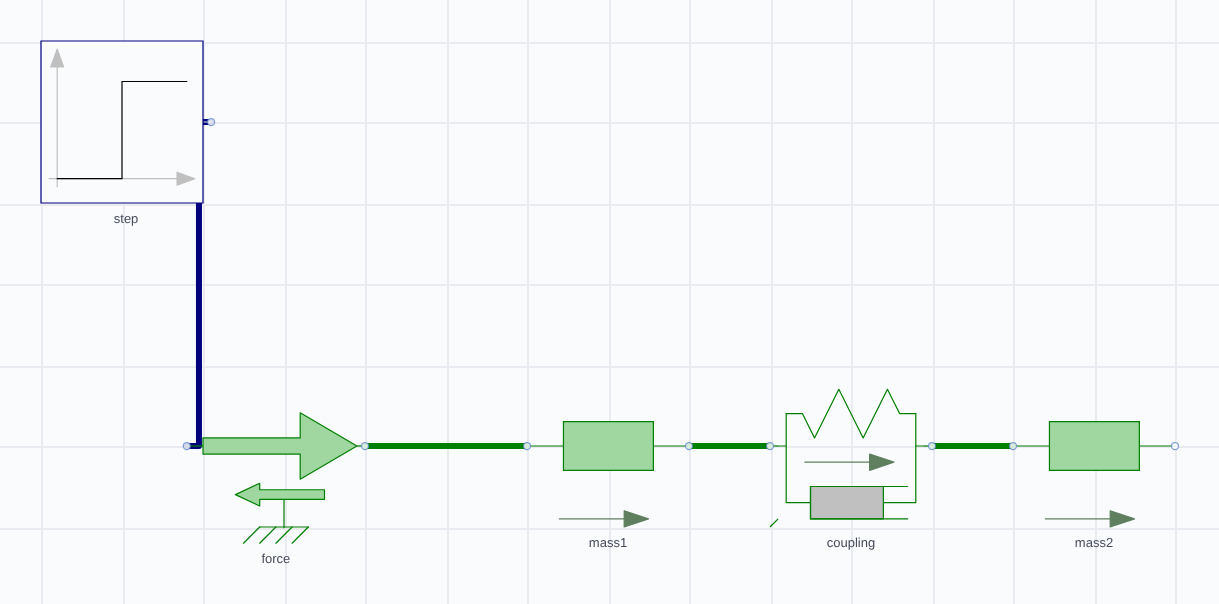
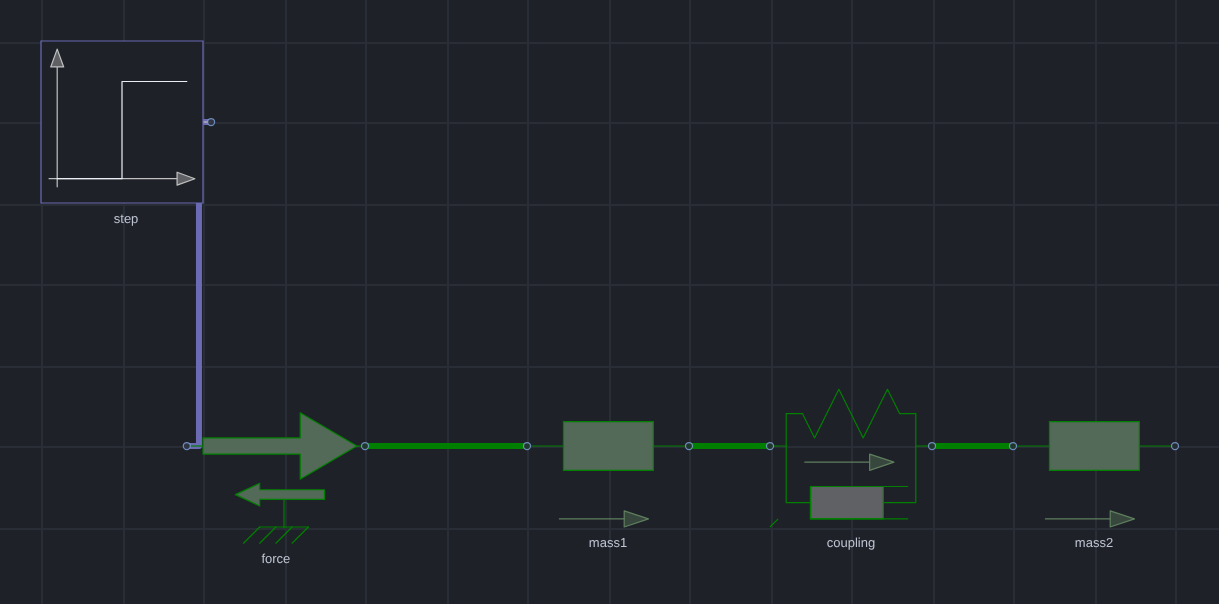
MassSpringDamper — two free masses joined by a spring and damper, with a 1 N step forced on the first. The signal wire is the Blocks library's dark blue, the mechanical wires are translational green: colours and line weights come from the library's own annotations, not from this plugin — including on a dark canvas, where a wire that would vanish is lifted just enough to stay visible.
Status: pre-1.0, and experimental — it works, its examples are verified numerically against independent calculations, and there are rough edges. See Beta status.
- Install · What it does · A worked example · Two more examples · Using it in a note · AI assistance · Testing and verification · Licence
Install
Requirements: Obsidian 1.11.4+ on desktop (it runs a compiler — mobile is
not supported), and OpenModelica installed separately. The plugin finds omc
on your PATH, tells you if it is missing, and uses the Modelica Standard Library
that ships with it.
Where to get OpenModelica — the same list the plugin prints when it cannot find omc:
| Platform | How to install it |
|---|---|
| Arch Linux, CachyOS | openmodelica-bin from the AUR — yay -S openmodelica-bin (or openmodelica, which builds from source). |
| Other Linux distributions | The Linux downloads page has the official packages; most distributions also carry it in their own repositories — Fedora: sudo dnf install openmodelica. |
| macOS | The macOS installer, then reload Obsidian. |
| Windows | The Windows installer, keeping Add OpenModelica to PATH checked. |
After installing, reload Obsidian (Ctrl/Cmd+R): the plugin looks for omc when it
loads. If it cannot find it, the message names the install route for your platform,
and OpenModelica path in the settings takes an explicit path to the binary.
With BRAT, which keeps it updated
BRAT installs a plugin straight from its GitHub releases and updates it for you. The plugin is pre-1.0, so the version numbers are 0.x; from 0.3.0 the releases are ordinary releases rather than pre-releases, and the 0.2.0-beta.* line stays available for anyone pinning an older build.
- Install BRAT from Settings → Community plugins → Browse.
- In BRAT's settings, Add Beta Plugin.
- Enter this repository:
AhmedAlfahdi/modelica-studio - BRAT installs the latest release. Enable Modelica Studio in Settings → Community plugins.
To pin a version instead of tracking the latest, use BRAT's frozen option and
name the release, for example 0.3.18.
BRAT reports a mismatch if a release's tag, its name and the version inside the
released manifest.json disagree. They are kept identical here on purpose, so an
update is never held back by a version string.
By hand
- Take
main.js,manifest.jsonandstyles.cssfrom a release, or build them (below). - Create
<your-vault>/.obsidian/plugins/modelica-studio/. - Copy those three files into it.
- Reload Obsidian — a plugin's
manifest.jsonis read at startup, so copying one in while the app is running does not register it. - Enable Modelica Studio in Settings → Community plugins.
To try it without your own vault, examples/vault/ is a ready-made one — see
Testing.
Verify what you installed
The three files on a release are built by
.github/workflows/release.yml from the tagged commit
and carry a signed build-provenance attestation, so you can check that the main.js
running in your vault came from this repository rather than from somewhere else:
gh attestation verify main.js --repo AhmedAlfahdi/modelica-studio
Run it inside your vault's .obsidian/plugins/modelica-studio/ — or against any release
download — with the GitHub CLI installed. A release from before
0.3.20 has no attestation; the command says so rather than pretending otherwise.
Build it yourself
npm install
npm run build          # typecheck, then bundle to main.js
npm run dev            # rebuild on change
npm test               # ~790 tests, including a numerical audit of the examples
npm run lint           # the plugin directory's own review rules
npm run lint runs eslint-plugin-obsidianmd's recommended config over the source and
the CSS checks the directory's published stylelint config applies to styles.css — the
same rules a submission is reviewed with — so that list is never seen for the first time
during a review. test/lint.test.mjs fails the suite when either is not clean, and
carries a canary proving the CSS gate still rejects :has() and display: contents
rather than passing because it stopped looking.
npm test runs the real OpenModelica compiler, so it needs omc on your PATH and
takes a few minutes. Without it, the simulation-dependent tests skip.
What it does
Each of these is a capability, with the picture that goes with it. The screenshots
are rendered from the plugin's own code by scripts/readme-images.mjs, so they
cannot show something the plugin does not do — and regenerating them after a change
is one command.
The whole studio — palette, diagram, inspector, result — looks like this:
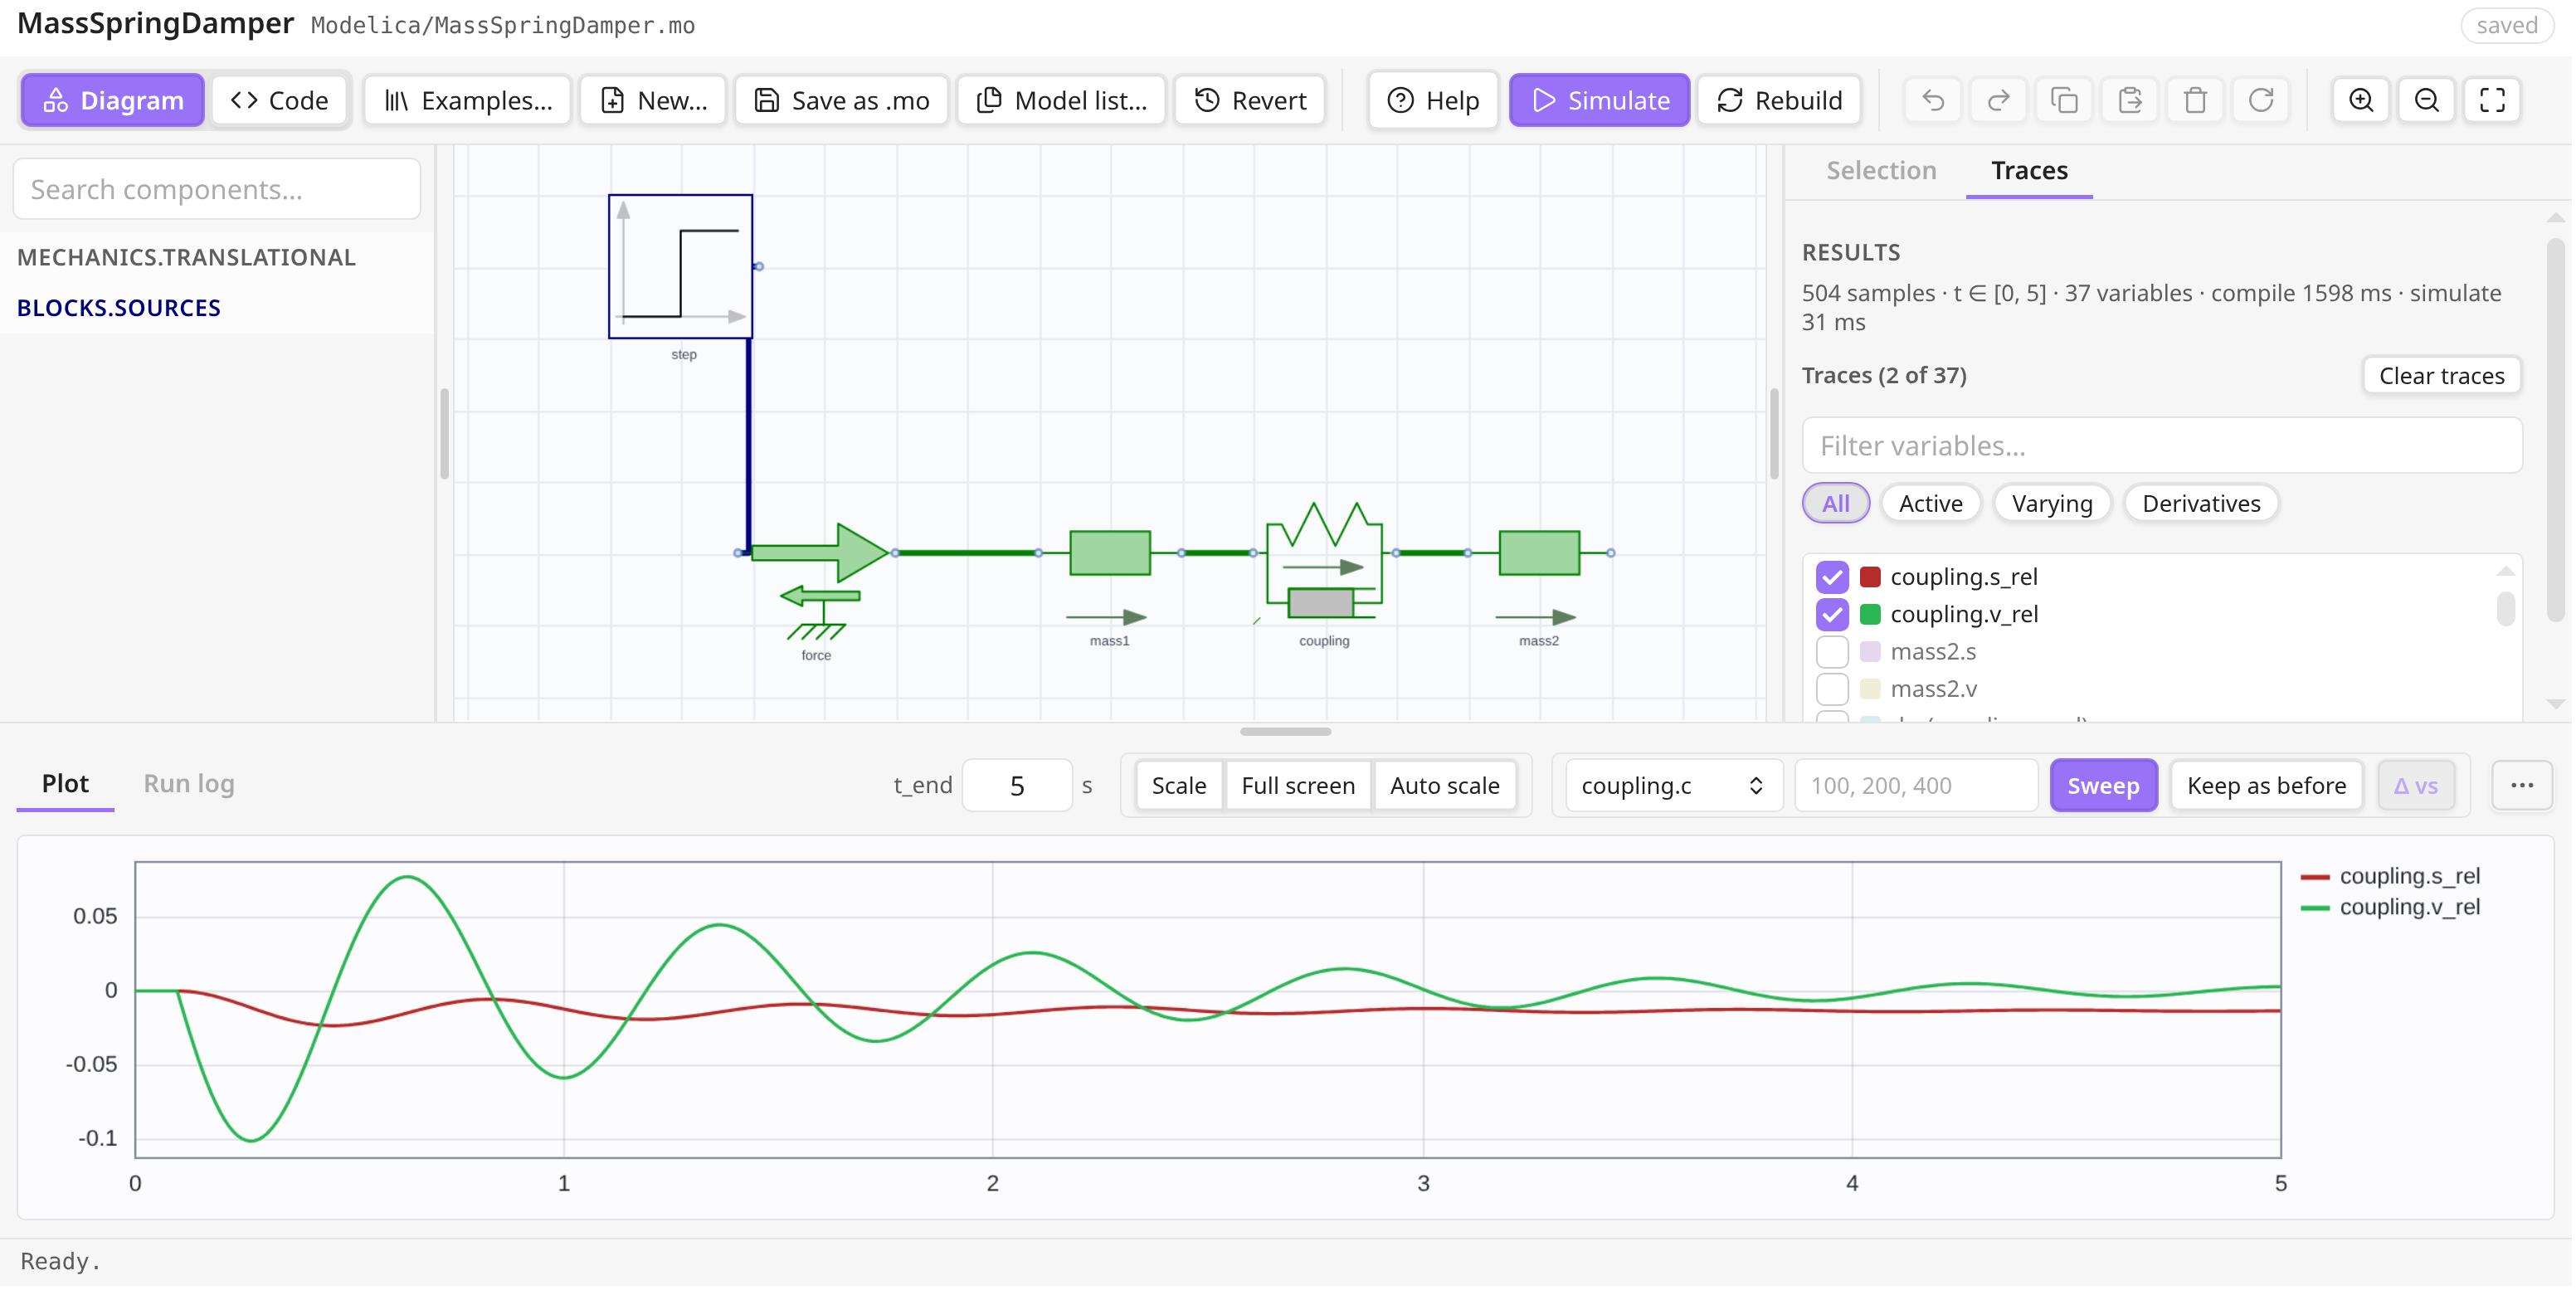
Light theme. The palette on the left, the diagram in the middle, the inspector on the right — here on the Traces tab, listing the result's 37 variables with two of them plotted — and the result below, with the sweep controls beside it. The names under the components are placed by the plugin: a name that would land on another symbol or on a wire is moved aside, which is the Move names out of the way setting.
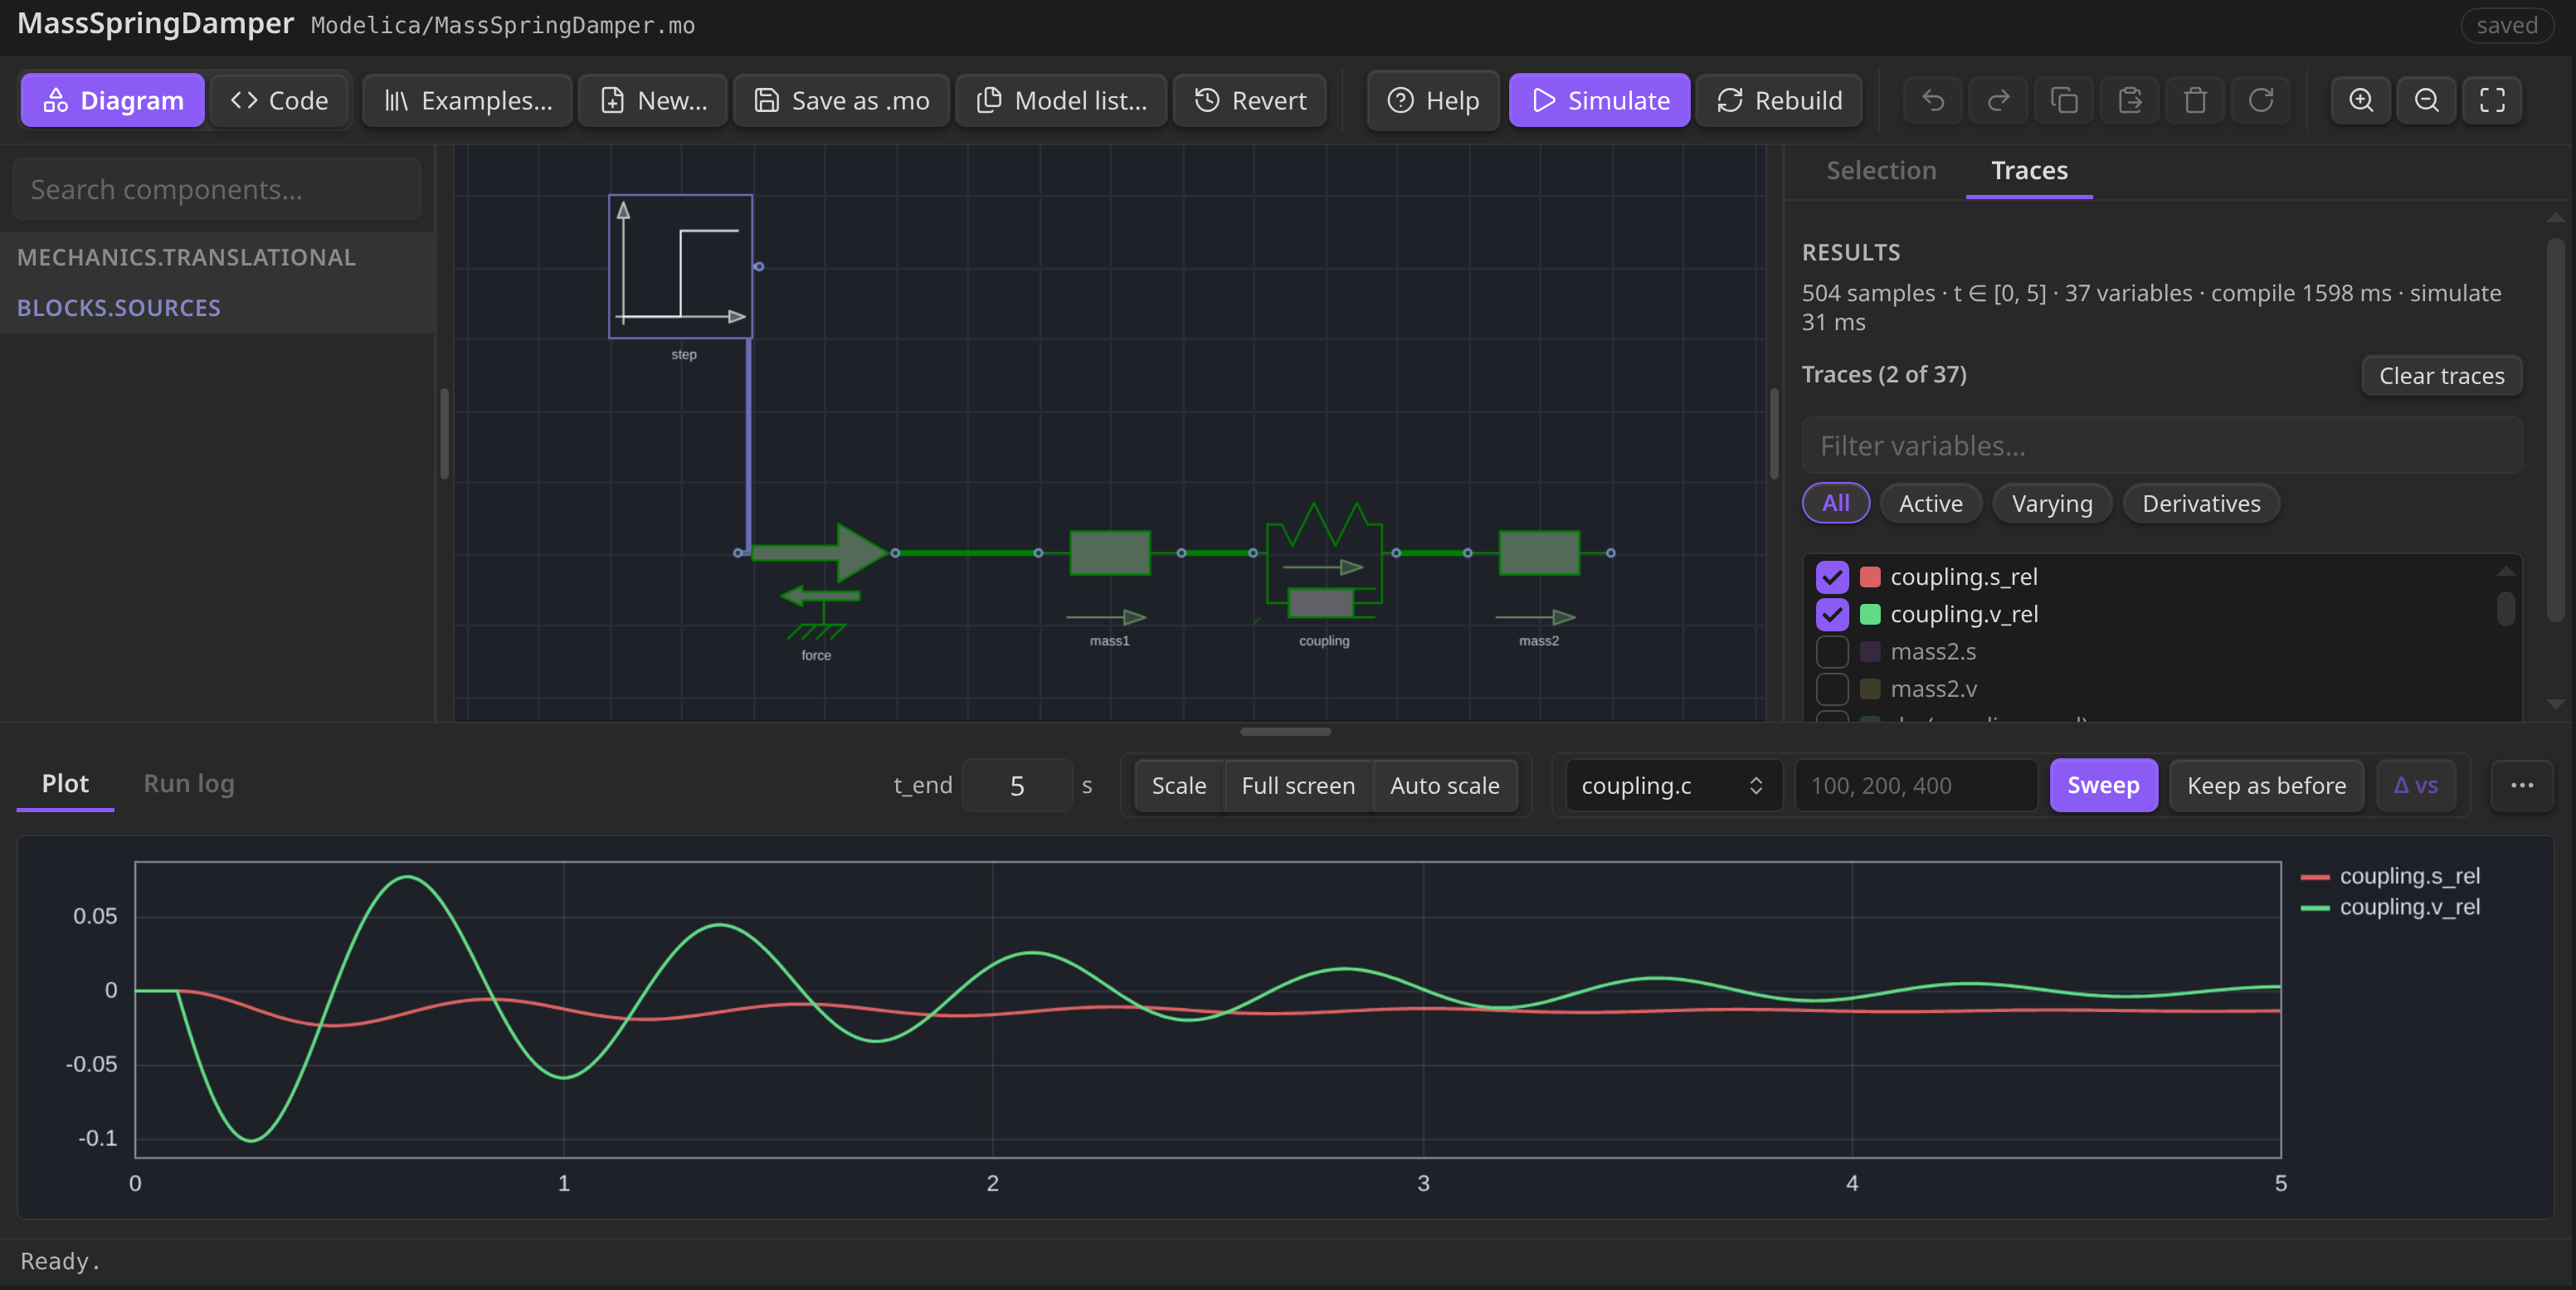
Dark theme.
How it talks to OpenModelica
The plugin never implements a simulator. It writes a model out as Modelica source,
hands that text to the omc you already have installed, and reads the result file
back:
flowchart TD
  subgraph plugin["In Obsidian: the plugin"]
    canvas["Diagram canvas<br/>drag, wire, rotate"]
    src["Modelica source<br/>the .mo file in your vault"]
    plot["Plot<br/>in the studio or in a note"]
  end
  subgraph omc["OpenModelica: omc"]
    t["Translate<br/>flatten and type-check"]
    cc["Compile to C, link"]
    run["Run the executable<br/>writes a result file"]
  end
  lib[("Modelica Standard Library")]

  canvas -->|serialize| src
  src -->|"Simulate: one .mos script"| t
  t -->|ok| cc
  cc --> run
  run -->|"the result file: a time series"| plot
  t -.->|"errors, with line numbers"| src
  lib -.->|"icons, colours, parameters"| canvas
Nothing is hidden in the middle: Simulate is those four steps in order, and
everything omc reports comes back with its line number and is shown against the
code. The library is read once to draw the palette and the symbols, and the model
imports it by its ordinary name — so a file written here compiles in any other
Modelica tool too.
A schematic editor that draws what the library declares
Drag a class from the palette onto the canvas, wire the pins, drag a wire vertex to
route it, rotate, resize, copy and paste, undo. The search is fuzzy (tank finds
OpenTank), whole libraries can be hidden, and the diagram is stored as real
Modelica source with graphical annotations — so a file round-trips through OMEdit
and the other Modelica tools.
Symbol outlines, wire colours, wire weights and pin shapes are read from the
library: an electrical connection is the electrical blue, a shaft is ink, a bus is
yellow at double width, and a component's own icon text (R=100, a valve's state)
is drawn as the library wrote it. Help → Diagrams lists every domain's colour,
measured from the installed library rather than copied into the source.
Run it, and read the result where you are
Simulate serializes the diagram, compiles it with omc, runs it and plots the
result. Traces are grouped onto one or two value axes by magnitude, so a pressure
in the hundreds of thousands and a flow in hundredths are both readable; the legend
names the run, and the cursor reads every visible trace at the instant under it.
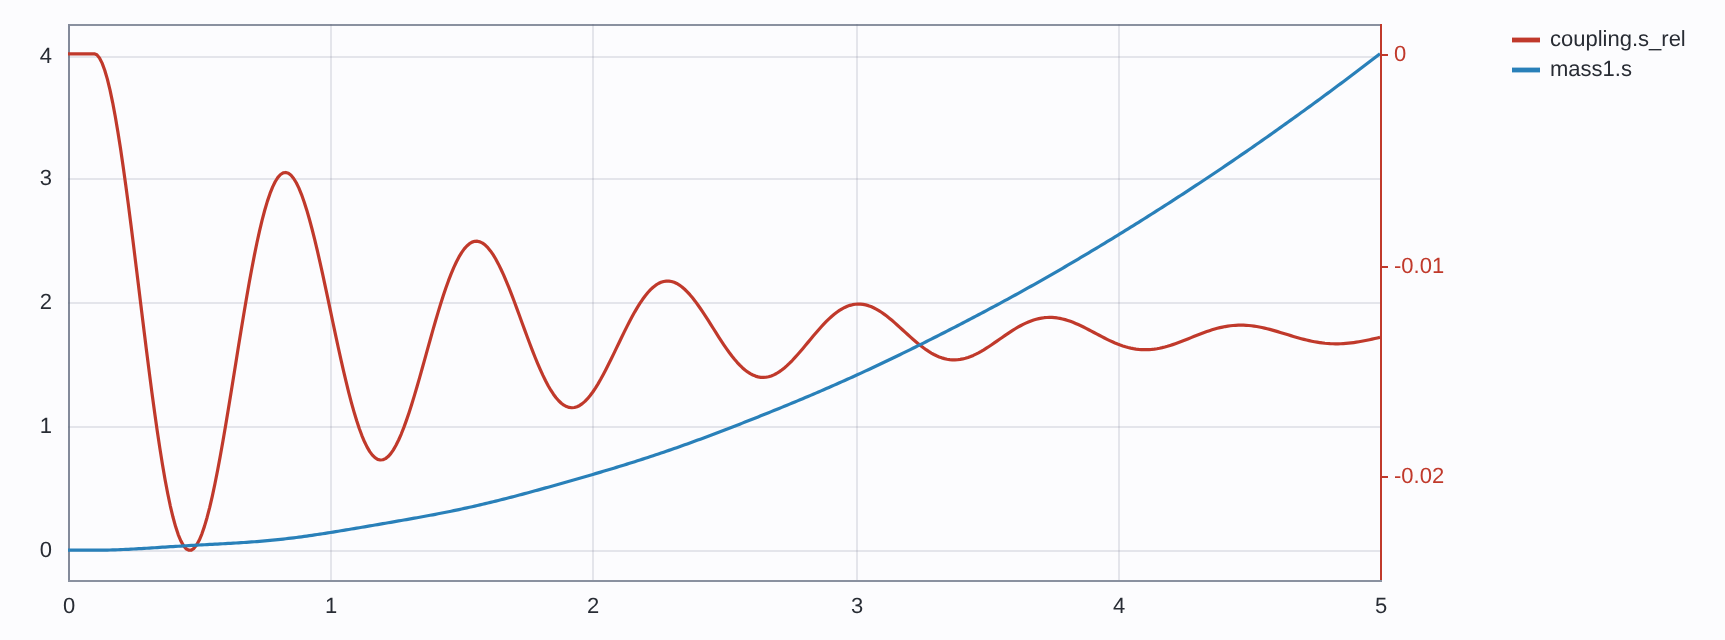 |
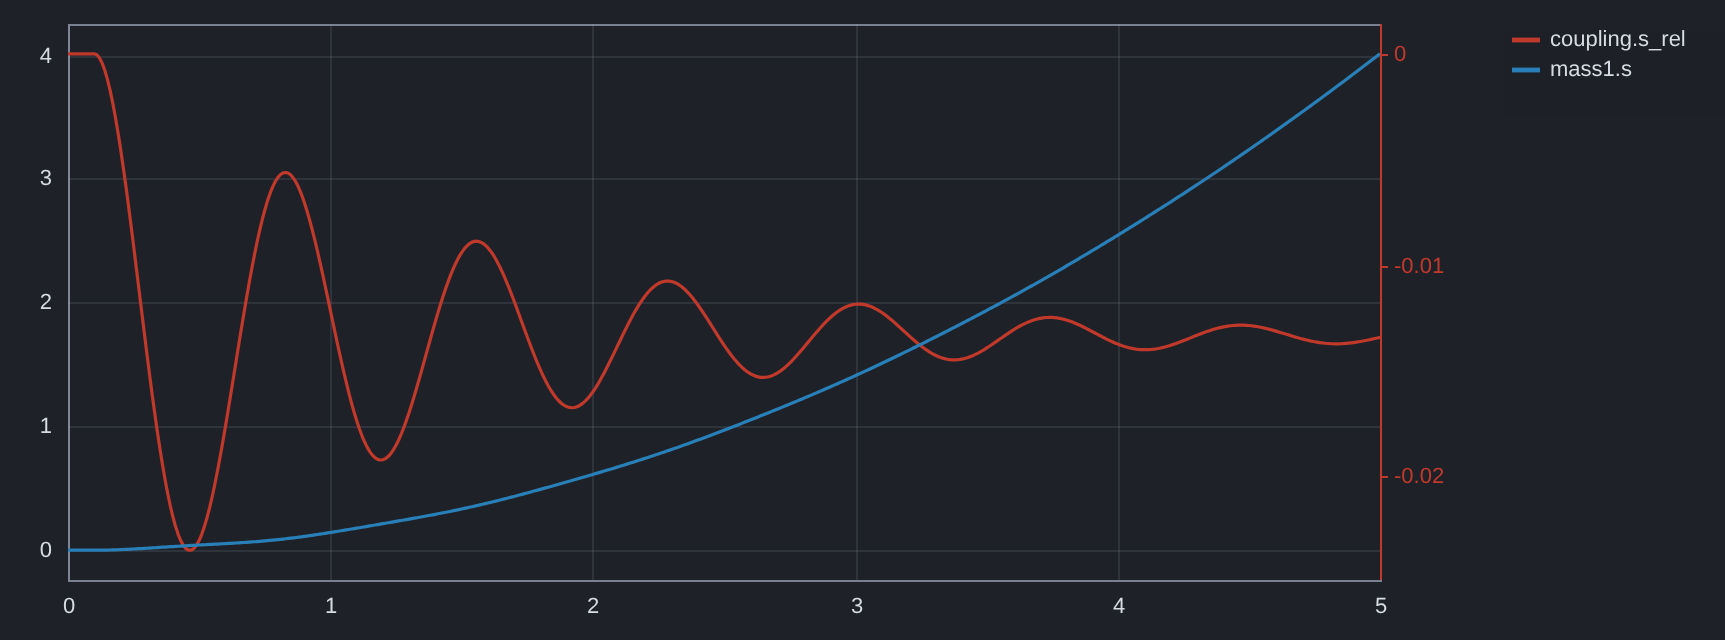 |
| Light theme | Dark theme |
The first mass's position and the coupling's deflection — the two quantities this
model is about, and the two its example opens with. Nothing is anchored, so
mass1.s drifts upward; coupling.s_rel is the gap, which rings and settles at
F·m₂/(c(m₁+m₂)) = 1/75 m rather than at F/c, because both ends are free. Both
curves are the numbers OpenModelica returned; nothing in this README is redrawn by
hand.
A sweep runs the model once per value of one parameter and overlays the results as a family, dotted per run; Δ vs measures a trace against the run on screen, so "this valve opens 12 ms later" is a number rather than an impression. A changed parameter re-runs in tens of milliseconds by overriding it in the compiled binary; a structural change recompiles.
The same thing, in a note
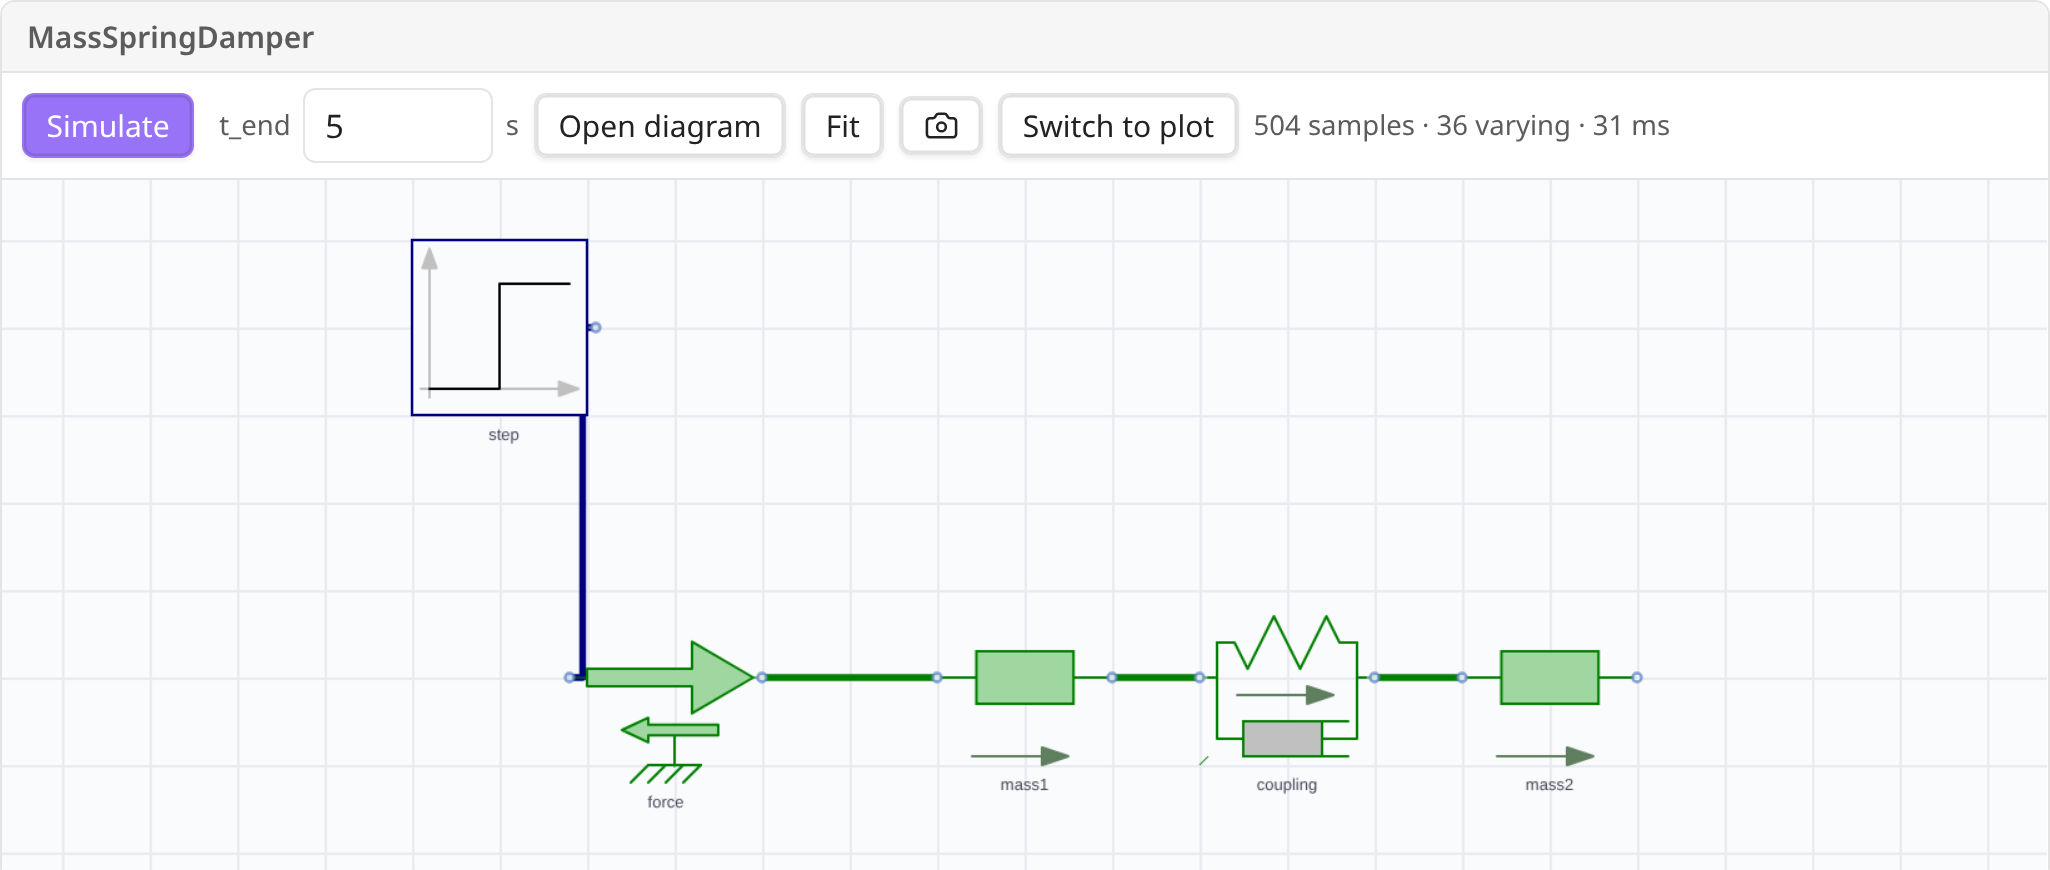
A fenced modelica block renders a live diagram and a plot, and simulates when the
note opens. The block's text is the model — the one below is the MassSpringDamper
from the worked example — so the diagram lives in the note and the note travels with
it.
 |
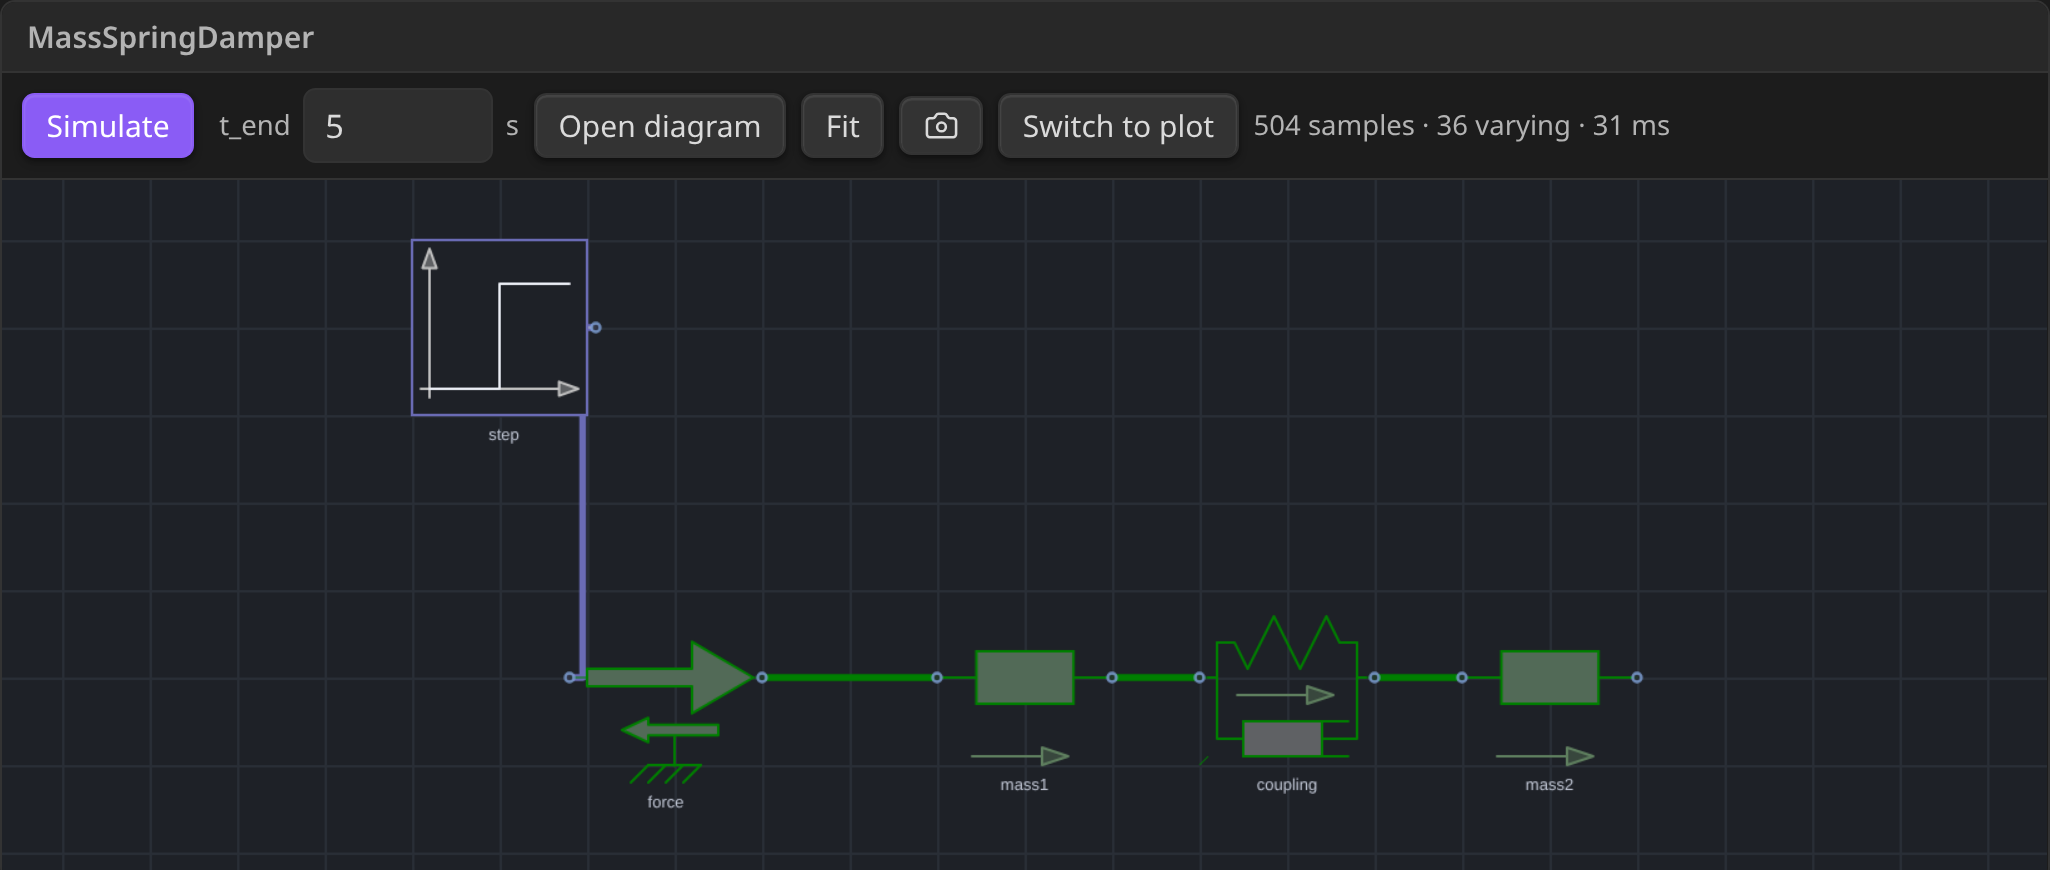 |
| Light theme | Dark theme |
A block in a note, opened on its diagram. It carries its own toolbar: Simulate, the span it runs over, Open diagram to take the model into the studio, Fit, and the switch between the two panes. It simulates once when the note opens.
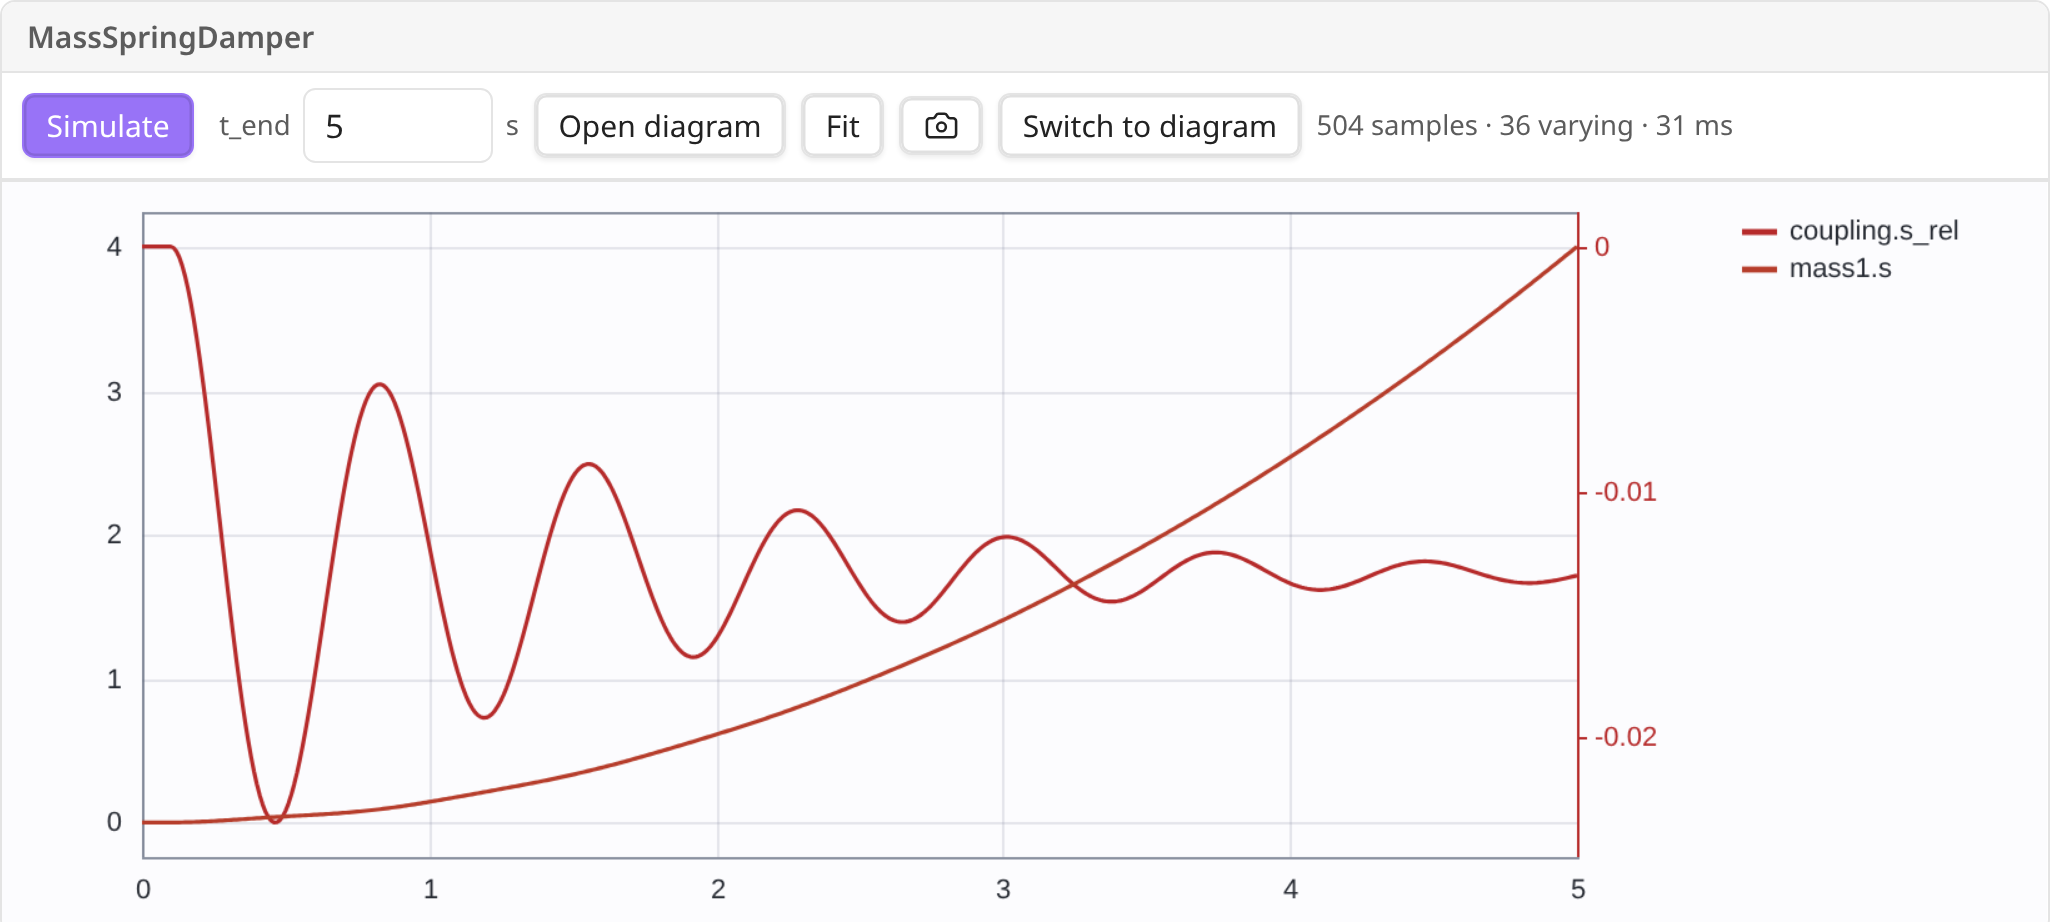 |
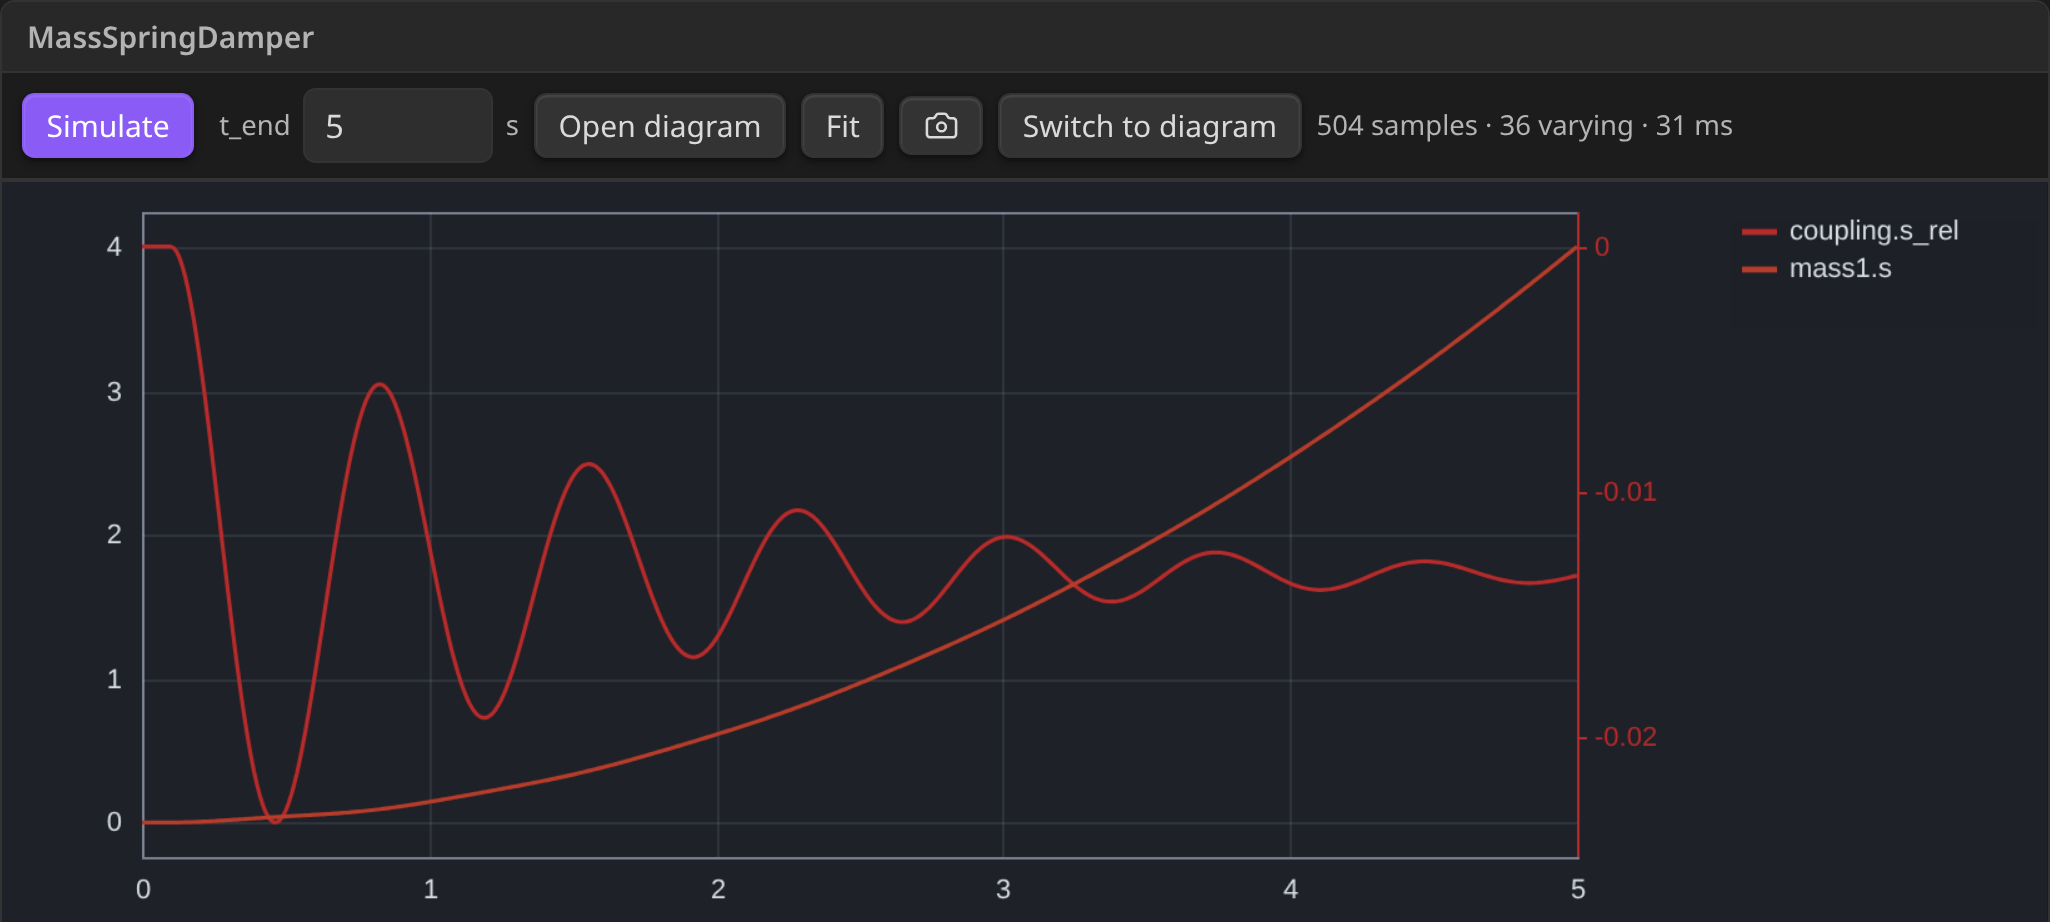 |
| Light theme | Dark theme |
The same block on its plot — this is what //@ result in the block's first line opens on. The diagram is always there underneath, a scroll away: a plot is the result of the diagram, and hiding one to show the other loses the thing the reader came for.
A block runs itself once, when the note opens; after that the Simulate button starts a run. Dragging a component inside the block writes the note back — see Using it in a note for why that does not start a loop, and what the directive on the block's first line can set.
Help that quotes the library
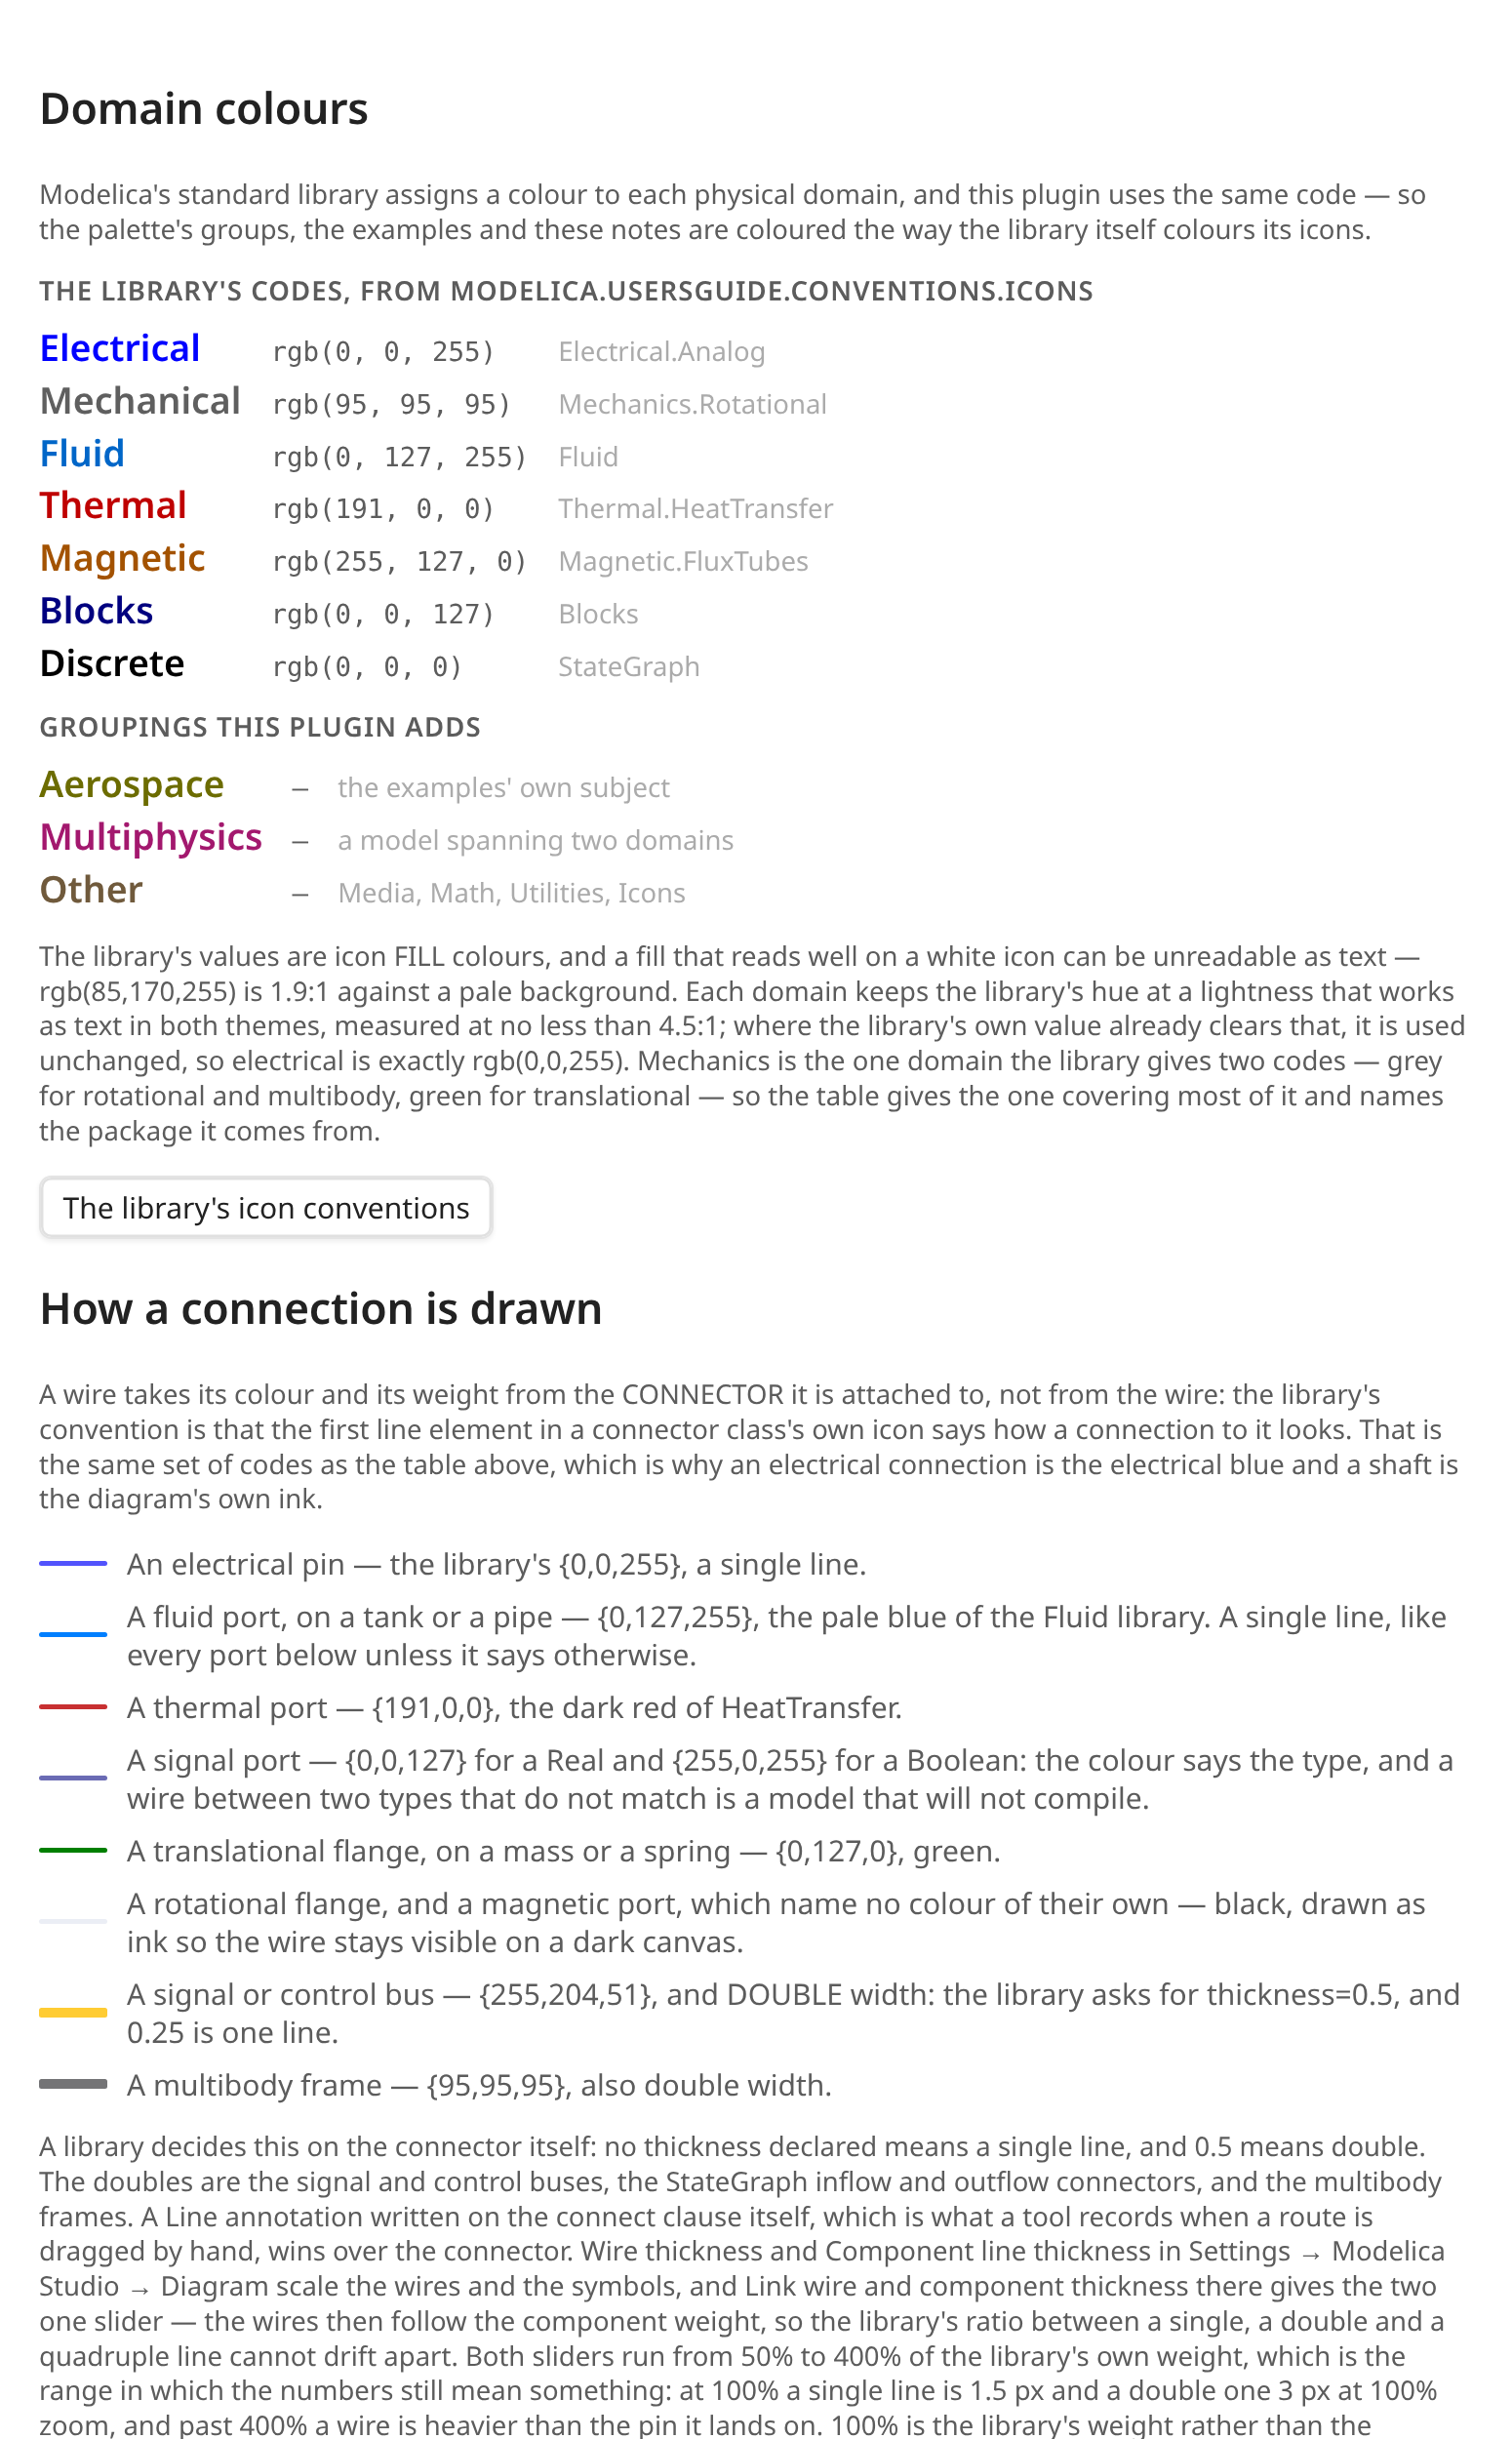
The Help window, in the studio, carries the shortcuts (read from the code that implements them, so a key that does not exist cannot be documented), the domain colours, the connection rules quoted from the library's own documentation, and what this installation actually is — the OpenModelica version, the library, the class count.
 |
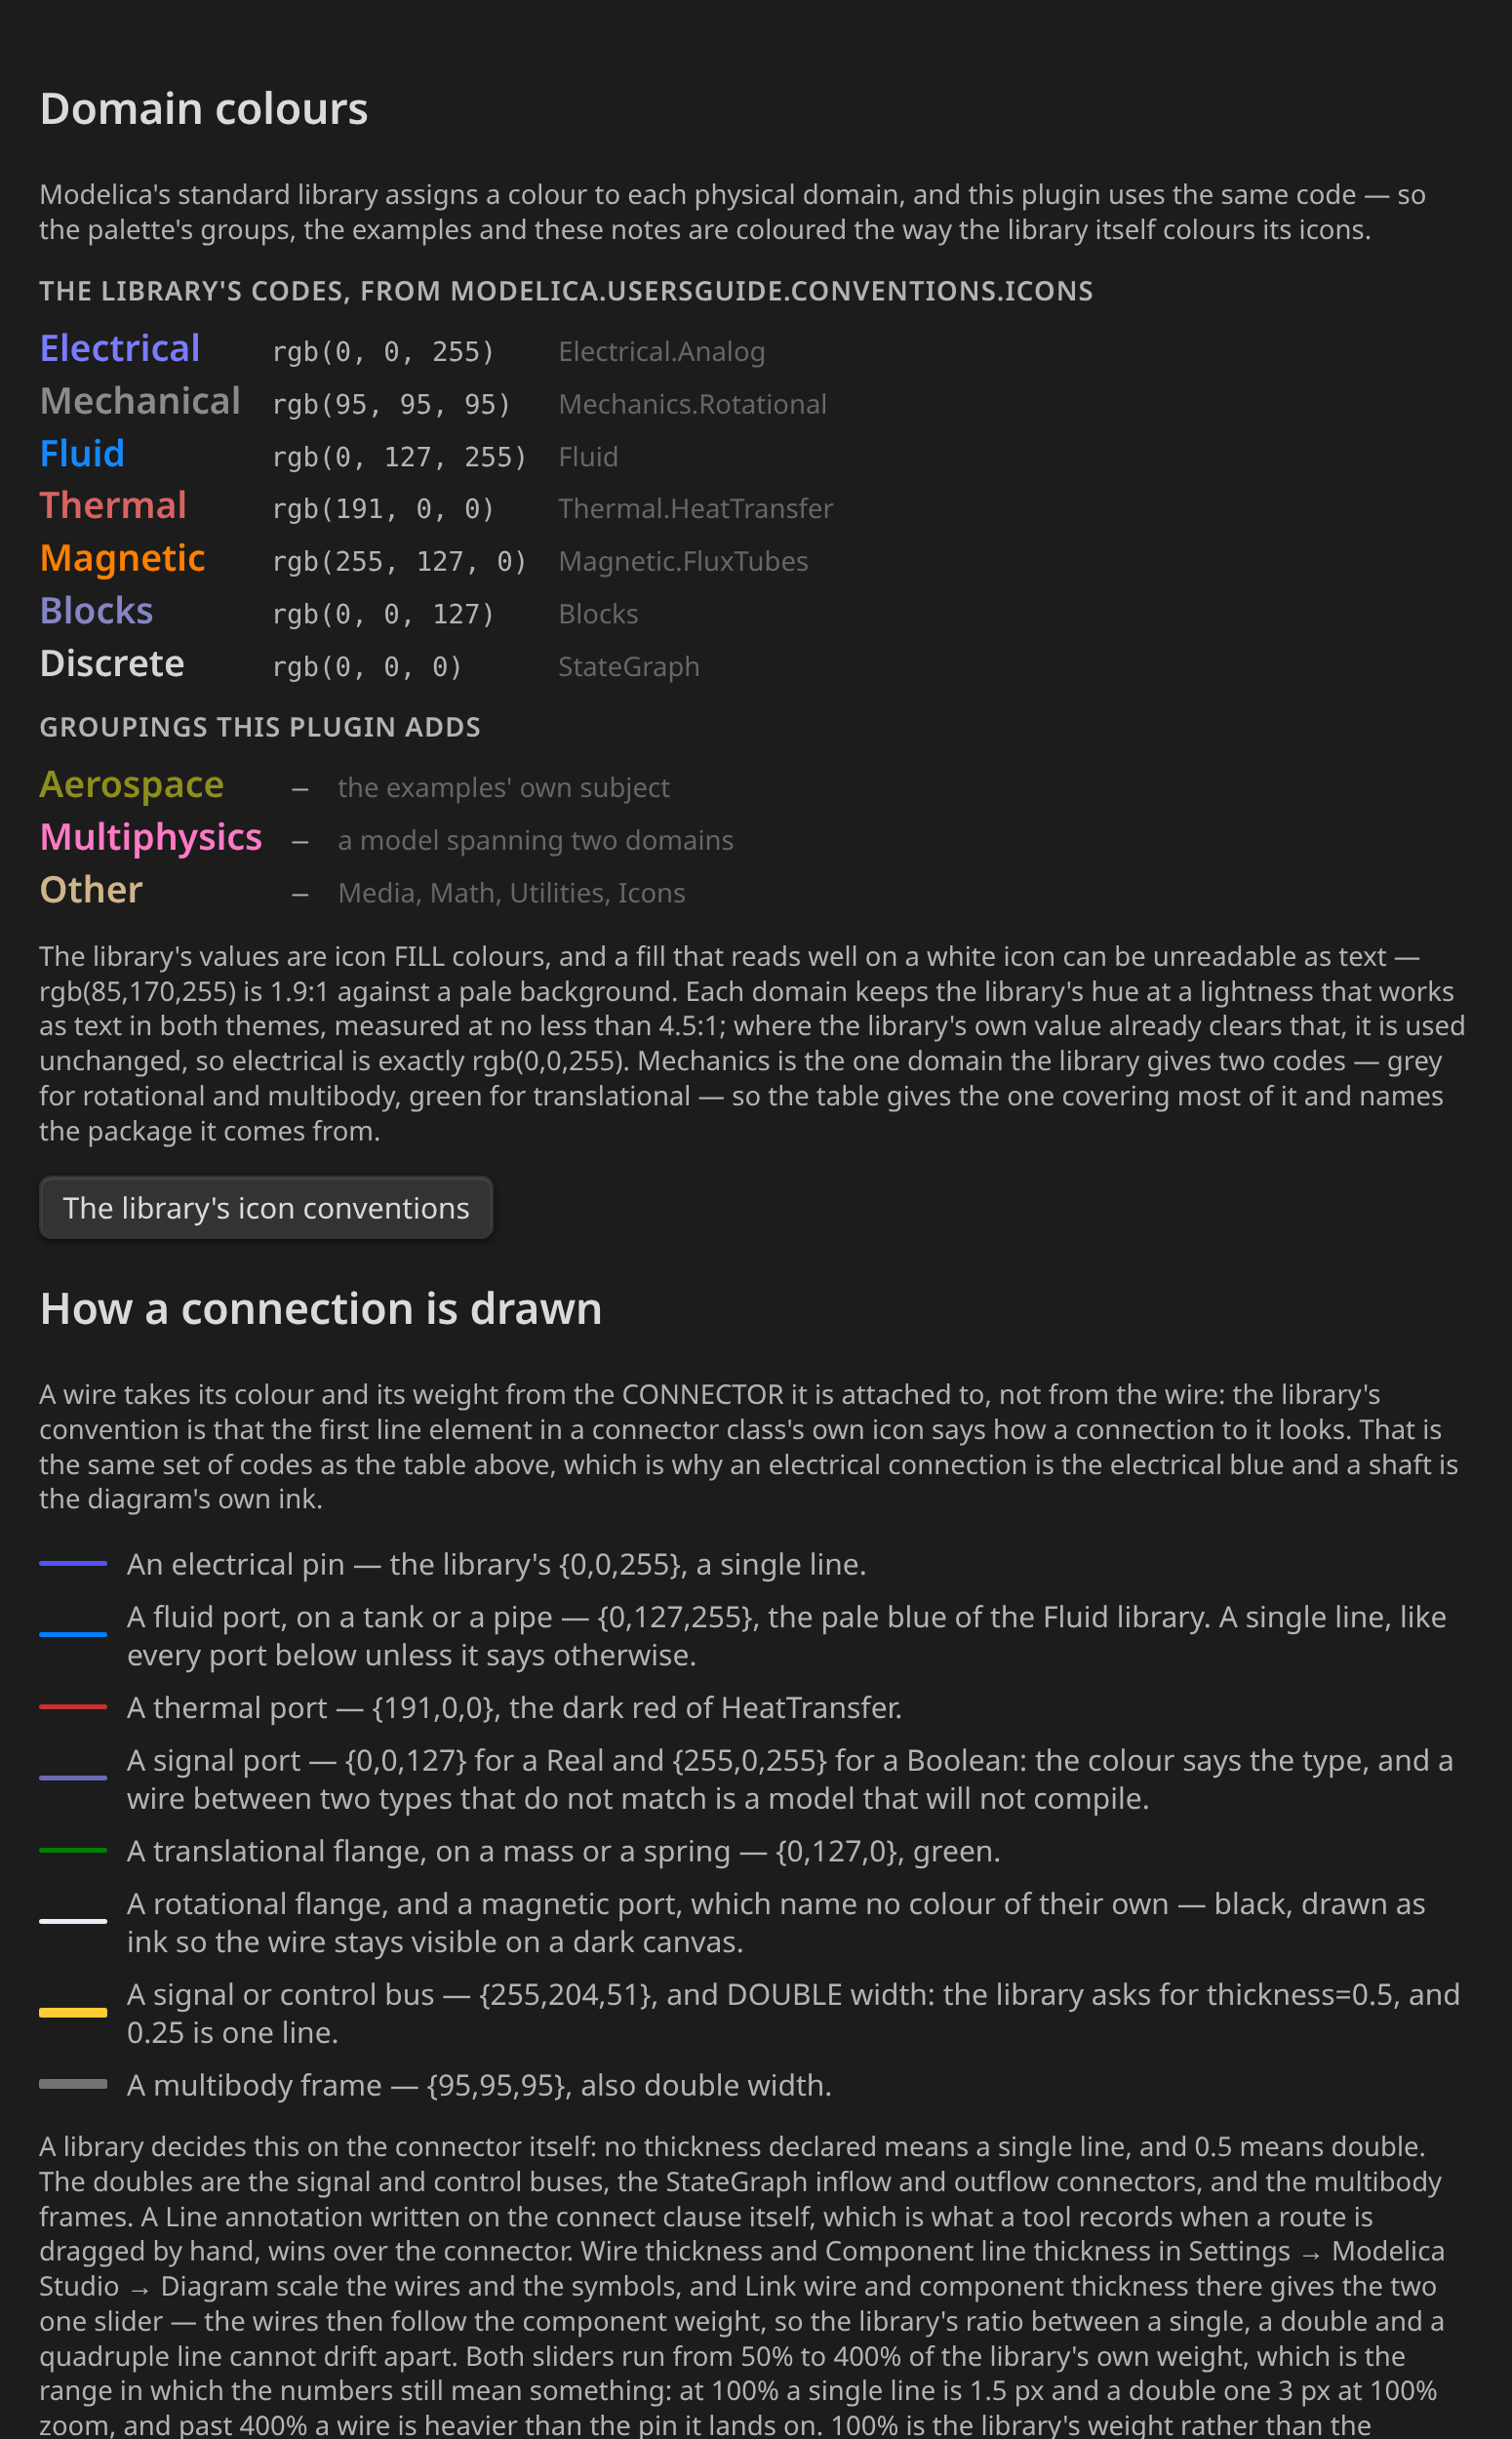 |
| Light theme | Dark theme |
Every colour in that table is measured from the installed library by a test, so a row cannot describe a library that no longer says it. The connection rules are quoted from the library's own UsersGuide.
Ask the diagram what it is set to
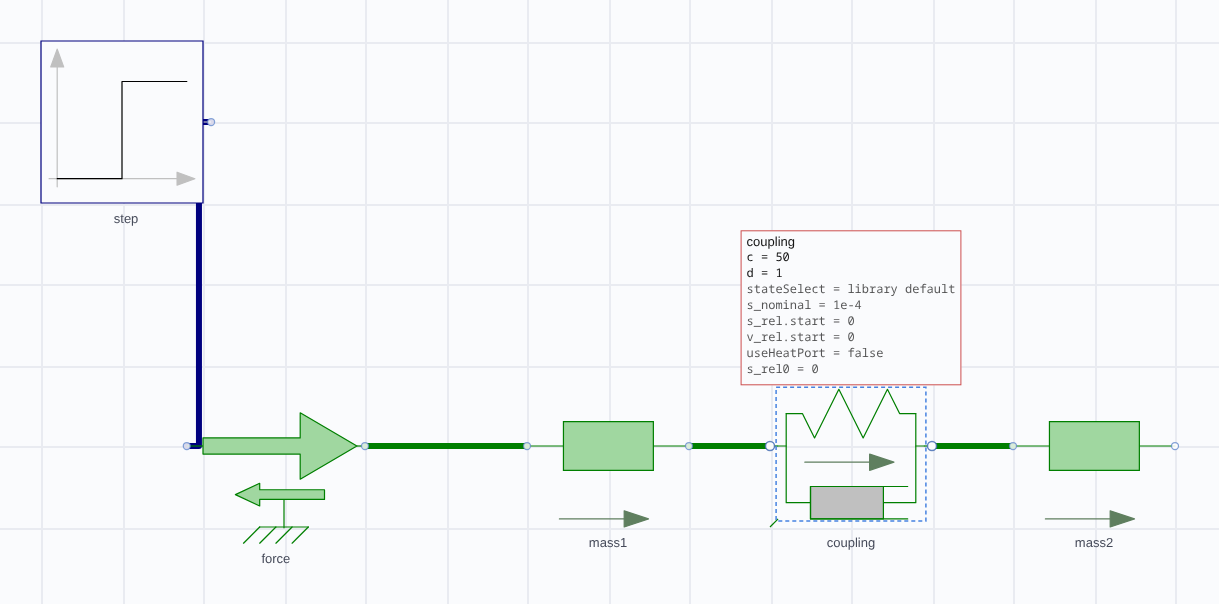
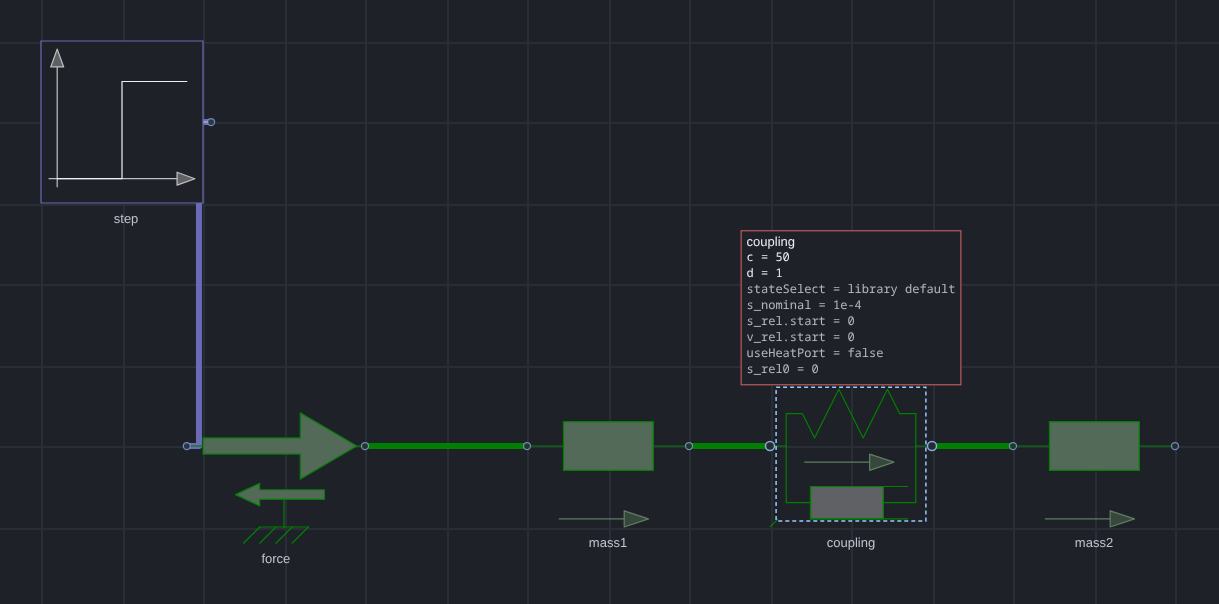
Resting the pointer on a component shows what its parameters are set to — the ones this instance overrides first, so the answer to "why is this different from the library default" is one hover away. Reading a diagram's settings otherwise means selecting every component in turn.
 |
 |
| Light theme | Dark theme |
Resting on the coupling in MassSpringDamper: c=50, d=1, the two values this instance sets, with the library's own defaults for the rest. On a class with a conditional connector, the connector is dimmed and cannot be wired until the parameter that declares it is on.
Sweep a parameter, and measure the difference
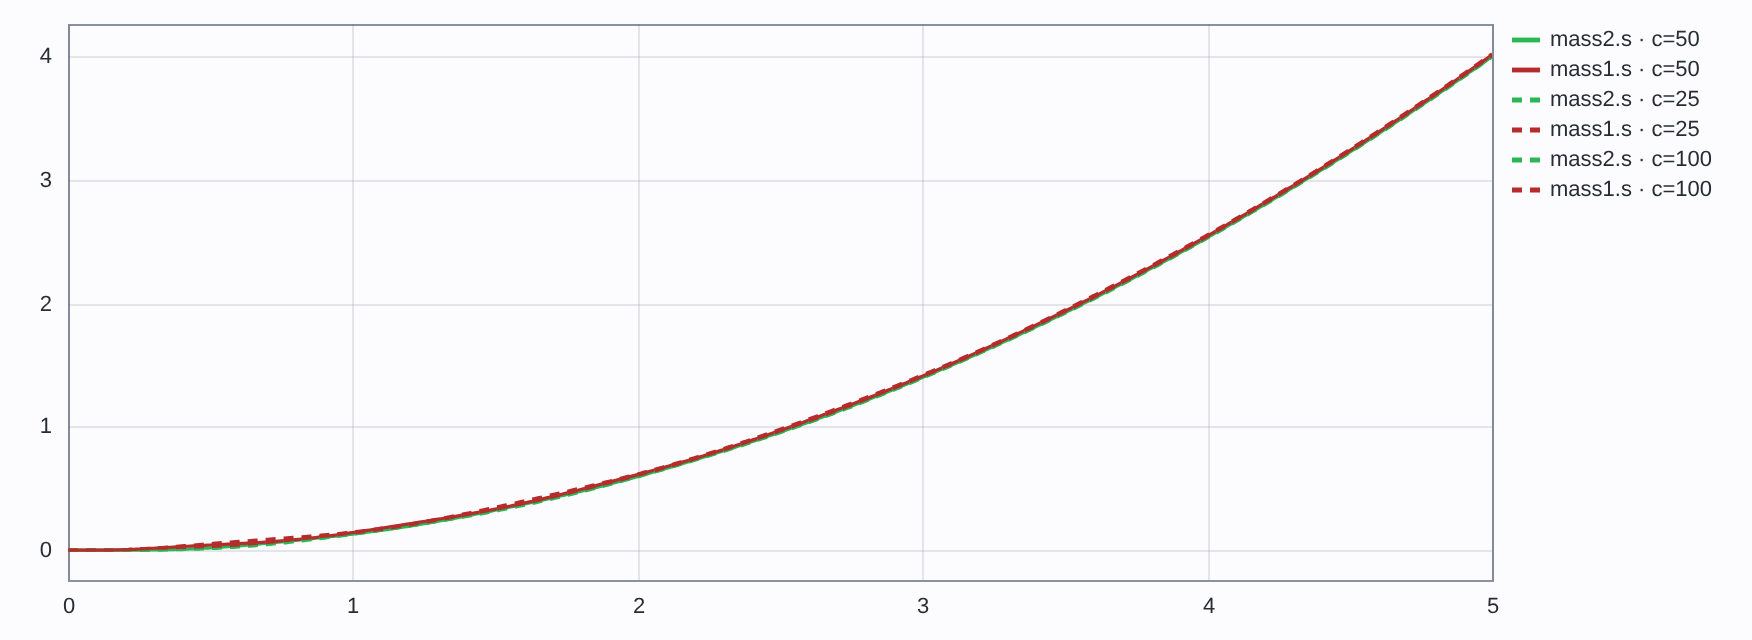
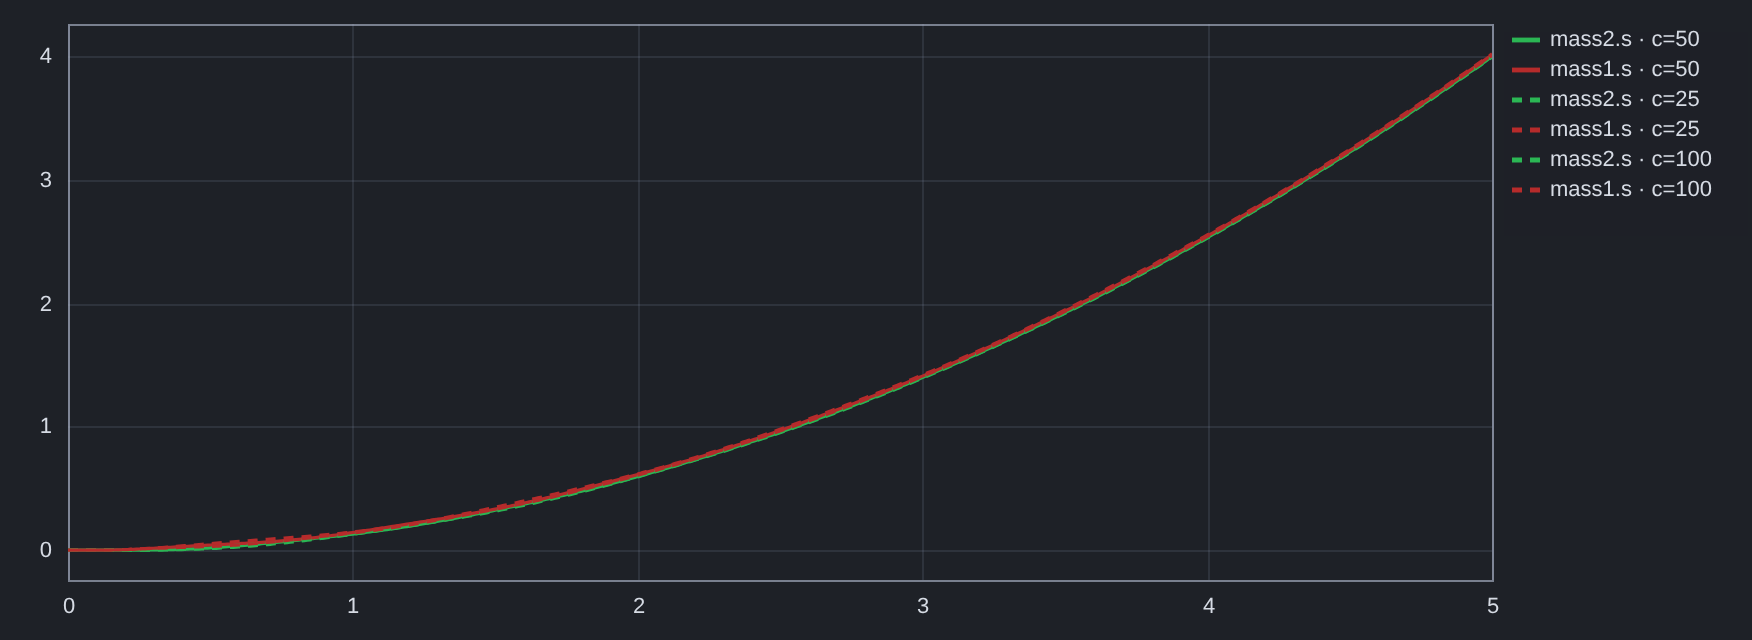
A sweep runs the model once per value of one parameter and overlays the results as a family — the run on screen solid, the others dashed, so which curve is which is never in doubt. Δ vs then reads how far each member is from the run on screen at the cursor, which turns "this valve opens a little later" into a number.
 |
 |
| Light theme | Dark theme |
MassSpringDamper swept over the coupling stiffness — c=25, c=50 (the run on screen) and c=100 — with each family member's distance from it at the cursor. Each value is one simulation of the same compiled binary: a parameter change overrides it at run time, which is why a sweep is seconds rather than minutes. A structural change recompiles.
The rest of it
- Diagram and code modes. The same model, built by dragging or edited as source with syntax highlighting, completion from the library, and inline diagnostics.
- Models as files. Create a model and save it as
.mo. Models go into aModelica/folder at the vault root by default — they are source for a compiler, not notes. A saved model opens four ways: right-click → Open in Modelica Studio, drag it onto the canvas or the code pane, the command palette, or click it and read the source as text (that last one is deliberately still the default: the file is source). - Parameters, without hunting. Hovering a component shows what its parameters
are set to, with the ones this instance overrides first. A connector a class only
declares conditionally — a heat port before
useHeatPortis true — is dimmed and cannot be wired until the parameter is on. - Optional AI assistance. With your own API key, describe a model in words and have it written into the editor, or ask for a compile error to be fixed. See AI assistance.
- 30 worked examples across electrical, mechanical, fluid, thermal, aerospace,
control and discrete domains, each with a derivation, the live model, and a table
comparing an independent calculation against the simulation. Every table is re-checked
against a real OpenModelica run by
test/audit.test.mjson every test run, so a stale number fails the suite rather than misleading a reader. - A record of what went wrong. Testing findings lists every expectation that failed, which side was wrong, and the five models dropped for being unverifiable.
What it accesses, and what leaves your machine
Stated plainly, because a plugin that runs a compiler should say so. The plugin directory's own analysis flags five capabilities here; this is what each one is for.
| Capability | What it is used for |
|---|---|
| Runs a shell command | omc, the OpenModelica compiler: translate, compile and run a model. Nothing else is executed, and only when you press Simulate, Sweep, Check or Rebuild. |
| Reads files outside the vault | The Modelica Standard Library of your installed OpenModelica (to index classes for the palette), and its own cache, history and logs under your Obsidian configuration folder. No file is scanned for anything but .mo source. |
| Machine details | Your home directory, to find OpenModelica's library folder; whether Obsidian runs in a Flatpak or a Snap, to find omc inside it; the core count, to default the compiler's parallel jobs. No hostname, no username, no hardware serial, no network interfaces — and none of it is ever sent anywhere. |
| Lists your vault's files | Model list… and the embed picker: they show the .mo files that exist, so you can open one. The list is not stored or sent. |
| The clipboard | Copy and paste inside the plugin — a component, a selection, the model as text — and the Ctrl+C/Ctrl+V you already expect. It is read only when you paste, and written only when you copy. |
Files, and what for. Everything inside your vault is reached through Obsidian's
own API, and the plugin writes only where you ask it to: .mo files in the model
folder (Modelica/ by default), the diagrams you embed in notes, and its own state
under your Obsidian configuration folder (<config>/plugins/modelica-studio/ —
history, the library index cache, and optionally an AI request log). The one other
file it writes is .modelica-studio.log in the vault root, only when you turn
Write diagnostic log on, and it keeps its most recent 512 KB rather than growing
without end.
Outside the vault it touches two things, both because the compiler lives there:
- the Modelica library folders of your OpenModelica installation — on Linux
~/.openmodelica/libraries, and the equivalent per-platform location elsewhere — read once to index the classes for the palette and the symbols, cached as JSON above, and re-read when a library changes; - the system temporary folder, where
omctranslates and compiles a model (<tmp>/modelica-studio/<pid>). That is OpenModelica's own scratch space: a compiled model is tens of megabytes of generated C. It is not in your vault, nothing there is read by anything but the compiler, and the folders left by earlier sessions — whose process has exited, so nothing can reuse them — are removed when the plugin starts. A folder belonging to a running Obsidian is left alone.
Nothing else is read or written, and no file is uploaded anywhere.
One file to read. The plugin's whole system surface — every file it reads and writes,
the compiler it spawns, the hashes it computes, the environment it looks at — is reached
through src/host/node.ts, which declares exactly those calls. No other file in the
source imports a Node module or touches process, and a test fails the suite if one does.
That file is the complete answer to "what does this plugin do to my machine".
Network. The plugin makes no network requests unless you turn on AI assistance. With it off — the default, and it stays off until you enter a key — it works entirely offline. With it on, and only when you press AI, it sends the prompt you wrote, the current model source, and OpenModelica's compiler output for that model to the provider you configured:
- OpenAI (
api.openai.com), DeepSeek (api.deepseek.com), Groq (api.groq.com) or OpenRouter (openrouter.ai), or - any OpenAI-compatible base URL you type in instead, including a local Ollama or llama.cpp server — in which case nothing leaves the machine.
What it sends is the prompt, the model source, the compiler's output, the OpenModelica version, the names of the libraries you have indexed, and your run settings. It does not send file paths, your vault's contents, or anything identifying the machine.
The benchmark (modelicaStudio.bench(), documented under Debugging)
is the one exception, and it is a developer tool: it measures a fixed set of prompts and
reports the timings, from your console.
The key is stored in Obsidian's keychain and sent only to that provider. The plugin has no telemetry, no analytics and no update check: it never contacts this repository or anyone else on its own, and updating is Obsidian's or BRAT's job. There is no account to create and nothing to pay for; the only cost of the AI feature is your own provider bill.
A worked example: two masses and a spring
The picture at the top of this page is this model — one of the built-in examples, so you can open it from Examples in the toolbar and run it yourself:
//@ time=5
model MassSpringDamper "Two masses coupled by a spring and damper"
  Modelica.Mechanics.Translational.Sources.Force force
    annotation(Placement(transformation(extent={{-80,-10},{-60,10}})));
  Modelica.Mechanics.Translational.Components.Mass mass1(m=1)
    annotation(Placement(transformation(extent={{-40,-10},{-20,10}})));
  Modelica.Mechanics.Translational.Components.SpringDamper coupling(c=50, d=1)
    annotation(Placement(transformation(extent={{-10,-10},{10,10}})));
  Modelica.Mechanics.Translational.Components.Mass mass2(m=2)
    annotation(Placement(transformation(extent={{20,-10},{40,10}})));
  Modelica.Blocks.Sources.Step step(height=1, startTime=0.1)
    annotation(Placement(transformation(extent={{-80,30},{-60,50}})));
equation
  connect(step.y, force.f);
  connect(force.flange, mass1.flange_a);
  connect(mass1.flange_b, coupling.flange_a);
  connect(coupling.flange_b, mass2.flange_a);
end MassSpringDamper;
A 1 N force is switched on at 0.1 s and pushes mass1; mass2 is joined to it by
nothing but a spring and damper. Nothing is bolted down, which is what makes it
worth reading: the two masses bob relative to each other and drift away together,
and the gap between them settles somewhere other than the value a bolted-down end
would give it.
Reduced mass — the effective inertia of the relative motion, always smaller than either mass alone.
$$\mu = \frac{m_1 m_2}{m_1 + m_2} = \frac{2}{3}\ \text{kg}$$
Centre of mass — nothing external holds the pair back, so the whole pair drifts while the gap between them settles.
$$\ddot{x}_{\text{cm}} = \frac{F}{m_1 + m_2} = \frac{1}{3}\ \text{m/s}^2$$
Steady gap — the trap, if you expect the spring to carry the whole force.
$$\Delta x = \frac{F,m_2}{c,(m_1 + m_2)} = \frac{1}{75}\ \text{m}$$
showcase/notes/02-Mechanical/11-mass-spring-damper.md
works the whole thing through, including the equations and a table comparing them
with what the simulation returns.
Two more examples
Every example below is built in — open it from Examples in the toolbar and press
Simulate — and every number is re-checked against a real OpenModelica run by
npm test, so a stale figure in this README fails the build rather than misleading a
reader. The closed forms are derived independently of the simulation.
A series RLC circuit that rings
//@ time=0.05
model RLC "Series RLC circuit: underdamped step response"
  Modelica.Electrical.Analog.Sources.StepVoltage source(V=10, startTime=0.001)
    annotation(Placement(transformation(extent={{-80,0},{-60,20}}, rotation=-90)));
  Modelica.Electrical.Analog.Basic.Resistor resistor(R=10)
    annotation(Placement(transformation(extent={{-40,20},{-20,40}})));
  Modelica.Electrical.Analog.Basic.Inductor inductor(L=0.1)
    annotation(Placement(transformation(extent={{0,20},{20,40}})));
  Modelica.Electrical.Analog.Basic.Capacitor capacitor(C=0.001)
    annotation(Placement(transformation(extent={{40,20},{60,40}})));
  Modelica.Electrical.Analog.Basic.Ground ground
    annotation(Placement(transformation(extent={{50,-40},{70,-20}})));
equation
  connect(inductor.n, capacitor.p);
  connect(source.p, resistor.p);
  connect(resistor.n, inductor.p);
  connect(capacitor.n, ground.p);
  connect(source.n, ground.p);
end RLC;
A 10 V step is switched on 1 ms into a series loop of a 10 Ω resistor, a 0.1 H inductor and a 1 mF capacitor. The damping ratio decides everything, and it is one line of algebra:
$$\alpha = \frac{R}{2L} = 50\ \text{s}^{-1}, \qquad \omega_0 = \frac{1}{\sqrt{LC}} = 100\ \text{rad/s}, \qquad \zeta = \frac{\alpha}{\omega_0} = \frac{R}{2}\sqrt{\frac{C}{L}} = 0.5$$
The damping ratio is below 1, so the step overshoots — by 16.3%, to 11.63 V, one quarter of a ringing period after the step — and then rings down:
$$\omega_d = \sqrt{\omega_0^2 - \alpha^2} = 86.6\ \text{rad/s}, \qquad \tau = \frac{1}{\alpha} = 20\ \text{ms}, \qquad t_{\text{peak}} = \frac{\pi}{\omega_d} = 37\ \text{ms}$$
which is what the plot is checked against, point by point:
$$v_C(t) = V\left[1 - e^{-\alpha t}\left(\cos\omega_d t + \frac{\alpha}{\omega_d}\sin\omega_d t\right)\right]$$
| Quantity | Closed form | OpenModelica |
|---|---|---|
capacitor.v at 5 ms |
0.6941 V | 0.694128 V |
capacitor.v at 20 ms |
8.0618 V | 8.06181 V |
capacitor.v at 50 ms |
10.8344 V | 10.8344 V |
| ζ from R, L, C | 0.5 | 0.5 |
A resistor heating itself
One model, two domains, joined at a single port — the electrical side is instantaneous, the thermal side integrates, and the port between them is what makes it a system rather than two circuits:
//@ time=200
model ResistorSelfHeating "A resistor self-heating: electrical loss into a thermal mass"
  Modelica.Electrical.Analog.Sources.ConstantVoltage supply(V = 10)
    annotation(Placement(transformation(extent={{-70,10},{-50,30}}, rotation=-90)));
  Modelica.Electrical.Analog.Basic.Resistor resistor(R = 10, useHeatPort = true)
    annotation(Placement(transformation(extent={{-30,10},{-10,30}}, rotation=90)));
  Modelica.Electrical.Analog.Basic.Ground return_path
    annotation(Placement(transformation(extent={{-50,-10},{-30,10}})));
  Modelica.Thermal.HeatTransfer.Components.HeatCapacitor body(C = 5, T(start = 293.15, fixed = true))
    annotation(Placement(transformation(extent={{20,20},{40,40}})));
  Modelica.Thermal.HeatTransfer.Components.ThermalConductor toAmbient(G = 0.5)
    annotation(Placement(transformation(extent={{50,10},{70,30}})));
  Modelica.Thermal.HeatTransfer.Sources.FixedTemperature ambient(T = 293.15)
    annotation(Placement(transformation(extent={{100,10},{120,30}})));
equation
  connect(resistor.heatPort, body.port);
  connect(body.port, toAmbient.port_a);
  connect(toAmbient.port_b, ambient.port);
  connect(resistor.p, supply.n);
  connect(resistor.n, supply.p);
  connect(resistor.p, return_path.p);
end ResistorSelfHeating;
Ten volts across ten ohms is one amp and ten watts, and every watt of it goes into the body's thermal mass — 5 joules per kelvin — which can shed heat to still air only at half a watt per kelvin:
$$P = \frac{V^2}{R} = 10\ \text{W}, \qquad \tau = \frac{C}{G} = 10\ \text{s}, \qquad \Delta T_\infty = \frac{P}{G} = 20\ \text{K}, \qquad T(t) = T_\infty + \Delta T_\infty\left(1 - e^{-t/\tau}\right)$$
| Quantity | Closed form | OpenModelica |
|---|---|---|
resistor.LossPower at t = τ |
10 W | 10.0000 W |
body.T at t = τ = 10 s |
305.792 K | 305.793 K |
body.T at t = 2τ |
310.443 K | 310.444 K |
body.T at t = 20τ (steady) |
313.150 K | 313.150 K |
resistor.LossPower − toAmbient.Q_flow at t = 3τ |
10 W | 10.0000 W |
The last row is the one worth having: it needs no closed form at all — what the
current makes, less what the body sheds, is what warms it — and it fails if the heat
port is wired to the wrong thing. The 30 notes under
showcase/notes/ carry the same treatment for every example —
the algebra, then the numbers the simulation returns.
Using it in a note
```modelica
//@ time=5
model MassSpringDamper "Two masses coupled by a spring and damper"
  Modelica.Mechanics.Translational.Sources.Force force
    annotation(Placement(transformation(extent={{-80,-10},{-60,10}})));
  Modelica.Mechanics.Translational.Components.Mass mass1(m=1)
    annotation(Placement(transformation(extent={{-40,-10},{-20,10}})));
  Modelica.Mechanics.Translational.Components.SpringDamper coupling(c=50, d=1)
    annotation(Placement(transformation(extent={{-10,-10},{10,10}})));
  Modelica.Mechanics.Translational.Components.Mass mass2(m=2)
    annotation(Placement(transformation(extent={{20,-10},{40,10}})));
  Modelica.Blocks.Sources.Step step(height=1, startTime=0.1)
    annotation(Placement(transformation(extent={{-80,30},{-60,50}})));
equation
  connect(step.y, force.f);
  connect(force.flange, mass1.flange_a);
  connect(mass1.flange_b, coupling.flange_a);
  connect(coupling.flange_b, mass2.flange_a);
end MassSpringDamper;
```
That is the model from the worked example — the same file the studio opens from Examples — so a block in a note and the studio show the same diagram and the same numbers.
To put a block in a note, use the command palette: Embed a simulation in the
current note asks which model — the one open in the studio, a built-in example, or
a saved .mo file — and writes the block at the cursor with its options filled in.
Embed the open model in the current note skips the question.
The first line is an optional directive: time sets the simulation span,
height the height of the pane (the plot and the diagram are the same box, shown one
at a time), result/edit which of the two starts open, and noauto/manual to
keep the block from running itself at all. It lives inside the block because
Obsidian does not pass a fenced block's info string to a plugin.
A block runs itself once, when the note is opened. After that the Simulate
button is what starts a run — the plot has a t_end field beside it, and typing a
span there re-runs the block and records it in the directive. The reason is that an
edit made in a block's own diagram writes the note back, and a note that re-renders
rebuilds the block: without the rule, dragging one component ran four simulations.
A rebuilt block repaints the result it already had; if the model has changed since
that run, the line above the plot says so rather than the stale curve passing itself
off as current.
Blocks follow the studio: change the plot scale, the visible traces or the simulation span there and the blocks follow, and a block re-simulates when a parameter value it ran with changes. A block answers the pointer the way the studio does — resting on a component shows its parameters, and moving across the plot reads the time and every visible trace's value with a crosshair on it.
AI assistance
Optional, off until an API key is entered.
- Settings → Modelica Studio → AI assistance.
- API key opens Obsidian's keychain: pick an existing secret, or create one. Pick a provider preset, or set the base URL and model directly. Any OpenAI-compatible endpoint works, including a local Ollama or llama.cpp server.
- Test confirms the provider answers, and says what it said if it does not.
- Refresh model list asks the provider which models it currently offers.
Model names are retired without notice —
deepseek-chatbecamedeepseek-flash— and a retired name fails with an error that reads like a bad key, so the plugin fetches the list rather than shipping a stale one.
In the studio, switch to Code and press AI. Describe the model you want and it is written, compiled and repaired until it builds — without further input:
- The request goes to the provider with the brief above attached.
- The reply is compiled with OpenModelica.
- If it fails, the compiler's own output — with its line and column numbers — goes back to the provider as the next request.
- Steps 2 and 3 repeat until it compiles.
You choose the form and the effort. Two settings under AI assistance:
- Model style — Diagram first builds from library components, so you get a schematic you can see and rewire. A schematic depends on component paths, parameters and every connection being right, so the ways to fail outnumber the ways to succeed; equations have far less to get wrong. So if the diagram has had two attempts and still will not compile, the run falls back to equations automatically and says so. Equations skips straight there.
- Reasoning effort — Off / Low / High / Max. Providers that default to thinking spend that time on every request, and it silently disables Temperature. Off is fastest and suits code; raise it when attempts keep failing.
The loop stops when the model compiles, when the model returns the same source twice, when the same error comes back twice (compared after stripping build paths and timings, which differ on every attempt), when a provider error occurs, or at five attempts. A model that compiles but has nothing that changes with time counts as a failure, because OpenModelica builds it and then refuses to simulate it.
Each step is reported as it happens — the attempt number, and the fault being repaired — and Stop ends the run after the current step. Nothing is written to the editor until a model compiles, so a run that produces nothing leaves your model as it was.
The Run log tab keeps every simulation of the session: the model, the
parameters and run settings used, the timings, and on failure OpenModelica's
complete output. Send to AI hands that to the model and asks for a fix,
so a repair request is built from the compiler's own words rather than a
paraphrase — the first line of an OpenModelica error is usually a file path or
Internal error, and the line naming the fault comes several lines later.
Copy puts the same text on the clipboard for a bug report.
Every request also carries a standing brief about this installation, so the model
writes for the machine it is actually on rather than a generic one: the
OpenModelica version and path, the indexed libraries and how many classes they
hold, the run settings a simulation will use (span, intervals, tolerance,
solver), the libraries you have excluded, and the failures already in the log.
It is told not to add an experiment annotation, because the plugin applies the
run settings itself and an annotation conflicts with them.
The key lives in Obsidian's keychain, not in this plugin's data.json. Only
the name of the secret is stored with the plugin, so the value stays out of
vault backups, sync services and version control, and any other plugin can reuse
the same secret. It is never written to the debug log, never attached to an error
message, and only ever sent to the endpoint configured here.
This needs Obsidian 1.11.4 or later, which is where the keychain API arrived; the plugin declares that as its minimum. On an older build the AI section says so rather than falling back to storing a key in plain text.
If you configured a key with an earlier version of this plugin, it is still in
data.json and the settings page offers to move it into the keychain and delete
the plaintext copy.
Generated code is unverified: it is a draft to simulate and check, not an answer. The request includes the current source and a shortlist of library classes relevant to your description, so the model composes real MSL classes instead of inventing names.
Recovering a lost model
A saved model has three places it can still be found after the vault copy is gone:
- The plugin's history — every save keeps the version it replaced, in the
plugin's own folder (
.obsidian/plugins/modelica-studio/history/), one directory per model. Twenty revisions are kept; Model list… in the studio shows them with restore. - OpenModelica's build cache —
/tmp/modelica-studio/*/<Model>/<Model>.moholds the exact source that was last compiled. - The desktop trash —
~/.local/share/Trash/files/on Linux.
Deleting from Model list… uses the vault's own trash and snapshots first, so that route is reversible twice.
Debugging
The plugin logs to Obsidian's developer console (Ctrl+Shift+I) as well as to
.modelica-studio.log in the vault. It also publishes a handle for inspecting its
state live:
modelicaStudio.help()        // what you can inspect
modelicaStudio.state()       // model, span, save path, toolchain, run count
modelicaStudio.source()      // the model as Modelica
modelicaStudio.model         // the parsed diagram
modelicaStudio.settings      // stored settings
modelicaStudio.library       // the class index
modelicaStudio.runLog        // every simulation this session
modelicaStudio.setVerbose(true)   // print every diagnostic line
modelicaStudio.trace()            // what the plugin held, step by step
The run log (the Run log tab under the results) and the AI prompt log (Show the AI prompt log in the command palette) each have a Copy button, which puts exactly what the pane is showing on the clipboard — for a bug report, or for pasting into a prompt. A copy that the platform refuses says so rather than claiming success.
trace() is the one for a suspected loss. The file log records what the plugin
did; the trace records what it held at each moment that changed — which
model, how long its source is, whether that source is still current, and which
file it will be written to:
      0ms  open    AirplaneDrag   src=2869 current=true comps=8 eqs=0 file=Modelica/AirplaneDrag.mo mode=code
   4200ms  edit    AirplaneDrag   src=2869 current=false comps=8 eqs=0 file=Modelica/AirplaneDrag.mo mode=diagram
   5100ms  adopt   AirplaneDrag   src=2874 current=true  comps=8 eqs=0 file=Modelica/AirplaneDrag.mo mode=code
   9800ms  switch  AirplaneDrag   src=2874 current=true  comps=8 eqs=0 file=Modelica/AirplaneDrag.mo mode=code
A current=false with no following save is the shape of a loss: the plugin was
holding an edit it had not written.
The log file is opt-in (Write diagnostic log in settings) because it survives a reload and can be read from outside the app. The console needs no setting: errors and warnings always print there, because a failure nobody can see is the one that gets reported as "nothing happened".
What is known about the AI
One model has been measured, not assumed: see
docs/ai-baseline.md for the method, the results, and
what they do not establish. In short, for deepseek-flash:
- diagram-first works — 8/8 compiled, 7 as fully wired diagrams across electrical, mechanical, thermal, fluid, multibody and control;
- the equations fallback earned itself, on one run out of eight;
- a hard request can take several minutes, because the repair loop is additive.
No OpenAI model has been tested. If you run one, modelicaStudio.bench() in
the developer console measures it, and the result belongs in
docs/ai-baseline.json as a new entry.
Beta status
Experimental, and it wants more testing. Specifically:
- Requires Obsidian 1.11.4+, for the keychain the AI feature stores its key in. Earlier builds are refused rather than downgraded to plain-text storage.
- Tested against one OpenModelica build (1.27.0) on one platform (Linux). Windows and macOS are untested, and so is every other OpenModelica version.
- MSL 4.1.0 is what the examples use. Other library versions have not been tried.
- Not all of Modelica is supported. Array-valued connectors,
redeclare modelrefinements, and bitmap icons have known gaps. Conditional connectors are handled — they are dimmed and unwireable until their parameter is on — but an array port is not captured, so a class with one is reported rather than silently mis-drawn. Unsupported constructs surface as compiler errors rather than silently. - The audit covers the built-in examples, not your models. A hand-built model may hit a parser or serializer limitation the examples do not.
- No plugin-store review. Nothing has been checked by anyone but its author.
If something fails, enabling Write diagnostic log in settings writes a diagnostic
log to .modelica-studio.log in the vault — the most recent 512 KB of it, trimmed as
it fills — and Show coordinate diagnostics overlays the editor's geometry.
Testing
examples/vault/ is an Obsidian vault you can open directly: the 30 worked
examples, cross-linked, each with a live model and its verified numbers, plus an
introduction to the language and a demonstration of using it to learn a new
subject.
- Copy
main.js,manifest.jsonandstyles.cssintoexamples/vault/.obsidian/plugins/modelica-studio/. - Open
examples/vault/as a vault in Obsidian. - Enable the plugin, then open
showcase/00-modelica-intro.md.
Start with the introduction, then any example, and press Simulate in a block.
Reports of what breaks are the most useful contribution at this stage. Include the Modelica source, the error, and your OpenModelica version.
Verification
Every built-in example is checked numerically against a value derived
independently of the plugin — a closed-form solution, an independent integration
of the same ODE, or the Modelica Standard Library source. The audit runs on every
npm test.
Where a check was not possible it says so rather than asserting a number: the double pendulum is chaotic, so its total energy is checked (drift under 1%, non-growing) instead of its trajectory; pipe friction depends on an empirical correlation, so a mass balance is checked rather than a pressure drop.
Twelve expectations were themselves wrong when first written, and every one was
corrected only after tracing the discrepancy to the expectation rather than the
simulation. Not once was the solver at fault. The full account — what was
expected, what came out, which side was wrong and how it was settled — is in
docs/testing-findings.md, along with the five models
that were built, found unverifiable, and abandoned.
Performance
Measured on the development machine — Ryzen 5 2600X, 12 threads, 15 GB, NVMe, OpenModelica 1.27.0, Modelica 4.1.0 — for a small MSL circuit. Every number below is a wall-clock measurement, not an estimate.
The one thing worth knowing: the first launch after installing or upgrading the library costs about 1.2 s, and nothing else is slow. Editing and re-running is milliseconds.
Startup
| Stage | Measured | When |
|---|---|---|
| Parse the whole MSL into the class index | 1.2 s | first launch after install/upgrade |
| Load the index from its cache | ~0.3 s | every launch after that |
| Cache file | 25 MB | written beside the plugin's data |
5984 classes are parsed out of 2424 files — 13 MB of library source. Only the
newest release of each library is read: OpenModelica keeps every installed
version side by side, and indexing all of them put three releases of Modelica
into one table keyed by class name, where the definition that won depended on the
order the filesystem handed the files over. The palette is built while this
happens rather than before it, so the index cost is not a delay in opening the
studio — it is why the palette fills in a moment late on a cold start.
Editing and running
| Action | Measured | Why |
|---|---|---|
| Simulate with the binary already built | 18–36 ms | the compiled model is reused |
| Change a parameter and re-run | ~30 ms | applied as a run-time override, not a rebuild |
| Building the identical source again | 0 ms | the fingerprint matches and the binary is reused |
| First build, small equation model | 0.6 s | translate, generate C, compile, link |
| First build, 4-component MSL circuit | 1.5–1.8 s | library classes bring their own equations |
The 30 ms row is why parameters are applied as run-time overrides rather than by
regenerating code, and why editing a value and re-simulating is immediate. Only a
structural change — adding a component, rewiring, editing an equation — pays for a
rebuild. Details in docs/design.md.
An edit that only changes a value, a start attribute or a run setting stays on the fast path. So does switching between models that have both been built once.
What the settings are worth
Parallel compile jobs is the setting that matters, and it is worth measuring rather than guessing. Same 4-component circuit, cold cache, on the 12-thread CPU:
jobs |
First build | Saving |
|---|---|---|
| 1 | 4.07 s | — |
| 2 | 2.47 s | 39% |
| 4 | 1.75 s | 57% |
| 8 | 1.43 s | 65% |
Each measured with an empty build cache and a freshly constructed backend, and reproduced twice — the first attempt at this table compared contaminated figures, since a backend remembers what it has already built and answered in 0 ms.
The default is one less than the core count. Raising it past the physical core count does little, because code generation is CPU-bound.
Excluded libraries does not affect the timings above — the whole library is still parsed — but it decides how much the studio has to offer. Excluding four sub-libraries that many models never touch:
| Placeable classes | |
|---|---|
| Everything indexed | 1365 |
After excluding Magnetic, Clocked, ComplexBlocks, StateGraph |
1089 |
A shorter palette is easier to search, and a shorter list in the AI's brief is less to choose wrongly from.
Choosing a solver
Leave it on OpenModelica default unless you have a reason. The list is what this runtime offers, read from the runtime itself:
| Solver | What it is | Use it when |
|---|---|---|
dassl |
BDF, implicit, adaptive order 1–5 | the default; right for stiff systems |
ida |
SUNDIALS BDF, implicit, sparse | large systems, where the sparse solver scales better |
cvode |
SUNDIALS BDF or Adams–Moulton, order 1–12 | you want accuracy — measured 1e-16 against 8e-8 for dassl on a stiff problem |
gbode |
a family of Runge–Kutta methods, order 1–14, implicit or explicit | you want to try a non-BDF method, or multi-rate integration |
euler |
explicit, fixed step, order 1 | teaching, and seeing what a bad solver looks like |
rungekutta |
classical explicit RK, fixed step, order 4 | smooth non-stiff models; unstable on stiff ones |
symSolver, qss |
symbolic inline; quantised-state | experimental — symSolver needs a compiler flag this plugin does not pass |
A stiff system is one where something changes far faster than the interval you
care about — a fast electrical transient next to a slow thermal one. Explicit
methods take tiny steps to stay stable there; implicit ones like dassl and
cvode do not.
One caution worth knowing: an unrecognised solver name is not an error to
OpenModelica. It warns, exits successfully, and writes a result file full of
NaN. The name is rungekutta, not rungekutta4 — and this plugin recommended the
wrong one until it was measured. The plugin now reports an all-NaN result as a
failure naming the solver, rather than showing an empty plot.
Measuring it yourself
modelicaStudio.state() reports the toolchain, the index size and the settings in
force. The AI timings in docs/ai-baseline.md are measured
the same way: by running the thing and writing down what happened.
A different machine will differ, most in the compile column — that stage is
CPU-bound and parallel, so core count moves it more than anything else. If a
simulation feels slow, check jobs first, then whether the model is rebuilding
when it should not be.
Repository layout
src/
  main.ts              plugin entry, commands, settings, embeds
  ai/                  prompt construction and the OpenAI-compatible client
  modelica/            parser, serializer, library index, examples
  render/              canvas drawing of Modelica graphical primitives
  view/                schematic editor, studio view, plots, inline blocks
  omc/                 OpenModelica process, build cache, result reading
test/                  unit and integration tests, and the numerical audit
showcase/              generator for the example notes (math, explanations)
examples/vault/        the test vault, with the generated notes
docs/
  design.md            why it is built this way, and the measurements behind it
  testing-findings.md  every failed expectation and what it turned out to be
research/              background research kept from development
scripts/               bundle checks
License
GNU General Public License, version 3 or later — see LICENSE.
Copyright (C) 2026 Ahmed N. Alfahdi.
Use it for anything, including commercially, and change it however you like. Two things come with that, and they are the point of choosing this licence:
- It stays free. Anyone who distributes this code or a modified version must pass on the same freedoms — the source has to come with it. Nobody can take it closed.
- It stays attributed. The copyright notice and this licence travel with every copy, and modified versions have to say that they are modified. A fork cannot present itself as the original work.
Nothing else is asked of you: running it, building models with it, publishing results from those models, or using it inside a company are all unrestricted.
Citing
If this plugin contributes to work you publish, please cite it — as a favour to a
student, not as a condition of the licence, because a citation requirement cannot
be part of an open-source licence (the GNU FAQ
says so explicitly, and Debian patched exactly such a notice out of GNU parallel).
GitHub's "Cite this repository" button reads CITATION.cff, which
gives the version-independent form:
Alfahdi, A. N. (2026). Modelica Studio: a visual Modelica modelling and simulation environment for Obsidian [Computer software]. https://github.com/AhmedAlfahdi/modelica-studio
Third-party notices
Neither Modelica nor OpenModelica is bundled, so neither licence reaches this plugin:
- OpenModelica is installed separately and invoked as a separate program
(
omc); it is subject to its own licence. - The Modelica Standard Library is not redistributed either — it is parsed from the copy already installed on the machine. It is licensed under the 3-Clause BSD licence, which is compatible with this one. Two sentences of its documentation are quoted in the Help window, with their source named where they appear.
- Obsidian's API is imported at run time from the application, not distributed
with the plugin. Icons are drawn by Obsidian's own
setIcon, so the plugin ships no artwork. - Lucide is the icon set Obsidian draws those icons from.
scripts/readme-icons.jsonholds the 29 shapes the toolbar and menus use, vendored under Lucide's ISC licence for one reason: the README's screenshots are rendered by a script, and without the shapes the toolbar came out as a row of empty squares. Nothing in the plugin reads that file.