
- Overview
- Scorecard
- Updates2
English | 简体中文
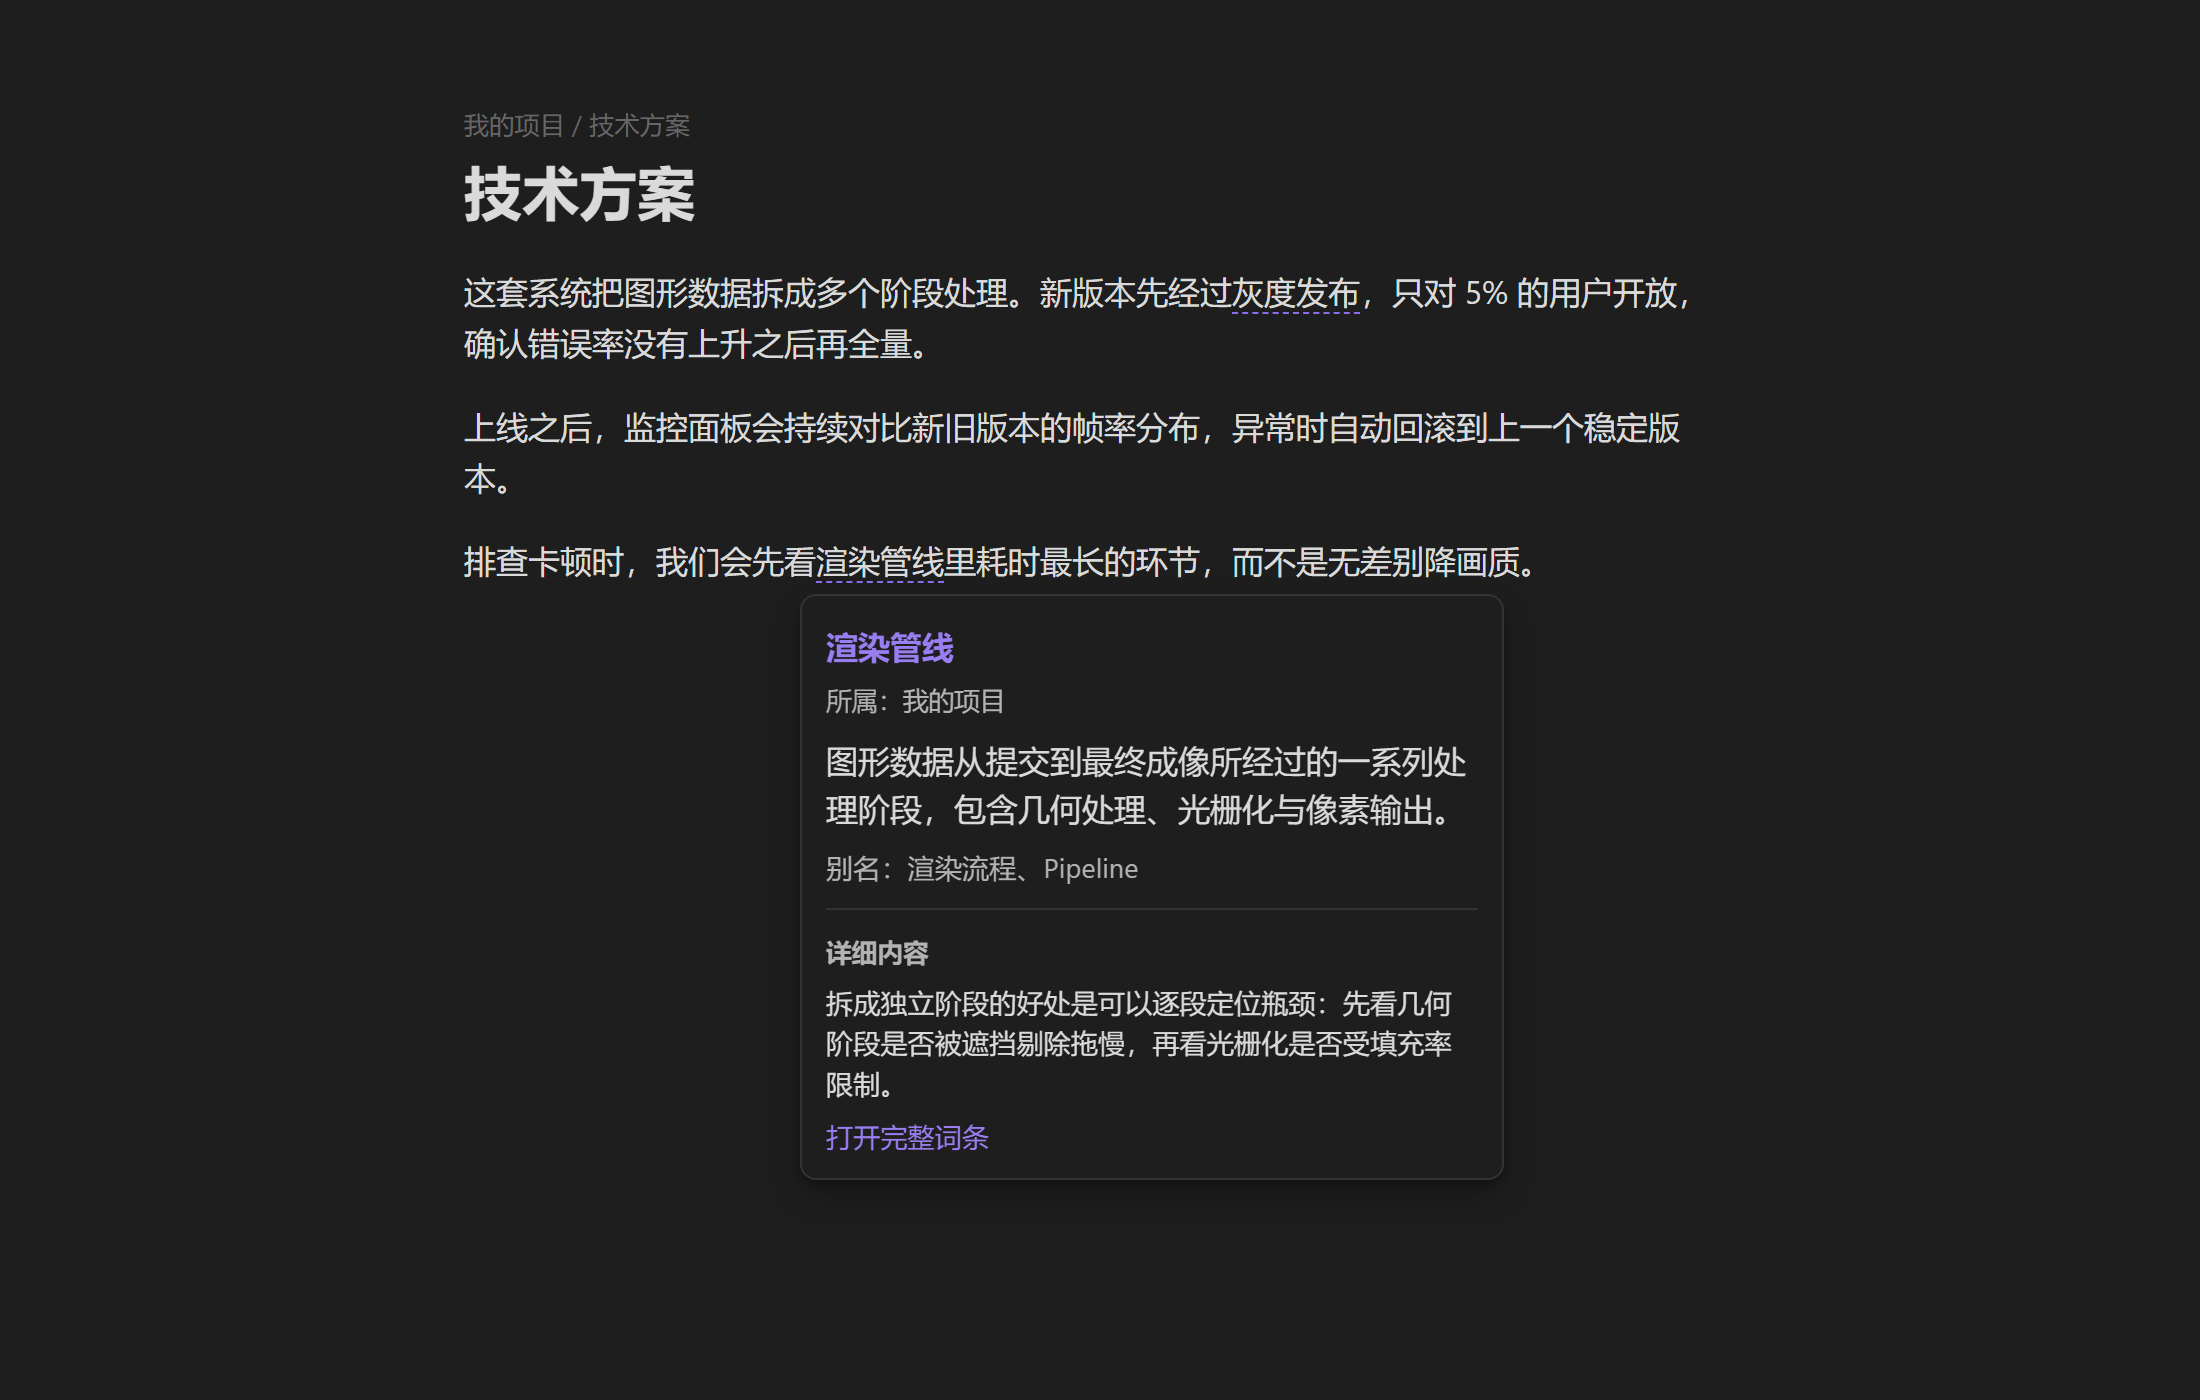
Hover any term in your notes to see its definition — written in a plain Markdown file you already own.
No new syntax to learn, no database, no export step: point the plugin at a note, and every term defined there becomes a hover card while you read. Your source text is never modified.
Why it's worth installing
Your glossary is just a note. It lives in your vault and works with search, backup, sync and version control like everything else you write.
Write the entry, get it immediately. Summary, aliases and full explanation all live in one place. Edit the dictionary and the changes apply right away — no restart.
One word, several meanings. The same term can mean different things in different projects; the plugin picks the right entry based on the note's folder.
Read-only. Highlighting happens at render time only. Your files stay byte-for-byte identical.
Fully local. No network requests, no accounts, no third-party services. Works on desktop and mobile.
Getting started
- Open Settings → Community plugins → Browse, search for Chinese Glossary Hover, then install and enable it.
- Create a note such as
Glossary.mdand write entries in the format below. - In Settings → Chinese Glossary Hover, click
+in the dictionary files section and pick that note. Add as many as you like. - Open any note, switch to Reading view, and hover a term.
A dictionary is an ordinary note in any folder. One dictionary can serve your entire vault.
Writing entries
Every entry is a level-2 heading written as scope / term:
# My glossary

## my-project / render pipeline

别名:rendering flow、Pipeline

> The series of stages graphics data passes through from submission to the final image.

### Details

Splitting the pipeline into discrete stages makes bottlenecks easier to locate.

---

## 全局 / canary release

> Shipping a new version to a small slice of users before rolling it out to everyone.
Four rules and you're done:
| Part | Syntax | Required |
|---|---|---|
| Entry heading | ## scope / term |
✅ |
| Aliases | one line: 别名:alias one、alias two |
optional |
| Hover summary | blockquote lines starting with > |
✅ |
| Details | any prose after the summary | optional |
Notes:
- Aliases are matched exactly like the term itself, so
Pipelinein your text opens the same card. - Summaries can span several lines; write a bare
>to leave a blank line in the card. ---separators are ignored, which makes them handy between entries.- Malformed or duplicate entries are skipped and reported in the developer console (
Ctrl/Cmd + Shift + I); the rest of the dictionary still works.
Scopes: one word, different meanings
A scope comes from one of two places:
- The note's top-level folder —
my-project/chapter-1.mdhas the scopemy-project. - Global — the literal scope name
全局, used as the fallback.
For a term like "render pipeline":
| Note you are reading | Dictionary contains | Card shows |
|---|---|---|
my-project/chapter-1.md |
my-project / render pipeline and 全局 / render pipeline |
the my-project entry |
notes/journal.md |
same | the 全局 entry |
| a note at the vault root | same | only 全局 entries match |
That way a "project terms + shared terms" setup covers the whole vault without configuring anything per note.
Reading view vs. Live Preview
Reading view — automatic. Terms in the text get a dashed underline; hover for the card, click to jump to the full entry. Links, inline code, code blocks, YAML and headings are left alone.
Live Preview — explicit. Automatic matching would fight with typing, so only terms wrapped in {{ }} are decorated:
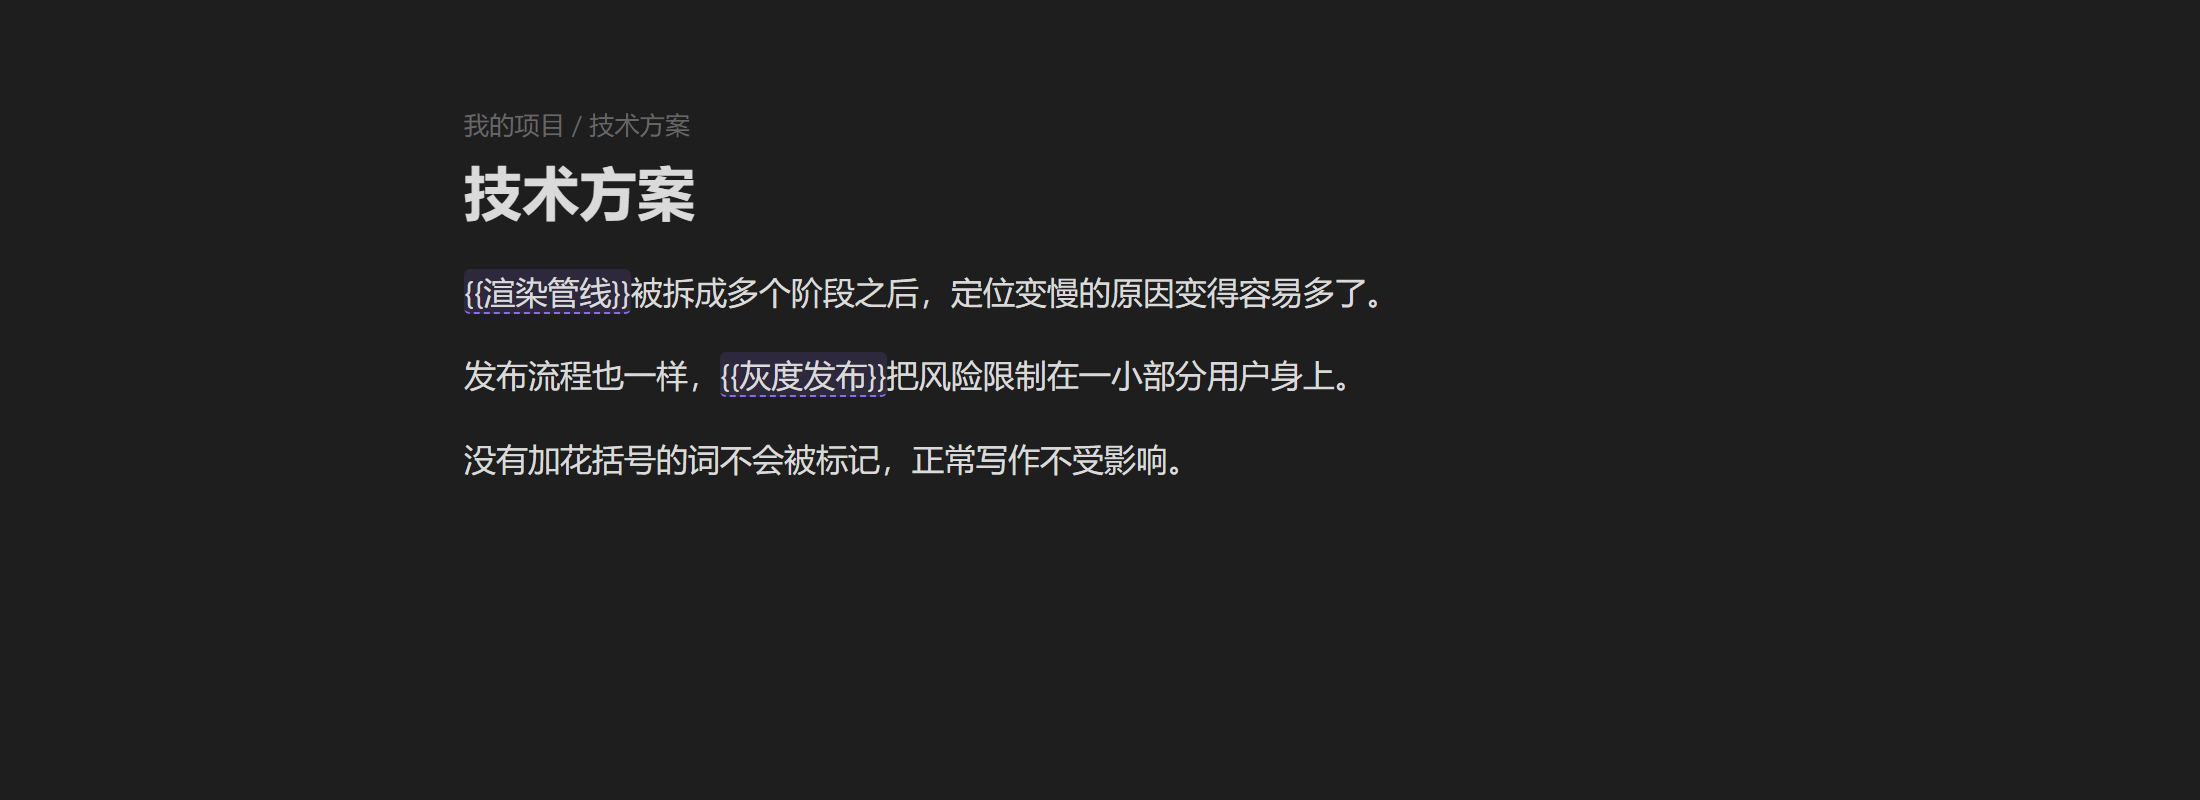
The braces stay in the source and stay highlighted, so you can see at a glance which words are registered. In Reading view the braces are hidden and the term looks like any other decorated term.
What's in the card: the term, its scope, the summary, aliases, details, and a button to open the full entry. Move the pointer into the card and it stays open, so long explanations are readable.
Settings
The settings tab lists your dictionaries as a compact list — add entries with +, remove them with the delete affordance — followed by these options:
| Setting | What it does | Default |
|---|---|---|
| Dictionary files | Markdown notes to index; add several, remove individually | empty |
| Enable global entries | Fall back to 全局 when the current scope has no match |
on |
| Minimum auto-detection length | Terms shorter than this are not auto-detected (aliases included) | 2 |
| Ignored terms | Comma-, ideographic-comma- or newline-separated words never get decorated | empty |
| Show scope | Show the entry's scope in the card | on |
| Reload dictionaries | Re-parse every dictionary now | — |
Dictionaries reload automatically when edited; use the last action if you want to force it.
FAQ
Nothing is highlighted in Reading view.
Check in order: is a dictionary selected → is the term at least as long as the minimum length → is it listed under ignored terms → is the note at the vault root (root notes only match 全局) → is the occurrence inside a link, code span or heading?
Live Preview shows no card.
It only decorates terms wrapped in {{ }}; plain text is not auto-detected there.
Will it rewrite my notes? No. Highlighting is applied while rendering; the file on disk is untouched.
Is my content uploaded anywhere? No. Parsing is entirely local and the plugin makes no network requests.
Does it work on mobile? Yes, it does not rely on desktop-only APIs. Obsidian 1.13.0 or newer is required.
Development
npm install
npm run build   # produce main.js
npm run check   # type check
Issues and pull requests are welcome.