Better Heading Hierarchy
 rogerfan482k downloads
Add guide lines to make the hierarchy of Markdown headings more visually clear.
- Overview
- Scorecard
- Updates8
An Obsidian plugin that draws vertical guide lines beside your notes, so the nesting of Markdown headings is visible at a glance — the way indent guides work in a code editor.
Long notes flatten out visually: an ### three screens below its ## looks identical to a top-level
one. This plugin colors and connects that structure instead of making you infer it from # counts.
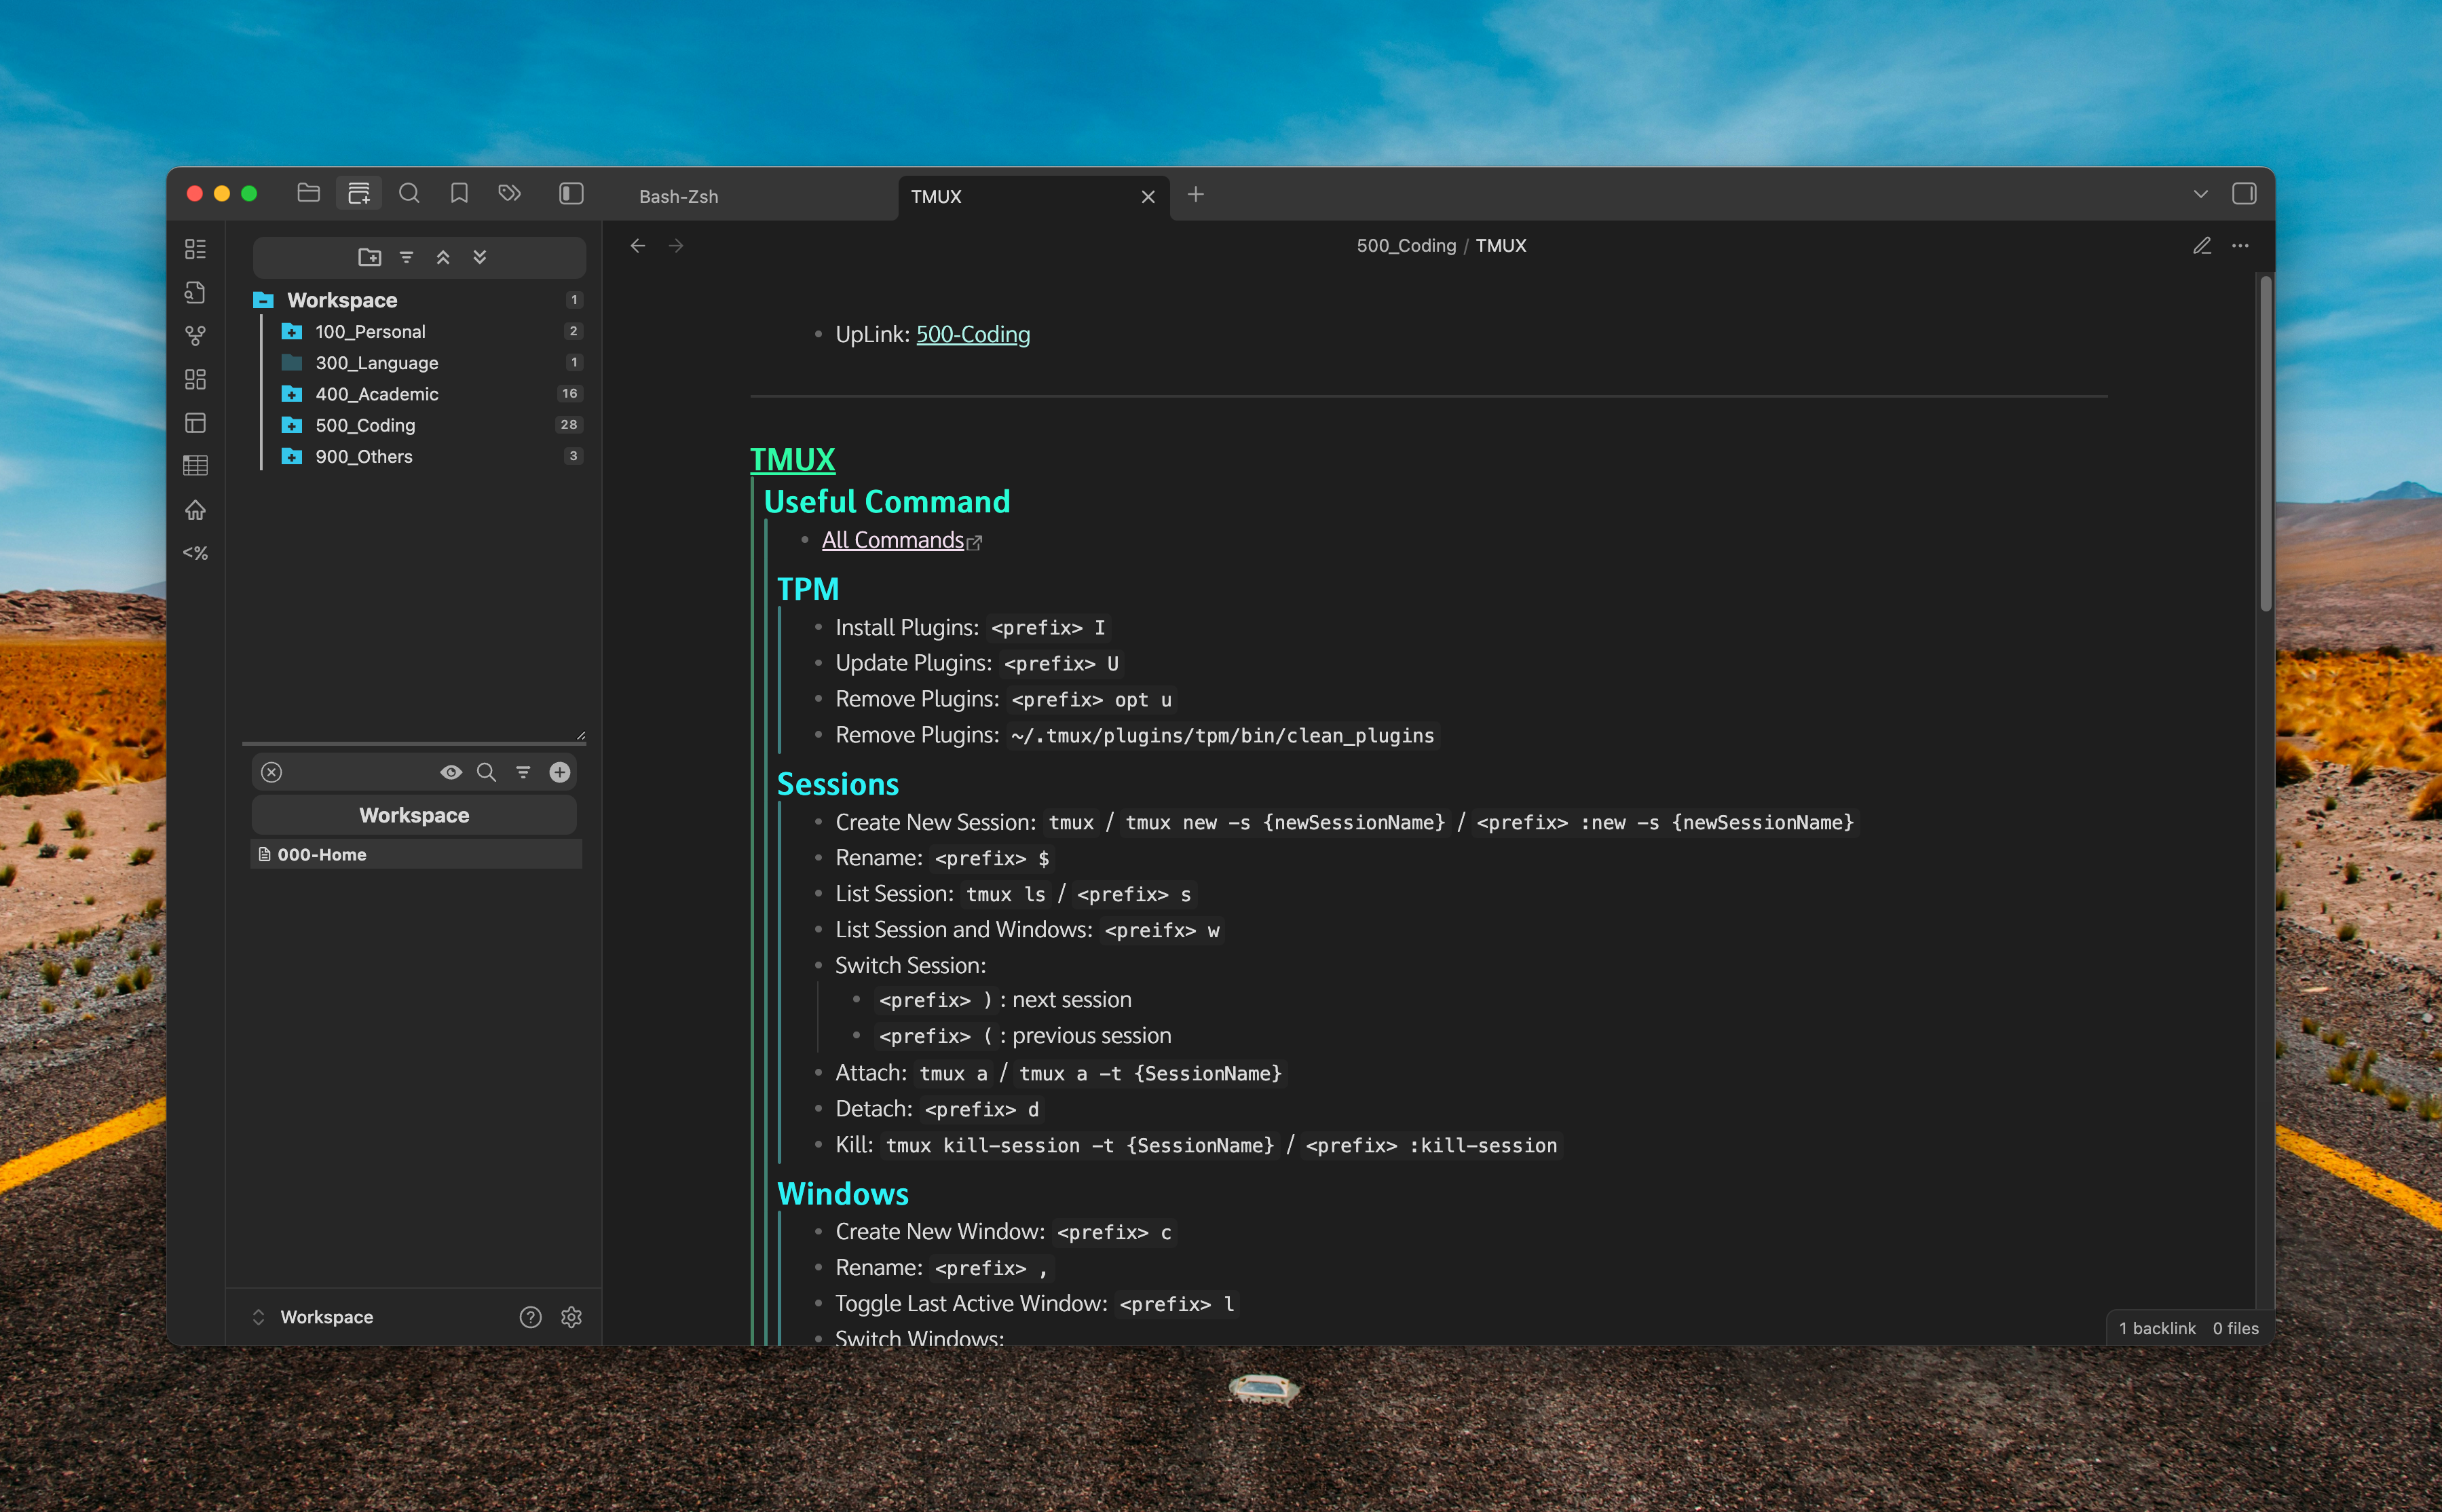
Features
- Guide lines for every heading level. Each level from
#to######gets its own color, and each block of content is indented to sit beside the line of the heading that owns it. - Works while you edit and while you read. Reading view and the editor (Live Preview and Source mode) are rendered by separate engines; both are supported, and each can be turned off on its own.
- Handles messy documents. Skipped levels (
#straight to###), headings inside fenced code blocks, and headings in YAML frontmatter are all treated correctly. - Fully restyleable. Colors, spacing and line thickness are CSS variables — no forks or
!importantbattles needed. See Customizing the look.
Installation
From Obsidian (recommended)
Settings → Community plugins → Browse, search for Better Heading Hierarchy, then install and enable it. Or open the plugin page and click Add to Obsidian.
Manually
Download main.js, manifest.json and styles.css from the
latest release and place
them in <your vault>/.obsidian/plugins/better-heading-hierarchy/, then reload Obsidian and enable
the plugin.
Settings
Guide lines
| Setting | Default | What it does |
|---|---|---|
| Reading view | on | Show guide lines in rendered notes. |
| Editing view | on | Show guide lines in Live Preview and Source mode. |
Recommended styling
A button that writes snippets/rogers-theme.css into
.obsidian/snippets/ and turns it on. It always shows where things stand and what pressing it will
do, so it never rewrites a file behind your back:
| Current state | Button | Effect |
|---|---|---|
| Not installed | Install and enable | Writes the file and turns it on. |
| Installed and active | Reinstall | Rewrites the file with the bundled version. |
| Installed, currently turned off | Turn on | Turns it on. The file is left as it is. |
| Installed, and edited since | Restore bundled version | Overwrites the file — your edits are lost. |
Install on startup (off by default) puts the file back if it goes missing. It never overwrites a snippet you have edited.
Customizing the look
Everything visual is a CSS variable defined on body. To change any of it, create a
CSS snippet and override the variables you care about — updates
to the plugin will not overwrite your changes.
| Variable | Default | Meaning |
|---|---|---|
--rgh-indent |
10px |
Horizontal distance between two adjacent guide lines. |
--rgh-content-gap |
15px |
Distance from the innermost guide line to the text, in Reading view. |
--rgh-editor-gap |
20px |
The same distance in the editor. |
--rgh-line-width |
2.5px |
Thickness of a guide line. |
--rgh-color-1 … --rgh-color-6 |
green → blue ramp | Color of the line for each heading level. |
--rgh-bleed |
2.5em |
How far a line reaches up into the gap above its block, so segments join. |
--rgh-start-bleed |
4px |
Same, but for the first block of a section, tucking the line under its heading. |
--rgh-tail |
2px |
Overshoot below each block, so segments never hairline-gap. |
--rgh-editor-bleed |
1px |
Overshoot above and below each editor line, for the same reason. |
A separate, slightly darker color ramp is applied under body.theme-light.
For example, to get wider spacing and a monochrome accent-colored set of lines:
body {
  --rgh-indent: 16px;
  --rgh-content-gap: 22px;
  --rgh-line-width: 2px;
  --rgh-color-1: var(--color-accent);
  --rgh-color-2: var(--color-accent);
  --rgh-color-3: var(--color-accent);
  --rgh-color-4: var(--color-accent);
  --rgh-color-5: var(--color-accent);
  --rgh-color-6: var(--color-accent);
}
Optional: the author's theme snippet
The screenshot above is not what the plugin looks like on its own — it also uses my personal styling: neon heading text against the muted guide lines, equal-sized headings, a tighter vertical rhythm, a wider centered page, and custom fonts. Up to version 1.x that styling was bundled into the plugin behind an additional author-styled CSS toggle. It is now a plain CSS snippet instead, because it is a matter of personal taste rather than plugin behavior, and keeping it separate lets the plugin stay neutral toward whatever theme you use.
The plugin ships a copy of it: open its settings and press Install and enable under Companion
snippet, and it is written to .obsidian/snippets/ and switched on for you. You can also copy
snippets/rogers-theme.css in by hand and enable it under Settings →
Appearance → CSS snippets. Once installed the file is yours — edit it freely, the plugin will not
overwrite your changes unless you explicitly ask it to.
It is written for the default Obsidian theme in dark mode, and every section of it is commented and
safe to delete piece by piece. Its page width works through Obsidian's own --file-line-width, so
Readable line length needs to be on for the width cap and centering to apply. It leaves the guide lines at the plugin's default colors and only
recolours the heading text; the comment at the top of the file says how to tint the lines to match.
If you want it to look exactly like the screenshot, install the fonts it asks for:
| Font | Used for | Note |
|---|---|---|
| jf-jinxuan | body text | Paid — this is the font in the screenshot. |
| Swei Gothic CJK TC | body text | Free fallback. Install the CJK TC series. |
| JetBrainsMono Nerd Font Mono | code blocks | Free. Install the JetBrainsMonoNerdFontMono series. |
The snippet degrades gracefully: without these fonts it falls back to your theme's fonts and everything else still applies.
[!NOTE] Upgrading from 1.x? If you had additional author-styled CSS enabled, that setting is gone. Install the snippet above to get the same appearance back. The guide lines themselves are unaffected, and now also render while you edit.
How it works
Reading view and the editor need two different implementations, so the plugin ships both:
- Reading view uses a Markdown post-processor. For each rendered block it looks up the block's position in Obsidian's metadata cache, derives the heading level that owns it, and inserts one absolutely positioned element per guide line. It is stateless — the depth of a block depends only on the file's cached structure, never on what was rendered before it — so multiple panes and lazy scroll-rendering both stay correct.
- The editor uses a CodeMirror 6 view plugin. It scans the document once per edit to record each
line's heading depth, then decorates only the lines currently on screen. The lines themselves are
drawn with a single pseudo-element per row, so no extra DOM is added to the editor. The indent is
a transparent left border: Obsidian sets
padding-inline-startinline on list lines for their hanging indent and forces every line to zero margin, so the border is the only edge free to use.
Installing the companion snippet writes a file through Obsidian's public vault API. Enabling a snippet has no public API, so that step uses an internal one; if it is ever removed, the file is still written and the settings tab tells you to switch it on yourself.
The plugin makes no network requests. The one link it can open is the Open documentation button in its settings, which hands this readme's URL to your browser.
Known limitations
- Notes embedded in another note (
![[Note]]) are not decorated: Obsidian does not expose the source line range for embedded content, which is what the plugin needs to place the lines. - Guide lines follow the rendered block structure, so content inside a table cell or a callout is drawn relative to the block as a whole rather than per line.
Contributing
Bug reports and pull requests are welcome — see CONTRIBUTING.md for how to build the plugin and test it against a vault.
License
MIT © rogerfan48